I’ve been encountering lots or Arduino projects but generally most are on intermediate and advanced level and only a few basic instructions on how to start with Arduino. This project I made were actually inspired by this example on the Arduino page, but a much in depth step by step instructions.
Assuming that you already have the basic idea on the parts and pin assignments of Arduino, you can now skip reading about them on this page.
Step 1: What you need?
1) Arduino – I used the Duemilanove since this is the only model currently available in local stores.
2) USB Printer Cable – Any USB printer cable you have at home.
3) LED – I used RGB LED.
4) PC with USB port – Any PC with USB Port. Preferably, PC with MAC OSX, Windows and Linus Operating System.
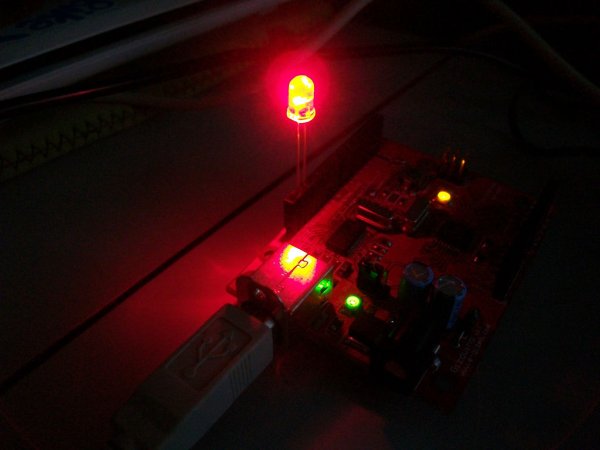
Step 2: Getting Started
1) Connect your USB Printer cable to your Arduino.
2) Connect your Arduino to your PC via the USB port.
3) Connect your LED’s Anode (+) longer pin to PIN 13 (Ideally pin number 13 because of the resistor connected to it) and the Cathode (-) shorter pin to the ground (GND).
Step 3: Downloading Software
1) Access Arduino download page.
2) Choose the appropriate download based on your operating system.
3) Extract files on your target folder.
[box color=”#985D00″ bg=”#FFF8CB” font=”verdana” fontsize=”14 ” radius=”20 ” border=”#985D12″ float=”right” head=”Major Components in Project” headbg=”#FFEB70″ headcolor=”#985D00″]Arduino[/box]
For more detail: Arduino Basics: Working One LED