This summer I wanted to combine my two loves of plant science and engineering. Thus I am constructing my very own greenhouse in my backyard. I am an undergrad, and as any former student knows, this means I move around constantly, and I am not always around to take care of my vegetable garden. I love my plants but since I am moving back to school in July, and my family is unreliable, I need a way to make sure that they are taken care of. Enter Arduino!

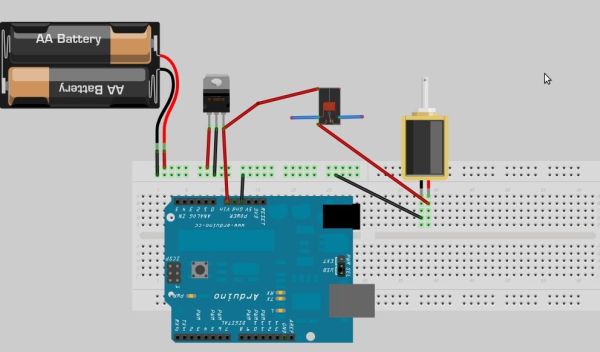
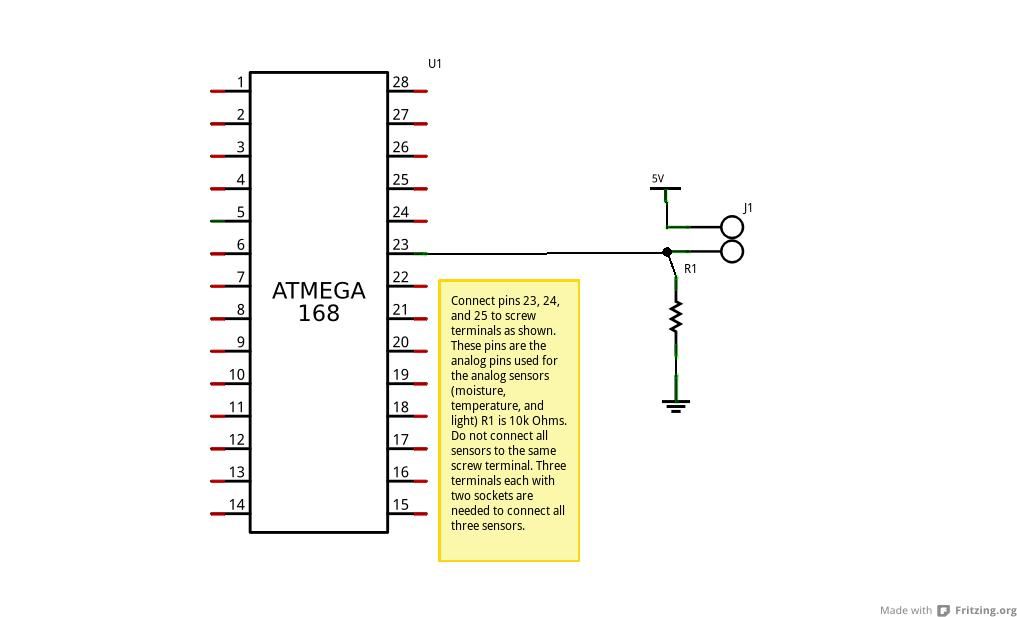
I have constructed an automated watering and temperature system. This includes sensors that will turn the systems on only when needed. This is essential when the ever-changing New England weather demands some intelligence in watering and heating patterns.
This is my first project using an Arduino so I am using wonderful articles from MAKE and Instructables as very helpful templates. Already the Instructables, MAKE, and Ladyada blogs have been ridiculously helpful so, worry not biology nerds, you too can show the engineers just how awesome we are!
Step 1: Plant Science 101
One facet of this project is to grow my own vegetables and do some scientific experiments.
Warning! Science…
Sources: Much of this information/ images came from Northeastern Univesity Professor Donald Cheney’s Plant Science lecture and the textbook Botany which is linked in the more information section.
Greenhouses
There are a lot of reasons that I am building a greenhouse. Greenhouses are a really cool way to grow larger and healthier plants faster and artificially extend the growing season. Greenhouses work by using a transparent airtight cover to trap in light and moisture to create a mini- ecosystem that is separate from the environment around the greenhouse. Heat is generated both from the sun’s rays that penetrate the greenhouse but do not escape as well as the trapped heat given off by the plants during their biological processes such as photosynthesis. This results in a very fascinating microclimate. This general idea of a layer of material trapping in heat and increasing the climate below is why sometimes global warming is called “the greenhouse effect” by people who like to oversimplify complicated climate phenomena.
Greenhouses can be made of glass or plastic. They create a controlled microclimate that makes experiments and procedures such as grafting or tissue cultures easier to perform.
Plant Anatomy and Physiology
Vascular Plants (plants that have stems and roots) develop mostly from seeds (a lot of nonvascular plants like mosses and ferns develop from spores which work a little differently). A seed consists of three types of tissues. The epidermal tissue is the outer layer for protection against the elements. This is usually embodied in the hard seed coat (Think the hard shell around sunflower seeds). The middle layer is called the ground tissue. The ground tissue is where photosynthesis takes place. The vascular tissue is in the very middle of the plant body and is where nutrients and water are conducted and stored. The roots are the first thing to grow out of the seed. The roots are made up of the same tissues except on the tips of the root is a number of epidermal cells called the root cap that are made to die and be ripped apart as the root burrows through the ground. The roots provide water and nutrients to the plant. Sometimes nutrients can be stored in the roots such as in the case of root vegetables like carrots or turnips.
The stem of the plant grows from what is called the coteledon in the seed. Longitudal growth is initiated by the apical meristem which is the primary growth bud. Lateral meristems are responsible for making the plant larger in diameter. There are two structures called the auxillary buds that grow on both sides of the main meristem. In case the axial bud is cut off for some reason the surrounding auxillary buds take over and grow the plant in a new direction. This is how pruners reroute tree growth by cutting off certain branches.
NOTE ABOUT WEEDING: This anatomical knowledge is very useful when you are weeding- particularly with grass. Grass is a special category of plants called a monocot. With grass the meristem is on the bottom of the grass blade which is why it grows even if it is cut. So do not just rip out the grass blade but make sure you get at the root system too.
Gardening: Plant Nutrients
Even though most plants grow well with just old fasion dirt and water there are a lot of other things that they need to grow and produce good fruits. These are broken up into two catagories: Macronutrients which take up more then .5% of a plant’s dry mass and Micronutrients which are only present in trace amounts. Some macronutrients that are essential for all plants are Nitrogen, Magnesium, and Sulfur . Sulfur is in proteins and vitamins. Magnesium is in the chloraphyll which are involved in photosynthesis. All of these are found in the soil. Plants are also about 45% Carbon which comes from the CO2 in the air and 45% Oxygen which comes from water and air. Some micronutrients that plants need are Boron, Chlorine, Manganese, Iron, Copper, and Zinc. All of those are naturally occuring in soil but the most important one is Iron. Iron deficiencies lead to a yellowing of the leaves. Fertilizers usually provide all the minerals needed for a plant to survive. The ratio of Nitrogen, Phosphorus, and Potassium are listed in that order on most fertilizer bags in ration form. For example: 10:20:10= ratio of N:P:K.

Photosynthesis
Photosynthesis is how plants turn sunlight into sugars. The chemical equation is 6CO2 +6H2O –> sunlight–> C6H12O6 +6O2. Photosynthesis happens in two stages: The dark and the light. First is the light stage where , as the name implies, the sunlight is needed. What happens is electrons are taken from the water molecule and excited in photosystem 2. Then the electrons are transported down what is called the electron transport chain. This chain is nothing more then a series of oxidation and reduction reactions that progressively bring the electrons down into a less excited state. Once the electrons hit photosystem 1 they are excited again and go down another smaller electron transport chain. While the electrons are moving from a more excited state to a less excited state they are also turning a substance called NADP+ (Nicotinamide adenine dinucleotide phosphate) into NADPH. This is used in the dark stage, also known as the calvin cycle. The Calvin Cycle is a series of modifications starting with a reaction with starting material RuBP (Ribulose bisphosphate) and Carbon dioxide using a series of enzymes and redox reactions. It is called a cycle because after the sugar is produced the starting material RuBP is again synthesized. For every round of the carbon cycle there is 1 sugar derivative output and 3ATP (the source of our life’s energy). So it takes 6 rounds of the Calvin Cycle to create one glucose molecule. There are a lot of plants that utilize different variations of this cycle.
pH
Part of my experimentation is to come up with a low tec pH monitor for the soil. pH measures relative acidity by taking the log of the concentration of hydrogen molecules present. pH is measured on a 14 point scale with 1 being very acidic and 14 being very basic. Water is neutral or 7. I measured the acidity of my soil with an at home pH kit that I bough on amazon for $5. The acidity of my soil was about 6.5 which is perfect for the types of plants I am growing (strawberries, peas, basil, broccoli). If there is a problem with your plants and the fertilizer is fine I would suggest checking the pH.
Step 2: Build a Garden/ Plant Seeds
My garden is in a raised bed. Raised beds are when you plant your garden in a wooden frame that is above ground level. The nice thing about raised beds is that they are easier to maintain because they can block weeds. Also, you fill it with whatever soil you have instead of the soil that you are blessed to be living on. In the case of my New England house, the infamously horrible soil makes a raised bed the obvious choice.
Building a Raised Bed
To build a raised bed, dig out a patch of land the size you want your garden to be. Then build a wooden frame that fits the perimeter of your garden. A cool trick is to put some burlap or pebbles on the bottom-most layer of your garden. This way the grass won’t grow back up through your garden. Putting down a bottom layer is not necessary and I did not do that in my garden. However, if you have the time, it will save you a lot of work later.
I have provided a link to a more step by step format for more specific details. I am doing this because the making of the garden was done the previous year before the greenhouse project. Here is a great website for these steps:
http://www.thisoldhouse.com/toh/how-to/intro/0,,1615067,00.html (this provides instructions for a slightly more elaborate garden than I built).
Soil
The mixture of soil that I use is a mixture of garden soil and peat moss. I also mix in some miracle grow potting soil. Dump a large lump of each soil into the garden and then mix it up with a large shovel or trowel. After it is mixed, spread it out over your garden evenly. This would be a good time to test the pH of your soil mixture. It should be between 6.5-7.5. You can test this by purchasing a pH soil tester. I bought the Luster Leaf 1612 Rapitest pH Soil Tester from Amazon for about $5. It is not the most precise way to measure pH, but it gives you a nice range. Also, this test has a chart with what to add if your soil is too basic or acidic.
Seed Planting
Planting seeds is very easy. In all cases, read the back of the packet your seeds came in. There should be a chart with depth and spacing requirements for that particular plant. Absolutely follow those spacing requirements or you are going to have a lot of trouble down the road. Also, only plant one or two seeds per spot. I made the mistake of planting a bunch of strawberry seeds in one plot (the seeds were so small!!!) and I have about 10 tiny strawberry plants that can’t get any bigger because they are entangled in each other and there are not enough resources for them all. Right after you plant them, make sure the soil is thoroughly moist. Watering is important and for most plants, should be daily. However, the plants are delicate, especially when they are developing stem systems, so water carefully.
Step 3: Build a Greenhouse: Step 1 materials
-two 10 foot long, ½ inch diameter PVC pipes
-three 40 inch long, ½ inch diameter PVC pipes
-Roughly twenty-five 6 inch long Zipties
-at least 9 by 12 feet painters clear painter’s plastic tarp 3mm thick
-Waterproofing Tape
-Duct Tape
-Industrial VelCro
Tools:
Hacksaw
Scissors
Staple Gun
Measuring Tape
Step 4: Build a Greenhouse: Step 2 Build the Frame
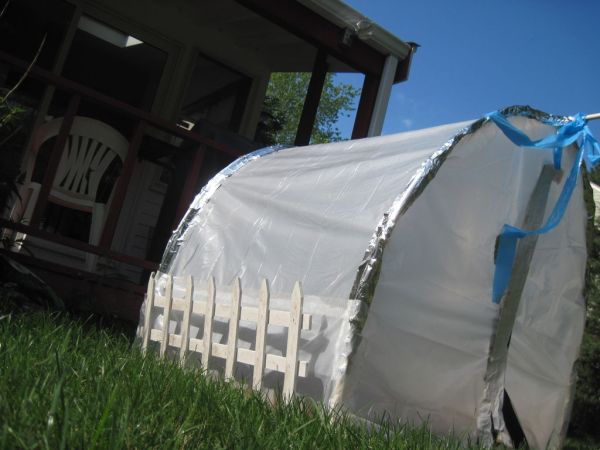
1) First we measured my garden which is about 1 square meter (tiny I know). Then we used complex integration and approximation to measure the arc length of the frame. Just kidding. We just used a tape measure to approximate and then just used the 10 foot measurement that the PVC came in.

2) We used the hacksaw to cut the ends of the PVC pipe at an angle so that they could be easily stuck into the ground. To do this, start about 3 inches from the bottom of the pipe and cut away from yourself at an angle.
3) Stick both ends of the pipe into the ground at opposite sides so that it makes a nice arc. We placed one arc behind and one in front of the garden. We measured three inches to the left and then another three inches away from the garden corners.
4) Next we placed one 40 inch PVC across the top in the center of the arc. We duct taped the ends to the arc.
1. perfboard
2. ribbon cable
3. 16 by 2 lcd
4. 10k potentiometer or patience and a resistor
5. female barrel jack
6. 7805 power regulator
7. (2) 10uF capacitors
8. Atmega 328 with arduino bootloader preloaded onto the chip
For more detail: Plantduino Greenhouse using an Arduino
