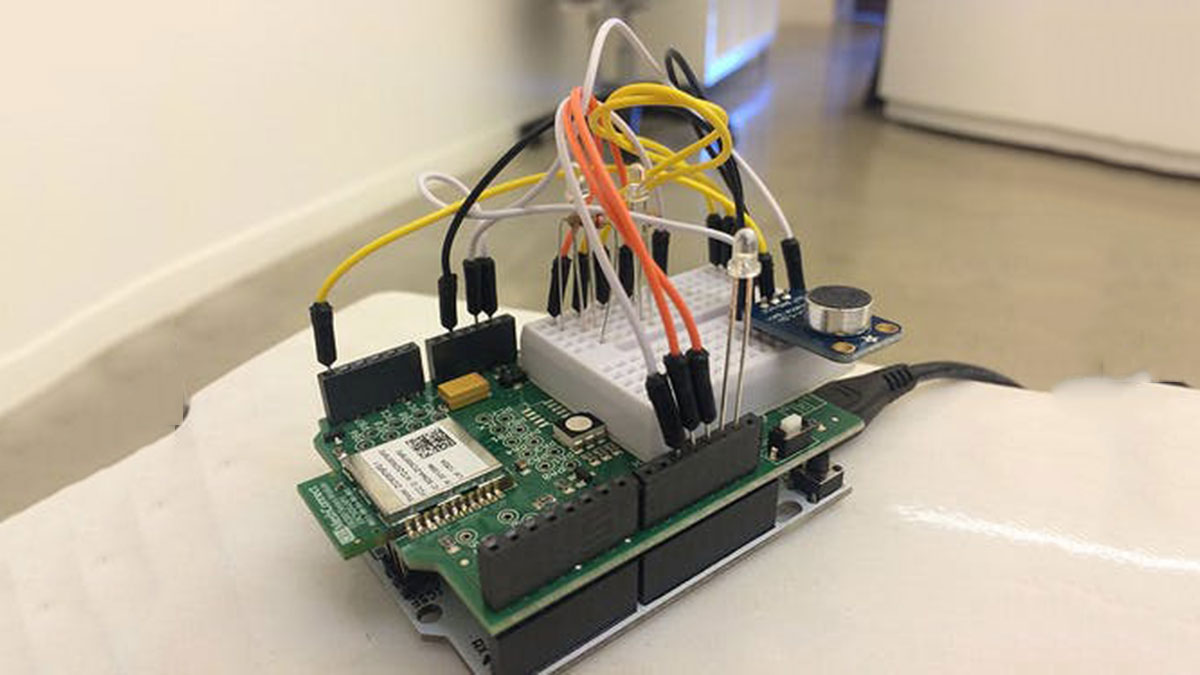
When my colleague @thegibertchan first set up his homemade “Clapper” in our office, I knew immediately that I had to learn how it was made.
The way it works is simple. A small microphone listens to two claps (within four seconds of each other) and it triggers a switch to turn on or off.

Gilbert even simplified the code so it uses the built-in LED in the our SmartThings Arduino Shield.
I will try to explain how to build it here.
You’ll need the following items:
Maybe the actual Clapper is less expensive, but this one is definitely more fun.
Pair the ThingShield with SmartThings
If you haven’t used Arduino before, make sure you have their software installed. Then download the ThingShield Library and copy the files to your sketchbook location, which is set in the Arduino IDE preferences. By default, the location should be:
Windows: My Documents\Arduino\libraries\SmartThings
OSX: ~/Documents/Arduino/libraries/SmartThings
To join the shield to your SmartThings hub, go to “Add SmartThings” mode in the SmartThings app by hitting the “+” icon in the desired location, and then press the “Switch” button on the shield. You should see the shield appear in the app.
Update the Device Type of the ThingShield
Log into http://graph.api.smartthings.com/ and click on “Devices”. Find your Arduino ThingShield then click on “Edit” on the bottom left of the page.
Select the “Type” drop down menu and choose “On/Off Shield”. Now click “Update”.
Now the shield will be able to accept on and off commands to control a switch. You can test it in the IDE by creating a new device type and selecting “On/Off Shield” from the dropdown. Here is the code for it.
https://gist.github.com/mager/c84ca99b14787e97a032
| definition (name: “On/Off Shield“, namespace: “smartthings“, author: “SmartThings“) { |
| status “on“: “catchall: 0104 0000 01 01 0040 00 0A21 00 00 0000 0A 00 0A6F6E“ |
| status “off“: “catchall: 0104 0000 01 01 0040 00 0A21 00 00 0000 0A 00 0A6F6666“ |
| reply “raw 0x0 { 00 00 0a 0a 6f 6e }“: “catchall: 0104 0000 01 01 0040 00 0A21 00 00 0000 0A 00 0A6F6E“ |
| reply “raw 0x0 { 00 00 0a 0a 6f 66 66 }“: “catchall: 0104 0000 01 01 0040 00 0A21 00 00 0000 0A 00 0A6F6666“ |
| standardTile(“switch“, “device.switch“, width: 2, height: 2, canChangeIcon: true, canChangeBackground: true) { |
| state “on“, label: ‘${name}‘, action: “switch.off“, icon: “st.switches.switch.on“, backgroundColor: “#79b821“ |
| state “off“, label: ‘${name}‘, action: “switch.on“, icon: “st.switches.switch.off“, backgroundColor: “#ffffff“ |
| // Parse incoming device messages to generate events |
| def parse(String description) { |
| def value = zigbee.parse(description)?.text |
| def name = value in [“on“,“off“] ? “switch“ : null |
| def result = createEvent(name: name, value: value) |
| log.debug “Parse returned ${result?.descriptionText}“ |
| // Commands sent to the device |
| zigbee.smartShield(text: “on“).format() |
| zigbee.smartShield(text: “off“).format() |
}
Read More: Build a smart “Clapper” with Smart Things and Arduino