With this device you diminish the use of water in your house or work. Instead of waiting to see vapor in the shower to get in, this device help you to know when the water its at the temperature you want and you can instantly enter to the shower. In this way you don’t waste the water by not knowing when its ready.
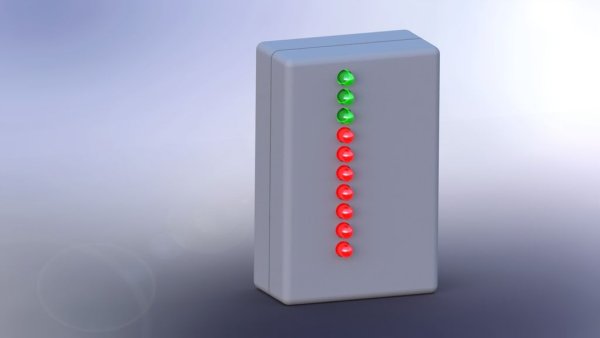
This device shows the temperature of the water with a led bar (made from 10 leds). The leds get on when the temperature of the water rise. Because we know that every person likes different temperature while taking a shower we add a knob so you can regulate the led bar to show the amount of light up leds at the temperature you wish. So in this way you can adjust the device to your needs.
Step 2: Circuit
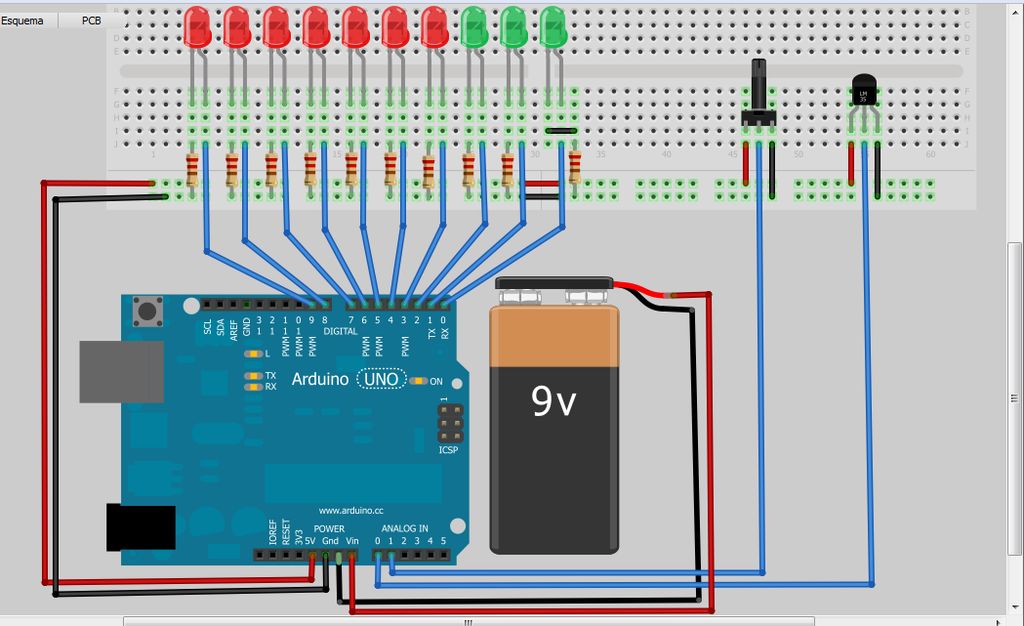
This is the device. Its made with fritzing like an arduino shield. So we can integrate it easily to arduino. The conections are really simple, each led goes to arduino, and the other end goes to a resistor and then to ground.
The temperature sensor and the potenciometer are connected equally. Voltage, ground, and the center pin goes to arduino analog in.
If you want the pcb files to download please go to my web page. You can find in there the pcb file in a pdf ready to print and transfer and also you can find the fritzing files if you want them. The link is:
http://www.bioespin.com/temperature-sensor-for-shower.html
Step 3: The code
There are a ton of ways to make this code but I make it like this to make it easier to read and modify. If you have another way to making it, please share it in comments :)

/***********************************************************************************/
//Declare the potencimeter and the temperature sensor pins
const int potenciometro= A1;
const int Temperatura= 0;

//declare each led pin
const int led1= 9;
const int led2= 8;
const int led3= 7;
const int led4= 6;
const int led5= 5;
const int led6= 4;
const int led7= 3;
const int led8= 2;
const int led9= 1;
const int led10= 0;

//Declare the variables for the temp regulation
int pot_regulador= 0;
int ajuste_de_temp= 0;

//declare leds as outputs
void setup() {

pinMode(led1, OUTPUT);
pinMode(led2, OUTPUT);
pinMode(led3, OUTPUT);
pinMode(led4, OUTPUT);
pinMode(led5, OUTPUT);
pinMode(led6, OUTPUT);
pinMode(led7, OUTPUT);
pinMode(led8, OUTPUT);
pinMode(led9, OUTPUT);
pinMode(led10, OUTPUT);

}

//main program

void loop() {

//read voltage from the temp sensor and transform to celsius
int reading = analogRead(Temperatura);
float voltage = reading * 5.0;
voltage /= 1024.0;
float TemperaturaC = (voltage - 0.5) * 100 ;

//This part if for regulating the temperature
//in this program we divide the value of the potenciometer by 30 to have 30 degrees of regulation
//if you divide by 100 you have 10 degrees of regulation
// and divided by 50 you get 20 degrees of regulation
//the values are only aproximate they are not exactMaterial
If you already have an arduino uno you can make this in no time and the materials are just a few.
1 Arduino UNO
7 red leds
3 green leds
10 220ohms resistance
1 9 volts battery
1 copper plaque
1 temperature sensor tmp36 o lm35
1 10kohms potenciometer
For more detail: Capteur de température pour la Douche à l'aide d'Arduino