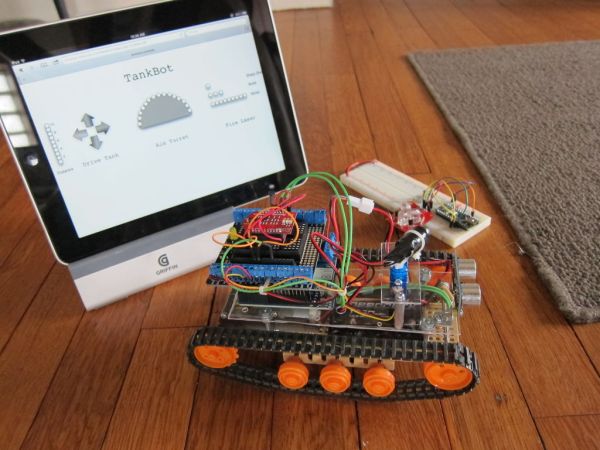
Do you remember a game called Tank Wars? This is an attempt to make a physical version of that classic arcade game. You, the player drive an Arduino powered tank and fire a laser at a target.
This project uses an Arduino to control a tank through a web page. The tank is driven from a control panel on a web page, that is communicated to over a WiFly. The tank uses a Parallax Ping to avoid obstacles, a servo for aiming the turret and a Tamiya tank platform for locomotion.
Why did I make this you ask? Because like everyone else I wanted to make a tank that fired lasers.
Step 1: Parts
For the tank you will need:
-Tamiya Dual Motor Gearbox: http://www.sparkfun.com/products/319
-Tamiya Tank Treads: http://www.sparkfun.com/products/321
-Universal Mounting Platform: http://www.sparkfun.com/products/10016
-Arduino Uno
-Arduino Motor Shield
-Sparkfun ProtoScrew Shield: http://www.sparkfun.com/products/9729
-Laser Pointer
-Parallax Ping: www.parallax.com/tabid/768/ProductID/92/Default.aspx
-Mini Servo: http://www.hitecrcd.com/products/analog/micro-mini/hs-55.html
-Nuts, Bolts, Standoffs, Plexiglass
-Dynamite Prophet Sport II : http://www.dynamiterc.com/Products/Default.aspx?ProdID=DYN4063
-Dynamite 7.2v Battery: http://www.dynamiterc.com/Products/Default.aspx?ProdID=DYN1466
-WiFly RN-XV : http://www.sparkfun.com/products/10822
-XBee Breakout: http://www.sparkfun.com/products/8276
For the target you will need:
-Arduno
-TSL230R : http://www.sparkfun.com/products/8940
-Sparkfun TriColor LED :http://www.sparkfun.com/products/10111
Step 2: Tank: Build
You will need to assemble the following:
-Gear Box
-Tank Treads
-Universal Platform.
I used nuts and bolts to create a platform above this for the Arduino, Servo and PING.
I copied the dimensions of the Universal Plate set for the plexi glass second platform.
The laser pointer can be attached to the servo horn.
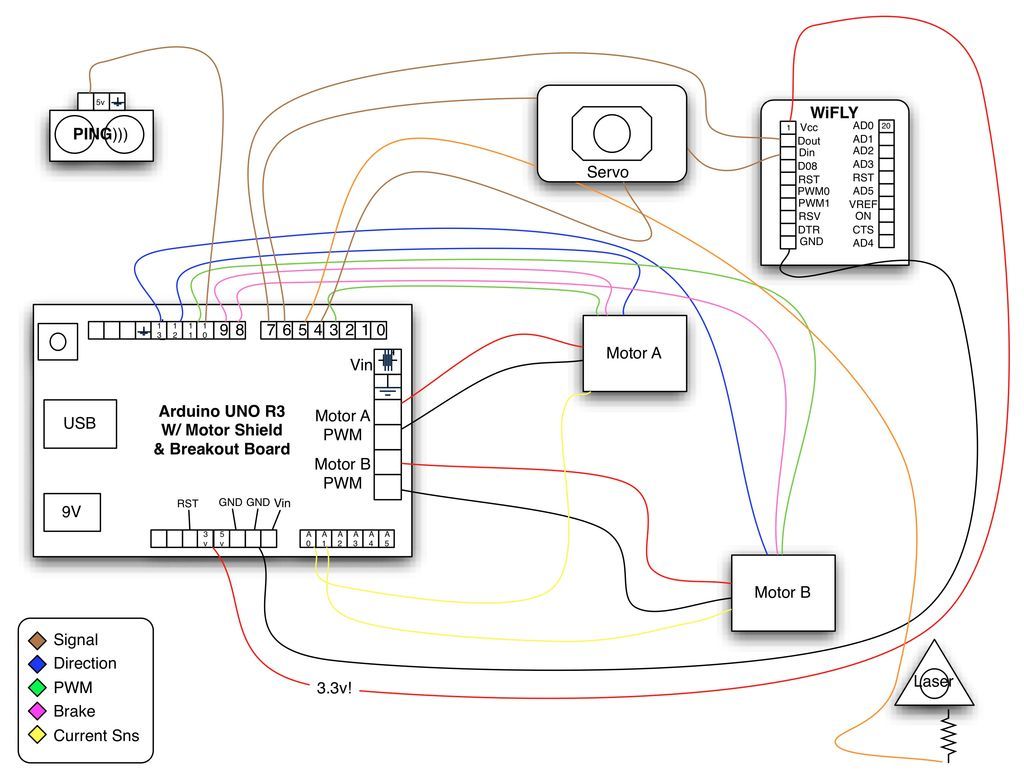
But what was really tricky for me, the Arduino Motor Shield uses up a ton of pins, but you cannot see it quickly as it is wired internally. I found it helpful to just quick sketch it out.
Step 3: Power
The tank motors require a lot of power and I did not want to wear down AA batteries or 9v that quickly. The RC car community has spent a good bit of time figuring out small power. So I picked up a Dynamite 7.2v 1750mah battery and Dynamite Sport II charger.
Then used a plug to connect to the motorshield’s screw terminal.
Step 4: Tank: Load Code
v.2 of the code updated on 3/29.
Step 5: Tank: Iterative Build – Object avoiding tank
To make the task a bit easier I built it first to just be an object avoiding robot. I attached the motors, a RC car rechargeable battery, the Arduino and the PING. When
Step 6: Tank: Iterative Build – Web Enabled Tank
Next I added a platform to the body and added the WiFly to get the tank to be controlled over the internet.
At this point the control was just telnetting to port 2000 and sending a command.
Step 7: Tank: Iterative Build – Robot Tanks with Lasers
For this part I attached the servo to the “control platform” by cutting a piece of plexi glass, then routing a hole in it for the servo to sit.
The laser pointer was attached to the servo horn and wired to the Arduino.
-Tamiya Tank Treads: http://www.sparkfun.com/products/321
-Universal Mounting Platform: http://www.sparkfun.com/products/10016
-Arduino Uno
-Arduino Motor Shield
-Sparkfun ProtoScrew Shield: http://www.sparkfun.com/products/9729
-Laser Pointer
-Parallax Ping: www.parallax.com/tabid/768/ProductID/92/Default.aspx
-Mini Servo: http://www.hitecrcd.com/products/analog/micro-mini/hs-55.html
-Nuts, Bolts, Standoffs, Plexiglass
-Dynamite Prophet Sport II : http://www.dynamiterc.com/Products/Default.aspx?ProdID=DYN4063
-Dynamite 7.2v Battery: http://www.dynamiterc.com/Products/Default.aspx?ProdID=DYN1466
-WiFly RN-XV : http://www.sparkfun.com/products/10822
-XBee Breakout: http://www.sparkfun.com/products/8276
For more detail: Tankbot – Internet Contrôlé Cuve du Robot à l'aide d'Arduino