Home Security project is a password oriented security device. This uses 4Duino display as the user interface where the password can be entered. 4Duino is also used as the host device in this project. It handles a buzzer, an ultrasonic sensor, a uCAM-II and a magnetic switch. As a home security device, it sends an alarm to the owner when there is an attempted entrance or any malicious kind of entrance.
Initially, Home Security Interface is in idle state. When a person approaches the device, it will be activated. This is achieved using an Ultrasonic Sensor. HC-SR04 Ultrasonic Distance Sensor is able to measure distances from 2cm to 400cm. Ultrasonic receiver and transmitter is included in the module.
uCAM-II is used in this project to capture images of the person who attempted a forced entry. uCAM-II is an integrated serial camera module, which uses a CMOS VGA colour sensor along with JPEG compression chip.
In addition, a buzzer is also used in this project to produce an alarm signal or noise if the password is entered incorrectly for more than three times.
An alarm message is sent to the owner through a web browser. This uses the built-in ESP8266 module in 4Duino.
Components
- 4Duino
- HC-SR04 Ultrasonic Distance Sensor
- uCAM-II
- Magnetic Switch
- Buzzer
- Jumper cables
- µSD Card
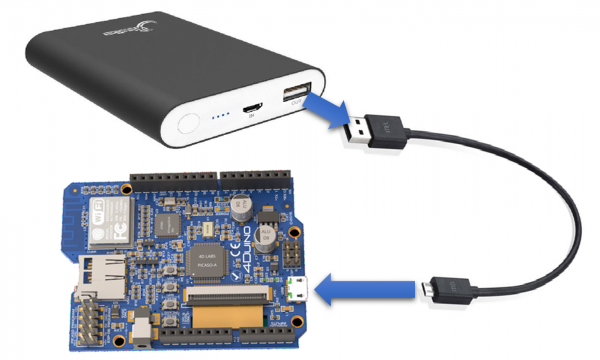
- Micro USB Cable
How it works
Implementation
Step1: Build
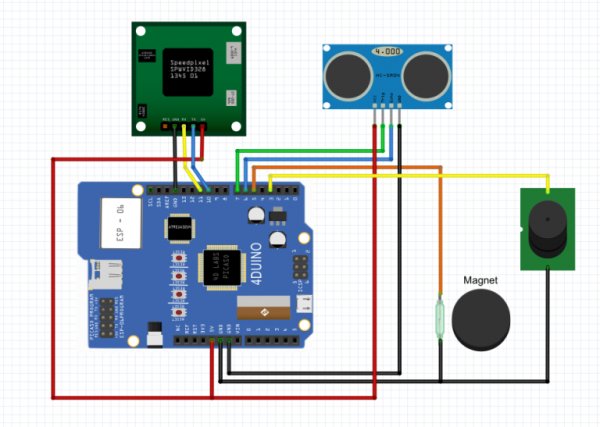
Connect the components mentioned above as you can see in the fritzing diagram below.
Step2: Program
Workshop 4 – 4Duino Basic Graphics environment is used to program this project. (The same could be implemented in the latest Arduino IDE)
This project requires the Arduino IDE to be installed as Workshop calls the Arduino IDE for compiling the Arduino sketches. The Arduino IDE however is not required to be opened or modified to program the 4Duino.
Open this file using Workshop 4.
Change the SSID and the PASSWORD to suit your router, in the program.
Note: Download the project code here.
You can change your Home Security Password in line 62 ( char pass[7] ) , and your reverse password in line 64 (char inPass[7]).
Step3: Comms Port
Connect the 4Duino to the PC using µUSB cable.
Then navigate to the Comms tab and select the Comms port to which the 4Duino connected.
Step4: Compile and Upload
Finally, go back to “Home” tab and now click on the “Comp’nLoad” button.
Workshop 4 IDE will prompt you to insert a µSD card to the PC in order to save the widget images. Select uSD card to be loaded and Click “OK”.
All you need to do is insert the μSD card to load the image files to into the 4Duino.
After uploading the program in to the 4Duino, it will try to mount the μSD card. If the μSD card is not inserted it will print an error message
Read more: Sécurité à la maison, mettant en vedette 4Duino-24