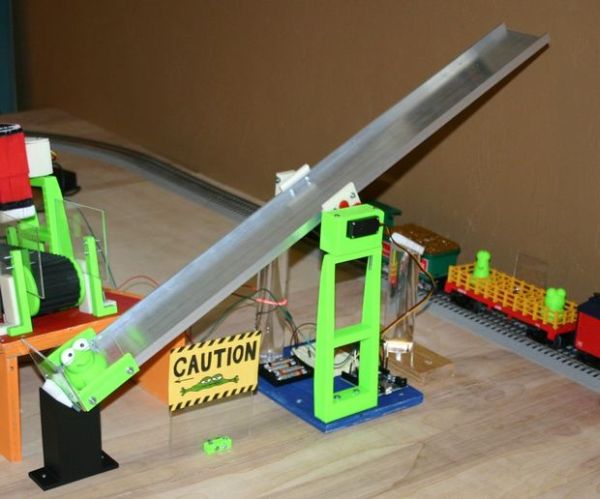
Froggy put on a little eye makeup before heading out for the new ride, “The Seesaw.” The Seesaw is the third ride in the amusement park for adventurous plastic frogs.
This ride received Froggy from “The Boot” and slides him over to a waiting rail car.
Froggy World 1 The Catapult is here:
http://www.instructables.com/id/Froggy-World-1-The-Catapult/
Froggy World 2 The Boot is here:
http://www.instructables.com/id/Froggy-World-2-The-Boot/
Files for the 3d printed parts are here:
http://www.thingiverse.com/thing:48138
An arduino controlled servo motor operates the slide.
Major components include:
Arduino
Servo motor–Hitec HS-311 (Amazon.com)
1/4 inch id bearing vxb.com
Aluminum channel from Amazon:
6063 Aluminum U-Channel, T52 Temper, Meets AMS QQ-A-200/ASTM B221 Specifications, 1/2″ Leg Lengths, 3″ Width, 0.125″ Wall Thickness, 36″ Length
Step 1:
Start with 3 inch wide (1/2 inch high walls) aluminum channel, 29 inches long.
Step 2:
Print the seesaw al bracket and attach it to the center of the aluminum channel with machine screws.
Step 3:
Add the seesaw cap to one end of the channel.
Step 4:
Add acrylic shields to the end and right side of the channel (these are to keep Froggy from bouncing out). I screwed one piece of acrylic on and I “welded” the other by “painting” (small brush) acetone on the abs printed part–then holding the acrylic against the abs printed part.
Step 5:
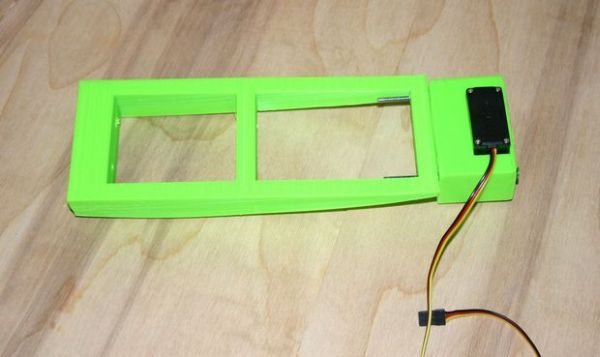
Using the balance base a, catapult motor c and catapult motor lid (printed 3d parts), attach the servo motor to “the tower.”
Step 6:
Attach a 1 1/2 inch diameter, 7 1/2 inch long acrylic rod to an 8 inch by 6 inch by 1/2 inch (painted plywood) base.
Step 7:
Find a position “midway” in the servo travel and let the motor rest there. This way, when you attach the channel in a “mid travel” position; you’ll know that you have room to make it move by software where it needs to go.
Step 8:
Pre drill holes in the top of the acrylic rod to accept the gear bearing holder.
Step 9:
Mount the servo horn to the seesaw al bracket, then mount the channel to the servo motor. Fasten the servo screw in the center.
Step 10:
The wood dowell (1/4 inch diameter) should fit into the bearing and slide through both holes in the seesaw al bracket.
For more detail: Froggy Monde 3 De La Balançoire À L'Aide D'Arduino