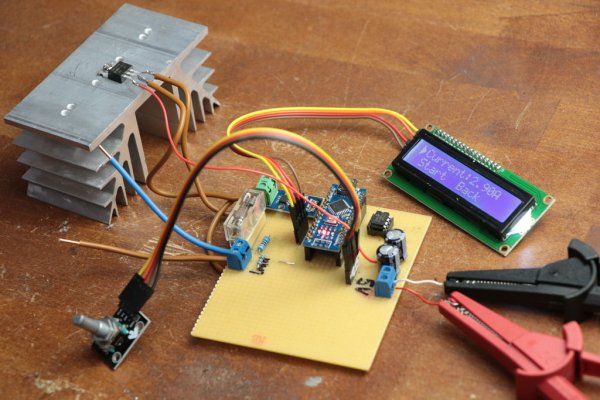
In this project I will show you how I combined an Arduino Nano, a current sensor, an LCD, a rotary encoder and a couple of other complementary components in order to create an adjustable constant load. It features a constant current and power mode and can handle a maximum of 30V and 20A if your heatsink design can handle it. Let’s get started!
Step 1: Watch the Video!
The video gives you all the information you need to make your own adjustable constant load. During the next steps though, I will present you some additional information.
Step 2: Order the Components!
Here you can find a parts list with example seller:
Amazon.com:
1x Arduino Nano: https://amzn.to/2PzA0ue
1x 16×2 I2C LCD: https://amzn.to/2o9Ms7N
1x Rotary Encoder: https://amzn.to/2wdvDNH
1x TC4420 MOSFET Driver: https://amzn.to/2PCV8Qf
1x IRFZ44N MOSFET: https://amzn.to/2P7NJYp
1x ACS712 Current Sensor: https://amzn.to/2BLBxL5
1x Fuse Holder: https://amzn.to/2BSGtxw
1x 20A Fuse: https://amzn.to/2MRbeax
2x Binding Post: https://amzn.to/2MN8Q4L
Ebay:
1x Arduino Nano: http://rover.ebay.com/rover/1/711-53200-19255-0/1?…
1x 16×2 I2C LCD: http://rover.ebay.com/rover/1/711-53200-19255-0/1?…
1x Rotary Encoder: http://rover.ebay.com/rover/1/711-53200-19255-0/1?…
1x TC4420 MOSFET Driver: http://rover.ebay.com/rover/1/711-53200-19255-0/1?…
1x IRFZ44N MOSFET: http://rover.ebay.com/rover/1/711-53200-19255-0/1?…
1x ACS712 Current Sensor: http://rover.ebay.com/rover/1/711-53200-19255-0/1?…
1x Fuse Holder: http://rover.ebay.com/rover/1/711-53200-19255-0/1?…
1x 20A Fuse: http://rover.ebay.com/rover/1/711-53200-19255-0/1?…
2x Binding Post: http://rover.ebay.com/rover/1/711-53200-19255-0/1?…
Amazon.de:
1x Arduino Nano: https://amzn.to/2BLw2Ml
1x 16×2 I2C LCD: https://amzn.to/2BJ8tnx
1x Rotary Encoder: https://amzn.to/2Lmt5S0
1x TC4420 MOSFET Driver: https://amzn.to/2PBVQ0g
1x IRFZ44N MOSFET: https://amzn.to/2PxQd38
1x ACS712 Current Sensor: https://amzn.to/2NijkGn
1x Fuse Holder: https://amzn.to/2NkffkK
1x 20A Fuse: https://amzn.to/2PCLm0A
2x Binding Post: https://amzn.to/2BP0eGq
Step 3: Create the Circuit!
Here you can find the schematic as well as pictures of my finished circuit. Feel free to use it as a reference for your own circuit.
Step 4: Upload the Code!
Here you can download the code for the project. Upload it to the Arduino Nano through the Arduino IDE
Read more: DIY ADJUSTABLE CONSTANT LOAD (CURRENT & POWER)