Contrôle de l'Arduino sans fil avec MATLAB

Been seeing few DIYs on how to establish a communication between MATLAB application and Arduino that is hardwired to PC. However, I haven’t encountered anything that control Arduino via MATLAB wirelessly using the ENC28J60 compatible Ethernet shield. In this ible’, I’m going to show the simplest way to control Arduino using MATLAB wirelessly.

Control Arduino Wirelessly

WHAT YOU NEED?

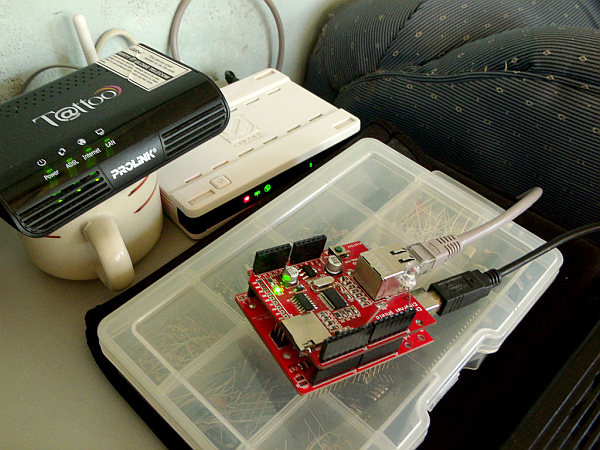
1) Arduino – You need a controller. I used Arduino since it is supported by MATLAB. For this project however I used, Gizduino, a locally made Arduino-based controller.

2) Ethernet Shield – You need a compatible Ethernet shield for your board. I used the ENC28J60 for my board.

3) Wi-Fi Router – To connect your Arduino which would be the means to communicate to your PC wirelessly.

4) LED – Any components to indicate communication between devices. For this project I used LED.

5) Printer Cable – To connect Arduino to your PC.

6) UTP Cable – To connect your Ethernet shield to the router.

Step 1: Connect Ethernet Shield to Arduino

Carefully connect your Ethernet shield to your Arduino. Avoid bending the pins.

Step 2: Connect LED

Connect any components that could indicate communication between devices. In this ‘ible I used an LED. Will try to turn LED on and off wirelessly using MATLAB. I’ve connected my LED’s anode (long pin) to Digital I/O pin 6 of the Ethernet shield attached to the Arduino and LED’s cathode (short pin) to Ethernet’s GND.

Step 3: Connect Arduino to PC

Arduino Wireless

Plug-in the printer cable to your Arduino and connect to PC.

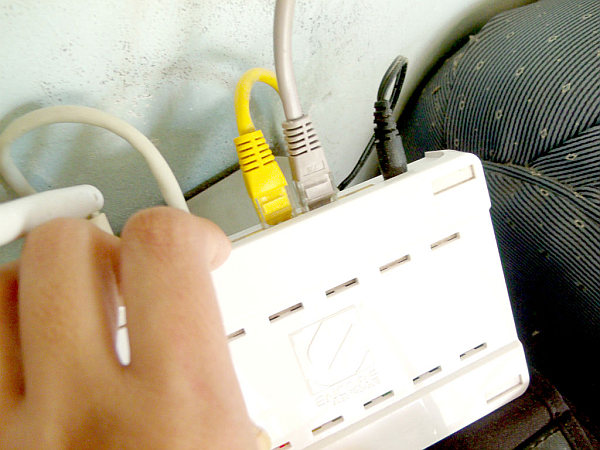
Step 4: Connect Ethernet Shield to Router

Plug-in UTP to your Ethernet shield and any of the LAN ports of your router.

Step 5: Open Arduino IDE

I used Arduino 1.0 because of the Ethernet shield library compatibility. After opening Arduino 1.0, download the library and copy paste the content to the library folder of your Arduino 1.0.

Step 6: Upload Code to Arduino

Before uploading the codes to your Arduino, make sure of that you have indicated a web server address that is with in the DHCP server range. To learn the DHCP server range of your router, you may access your router by opening a browser and typing the default gateway address, 192.168.0.1. Most of the router uses this default gateway address, however, some router may use different address. To learn the address of your router you may access the command prompt, if you are a Windows user, type in ipconfig and hit on enter. Look for the default gateway address if you are connected to your router.
Codes.rar674 bytes
Major Components in Project
1. Arduino
2. Ethernet Shield
3. Wi-Fi Router
4. LED
5. Printer Cable
6. UTP Cable

For more detail: Contrôle de l'Arduino sans fil avec MATLAB


A Propos De L'Auteur

Ibrar Ayyub

Je suis expérimenté, rédacteur technique, titulaire d'une Maîtrise en informatique de BZU Multan, Pakistan à l'Université. Avec un arrière-plan couvrant diverses industries, notamment en matière de domotique et de l'ingénierie, j'ai perfectionné mes compétences dans la rédaction claire et concise du contenu. Compétent en tirant parti de l'infographie et des diagrammes, je m'efforce de simplifier des concepts complexes pour les lecteurs. Ma force réside dans une recherche approfondie et de présenter l'information de façon structurée et logique format.

Suivez-Nous:
LinkedinTwitter

Laisser un Commentaire

Votre adresse e-mail ne sera pas publiée. Les champs obligatoires sont indiqués avec *

fr_FRFrench
Faire défiler vers le Haut