Use a $9 GSM module & the Hologram network to remotely control any Arduino with Blynk App.
Story
Blynk is an awesome tool that allows you to build drag and drop apps for controlling hardware remotely! Its perfect for quickly creating useful IoT projects. This tutorial will run you through setting up Blynk for cellular control using an Arduino and a $9 GSM board.
Hologram Network
Hologram.io is a cellular network provider perfect for makers. At $0.60 /mo plus $0.40 per mb, you’ll have plenty of data for most IoT projects.
You can get a free SIM card by going to hologram.io and then activate it at dashboard.hologram.io
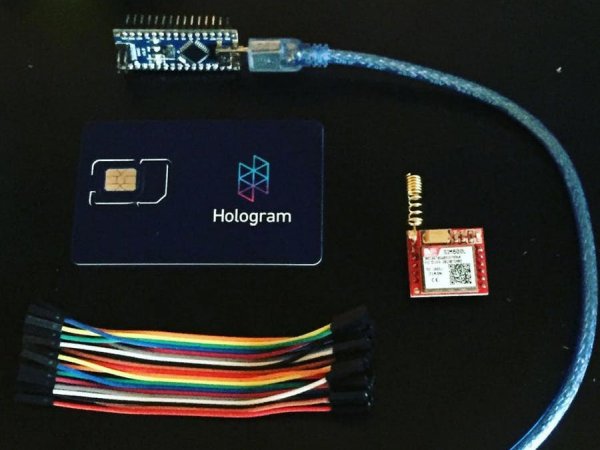
Wiring
Most GSM modules like the SIM800L will have Power, Ground, RX, and TX.
Although you can use certain other pins for SoftwareSerial, it is unstable. Use an Arduino that has extra onboard Serial pins. For the Arduino Micro wire to Serial1.
If you end up using SoftwareSerial, set the baudrate to 57600, 38400, or 9600 (unstable)
Before inserting the SIM card make sure you are putting it in the right way.
Install TinyGSM and Blynk Arduino Libraries
- Open the Arduino IDE
- Go to Sketch > Include Library > Manage Libraries
- Search for TinyGSM et Blynk and install them both.
Set-up Blynk App Project
- Install Blynk on your mobile phone
- Create a New Project
- Set the Device to “Arduino Micro”
- Set Connection Type to “GSM”
- Once you click Create Project it will send an auth token to your email. Save that.
- Add a button in your project, set it to toggle Pin D13 (the onboard LED)
Program Sketch
- Open the Arduino IDE
- Go to Examples > TinyGSM > BlynkClient
- Set apn to “hologram”
- Set auth to the auth token to you received in an email earlier
// Your GPRS credentials
// Leave empty, if missing user or pass
const char apn[]  = "hologram";
const char user[] = "";
const char pass[] = "";
// You should get Auth Token in the Blynk App.
// Go to the Project Settings (nut icon).
const char auth[] = "YourAuthToken";
Upload the sketch!
Did it work?!
Open the Serial Monitor in the Arduino IDE
Press Reset on the Arduino
After awhile you should see that everything is connected to the cell network and to the Blynk cloud
Open the Blynk project, press play
You should be able to toggle the button now and see that the onboard LED toggles in response!
Read more: Cellular IoT with Blynk & Hologram