Story
Voice-controlled Robot
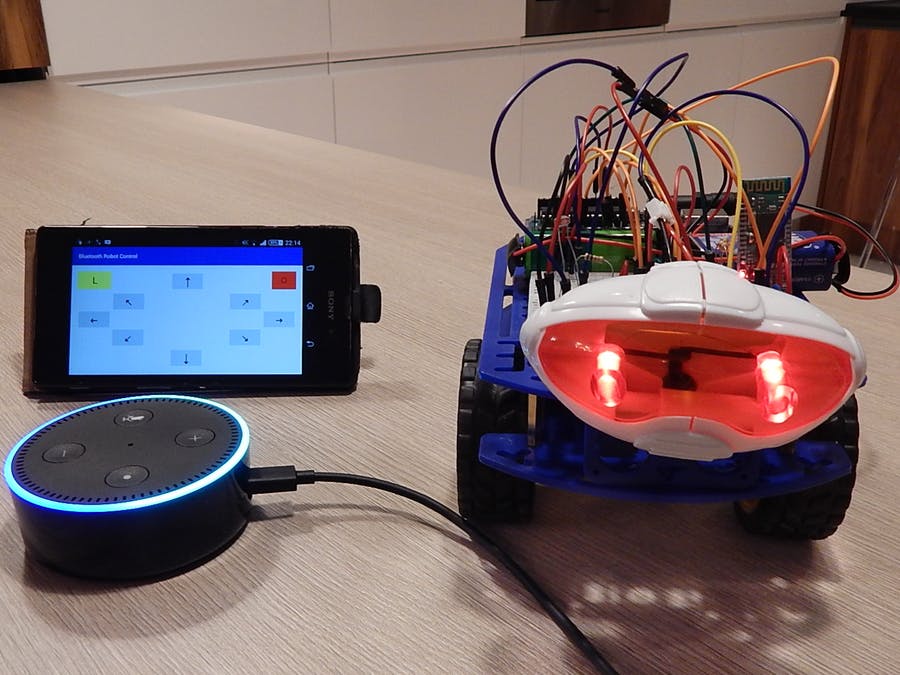
Voice-controlled robot is both hardware and cloud solution in one piece. The main components are:
1. Alexa Skill – to interpret voice commands and translate them to Google Cloud Messaging messages – deployed to Heroku cloud
2. Android application – to receive messages from Google Cloud Messaging and send them over Bluetooth to Arduino – deployed to your Android phone
3. Arduino – to read messages over Bluetooth and control the robot
4. The robot kit and robot circuit – any robot kit will do, you need HC-06 or HC-05 for serial Bluetooth communication and 2xDC motors attached to L293D to move it
It’s not an entry-level tutorial, but… everything is ready. All key components are open-sourced. It’s just a matter of assembling & integrating it all together. So let’s start.
The Control Flow
Here is how all the pieces are working together:
1. You speak to Echo device
2. Echo connects to Alexa Service
3. Alexa Service opens Alexa Skill called Robot
4. Robot skill interprets voice commands and translates them to proper digital messages. Messages are sent to Google Cloud Messaging service
5. Android application is setup to listen for messages from Google Cloud Service
6. Android application receives an incoming remote message and relays it over Bluetooth to Arduino
7. Arduino using HC-06 Bluetooth serial module is reading the messages and moving the robot accordingly
Simple 🙂
Google Cloud Services & Running Android Application
This is a first step of my tutorial. We will setup services which are prerequisites for the rest of the solution.
In this step you will learn how to setup & generate the following:
- Google Cloud Messaging server key – secret key used by Robot skill to authenticate itself.
- Google Firebase registration token – phone-specific token which Robot skill uses to send remote messages to a phone.
You will need Google account. If you don’t have one already, create it. Google Firebase and Google Cloud Messaging are free to start.
Checkout code section of this tutorial and fetch a copy of my Bluetooth Robot Control project.
Deploying Alexa Skill to Heroku
Now that we have Google Cloud Messaging server key and phone’s registration token we can deploy the Robot skill application.
In this step you will learn how to:
- Create heroku application
- Setup Robot skill
- Deploy it to heroku
You need a Heroku account. If you don’t have it already create one at: https://heroku.com. It’s for free. You can run simple apps on Heroku for free. Also, majority of add-ons provides free plans. I love it 🙂
Navigate to code section of this tutorial and fetch a copy of my alexa-robot-control project. Then watch the second part of my tutorial.
Read More: Construire Une Commande Vocale Du Robot À L'Aide D'Arduino
