Ever wondered if your phone can play games by itself. Yes, it is possible. You can build a circuit to play Piano tiles on your smartphone.
The video shows the demonstration of the project.
Step 1: Components Required
And the circuit can be built with simple components like Light sensors, Relays and Arduino.
Three main functions of the circuit are :
Sensing color of the tile (Black or White)Processing the color information and generating timing for the touch (Arduino)Simulating capacitive touch (Relays)
Step 2: Sensing
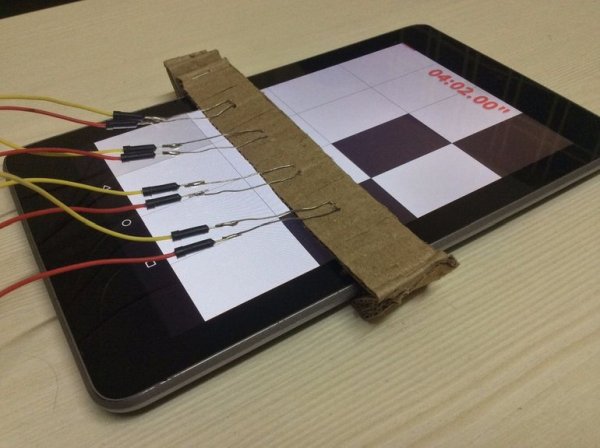
We use light dependent resistors (LDRs) to sense if the tiles are white or black. Four LDRs are positioned over the screen each facing one tile. The LDRs have been connected to the back of the cardboard like this.
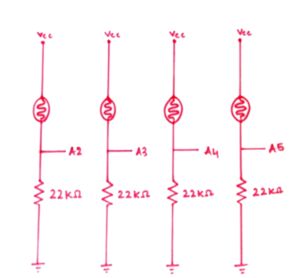
The LDR resistance changes with the intensity of Light. Higher the intensity of light, lesser the resistance. LDR is placed in a Voltage divider circuit to produce a voltage proportional to its resistance. The LDRs are connected to the analog input pins of the Arduino as shown.
Practically, this is how you would connect the circuit. You can check the test_ldr code to see if the LDRs are working fine. When you run the code, you will get a high value from the LDR if it’s sensing black, else you get a low value.
Step 3: Processing
Arduino reads the voltage drop across the LDR. Observe the voltage voltages for Black and White tiles, choose a suitable threshold voltage say Vt. If (V
Step 4: Simulating Touch
For this we have to understand how capacitive touch screens work. The electrodes apply a low voltage to the conductive layer creating a uniform electrostatic field. When a finger hits the screen a tiny electrical charge is transferred to the finger to complete the circuit creating a voltage drop at that point on the screen. The location of this voltage drop is recorded by the controller and this is how a capacitive touch screen works.
We are going to use this concept, except that in the place of a finger, we use the ground pin on the Arduino to transfer the charge on the screen. To have more surface area on the display of the screen, we use a coin.
Relays are directly connected to the output pin of the Arduino. It is equivalent to a touch if the voltage given is high as there is a path for the current to flow to the ground. It is equivalent to not touching if the voltage given is low.
Read more: Arduino Joue Du Piano Tuiles