There are some other NodeMcu or ESP8266 weather stations published on the web. Nevertheless they do not include the sensors I used and often are programmed in the more difficult language: LUA. This weather channel has got the following (unique) characteristics:
- NodeMcu board (V0.9 or V1.0), programmed with arduino IDE (easy);
- Streaming data to Thinkspeak (also easy!);
- DHT11/22 sensor;
- BMP180 sensor;
- Rain sensor;
- Light sensor;
- Piezzo indicating buzzer;
- Flashing indication led.
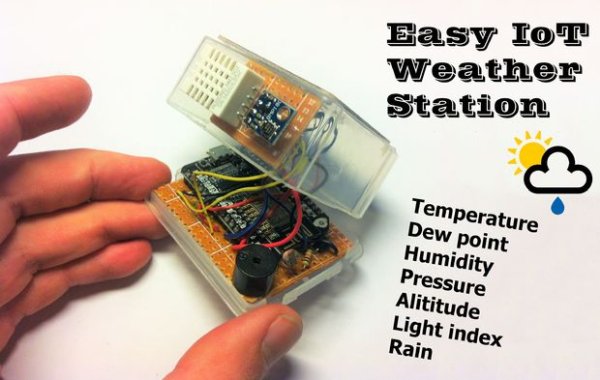
This channel will stream the following sensor data to a Thingspeak channel:
- Temperature DHT11/22;
- Temperature BMP180;
- Humidity DHT11/22;
- Pressure BMP180;
- Dew point temperature DHT11/22;
- Altitude BMP180;
- Light intensity LDR;
- Rain value.
The specific materials needed for this project are mentioned per step. General materials needed are:
- Breadboard;
- Perfboard;
- NodeMCU V0.9 or 1.0;
- Some wires;
- Micro USB to USB cable;
- 2 ‘1N4001 1A 50V Diodes’
- 3 ’10K resistors’
I estimate the costs of the project around 15$. (NodeMCU=4,76$, DHT22=3,10$ OR DHT11=1$, BMP180 = 3,50$, Rain sensor = 0.99$, additional materials such as perfboard, wires, 2 diodes, 2 resistors and 1 LDR, I estimate around 4$)
Step 1: The NodeMcu Board
As I am a newby, I bought the NodeMcu board for less than 6$, more or less per exident. I was looking for a board that could connect my projects to the internet. The NodeMcu board did look a lot like an arduino and therefore it felt very familar. At that time I had no idea of the big advantages of the board.
The NodeMcu board is in fact an arduino with a wifi shield. You can reconise this shield by the metal plate on top of it. This wifi shield is called the esp8266. The shield can be bought and used as an individual controler, a well known version is the esp8266 V1 which has only got 2 digital pins. The later version (one of them is placed on top of the NodeMcu board) do have more digital pins.
The big advantage of the NodeMcu board is that the board can be programmed in the arduino environment: arduino IDE. Also, the board consists of a 5 volt step down converter. You can safely connect the board by USB to your computer without having to buy a 3.3 volt stepdown module.