Arduino is a great hardware platform when comes to prototyping and building cool stuffs. Using this I have designed and developed a simple Arduino Weather machine which measures three important parameters Temperature, Light intensity and Humidity and predict the weather condition according to the measured parameters. This following article will walk you through the operation, working and code of this project.
SENSORS USED:
LM35:
This is a precision temperature measurement sensor with its output proportional to the temperature of the environment. It measures temperature from the range of -55C to 150C. The output voltage varies by 10mV with every degree Celsius change in temperature.
HUMIDITY SENSOR:
I got this humidity sensor from a local merchant. The increase in humidity level will in turn increase the output voltage of this sensor. We are going to scale the output voltage in terms of percentage.
LIGHT INTENSITY SENSOR:
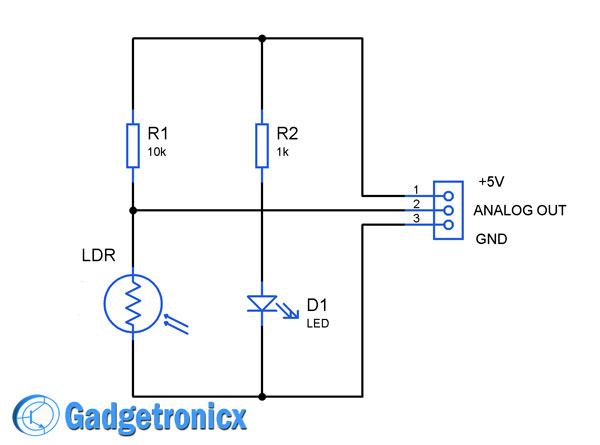
This sensor uses a simple LDR to measure the light intensity. The sensor was designed in such a way the increase in light intensity will result in decrease in output voltage. We are going to calibrate and scale the output voltage in terms of percentage.
DESIGN OF ARDUINO WEATHER MACHINE:
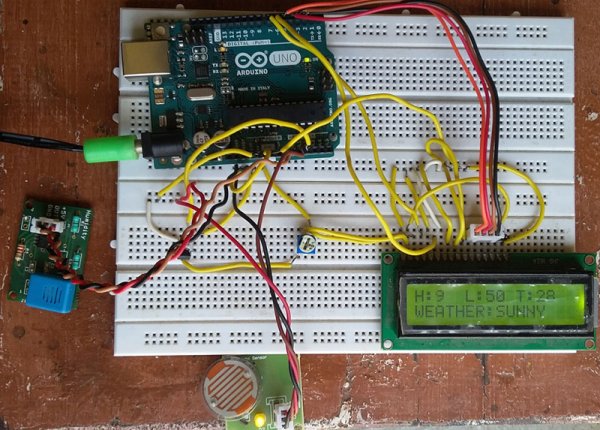
The design shows three simple sensors Light, Humidity and temperature sensors are connected to the ADC channels of Arduino Uno. LCD on the other hand connected to the digital pins to display sensor values and weather conditions. The operation is simple Arduino is gonna scan the sensor with periodical intervals and displays the readings in the LCD display after calibration. Based on those input readings I have added simple conditions in the code to make a weather forecast. The weather forecast is then printed in the LCD display for users.
CALIBRATION:
The calibration of this Project is pretty easy and simple. The temperature sensor LM35 will give a output change of about 10mV for every change in degree Celsius whereas the step size of Arduino ADC is given by the formula
Step Size = Aref / ADC bit size = 5 / 1024 = 4.88mV
Read More: Build A Simple Arduino Weather Machine