In this post I will show you how to add Wi-Fi connectivity and an OLED screen to the MightyOhm Geiger Counter kit. Lots of fun!
Introduction
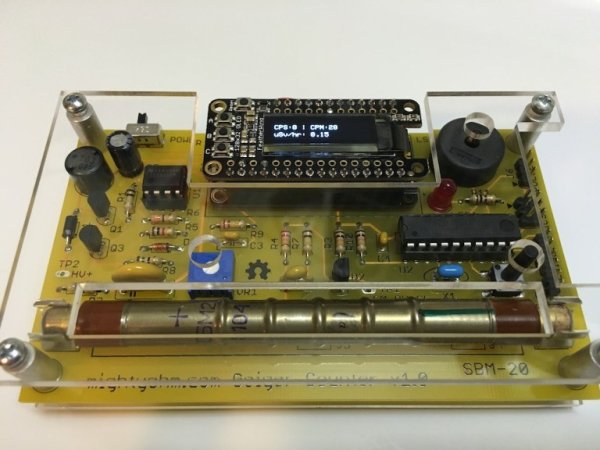
I assembled my Geiger counter kit from MightyOhm some time ago. It’s a very fun kit and the finished counter looks awesome. Oh, that Geiger-Muller tube sitting on that yellow PCB! I’ve always wanted to modify it somehow and add functionality. Today I realized that an Adafruit Feather sits PERFECTLY where the AAA battery holder normally goes. Doesn’t it look like they belong together? I modified the counter, added a Feather HUZZAH ESP8266 with OLED FeatherWing, and whipped up some code. I’m very happy with the end result. Want to do the same to your kit? Let’s get on with the tutorial.
Parts List
Here’s what you need to complete this mod:
- MightyOhm Geiger Counter kit. I recommend getting it with the case.
- Adafruit Feather HUZZAH ESP8266
- Adafruit FeatherWing OLED
- Male headers for the Feather HUZZAH
- Female headers for the FeatherWing that come with it
- Micro USB cable for programming Feather
- A Li-Po battery or some means of powering the Feather board without USB
- Three Female-Female or Male-Female breadboard jumper wires
- Double-sided tape
Code for this Project: Shared on Github
Tutorial
NOTE: Please read through this entire tutorial before starting the assembly. There are some important things to be aware of regarding power and program uploading.
First, solder headers to the Feather HUZZAH and OLED FeatherWing. Test those together with Adafruit’s example program. If you are unfamiliar with the Adafruit Feather or OLED, I recommend checking out their tutorials. They can be found by clicking on the product links in the parts list above.
Next, assemble your MightyOhm Geiger counter kit. That is a full tutorial by itself. There is just one modification to the instructions. Do not attach the AAA battery holder. We have other plans for that space on the board. You can tack on some wires in its place to test the counter before you continue. If you bought the case, don’t put it on yet.
If your kit is already assembled, you need to remove the battery holder. It doesn’t require any special tools beyond a soldering iron. First take the case off if you have one. You might also want to remove the tube and put it in a safe place, it is fragile! Remove the nut holding the battery holder, then heat each contact pin one at a time while gently wiggling it back out.