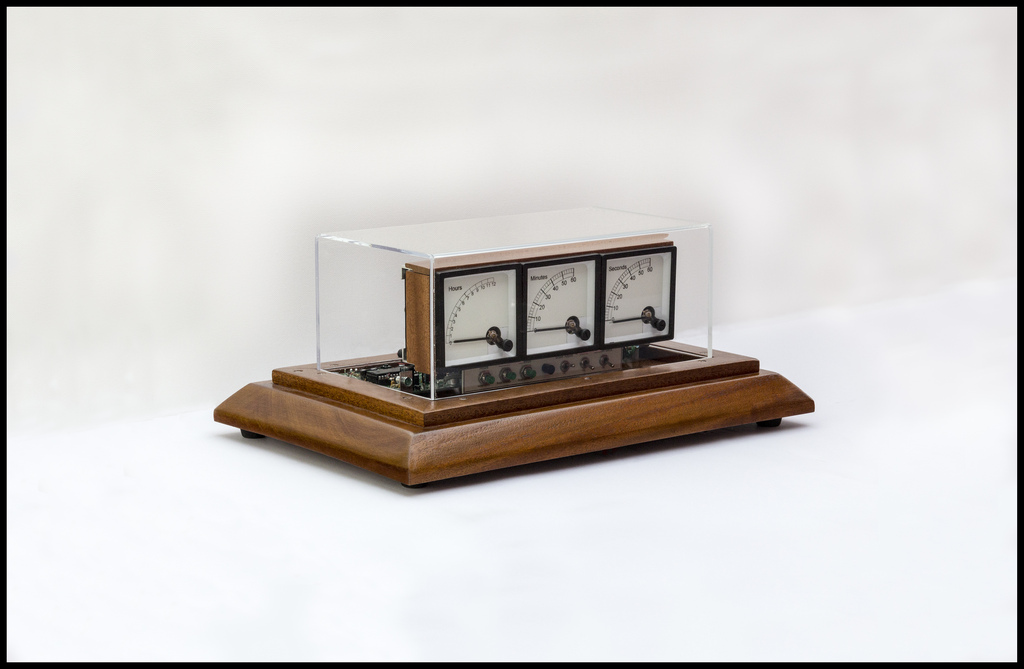
This clock is based largely on Alan’s code and circuit with a few changes.
I purchased a kit of parts for the main board from Alan’s site.
I have used three voltmeters and mounted them on a wooden plinth with a clear Perspex cover to give the clock an industrial look.
I have modified Alan’s code to run on PICBasic Pro version 3. I have also added the following.
Switched display On and Off (keeping battery backup as per Alan’s design) but also allows me to turn meters Off in full power mode.
Synchronization to my Master Clock every 30 seconds
Synchronized LED & Re-Synch LED
Synchronization On & Off
Transistor meter drivers
Separate hourly Chime Circuit
Pulsed “tick tock” seconds sound.
The standard clock due to limits of the 20Mhz quartz crystal (you can’t get a precise 1 sec pulse) runs fast by several seconds per day. In order to keep correct time the clock is connected to my Master Clock or LCD Master Clock and is kept in sync by 30 second pulses form the Master Clock ( the Master Clock is synchronized to the DCF77 transmitter).
The Clock also has an electronic chime via an ISD1730 audio record and playback kit from Sure Electronics. This was used to record my Long case clock chime then play it back on pulses from the master clock.
The chimes are also controlled via the Master Clock. The clock has battery backup on mains fail and can also be manually switch to backup mode (display off switch) if required.
The meters have had their original scales (left) removed and are then rubbed down to bare metal before being re-sprayed in off white to make them look old.
The new scales were drawn up in TurboCad and then printed on inkjet transfer paper before being cut out and applied to the blank scales.
The scales were then varnished over to seal them.
Clock Controls & indicators
Chime LED- lights while clock is chiming
Sync Pulse LED- lights when sync pulse received from master
Re-Sync LED- lights when Sync Pulse corrects clock
Seconds Led-Indicates Seconds
Hour/Meter Select- Sets hours and when Scale Adjust is On selects which meter scale to adjust
Minutes/Scale Increase- Sets Minutes and when Scale Adjust is On increases scale deflection
Seconds/Scale Decrease- Resets Seconds and when Scale Adjust is On decreases scale deflection
Scale Adjust-When On enables meter scale adjustment
Chime-Turns Hour Chime On & Off
Smooth Sec- When On Seconds meter deflect smoothly with each second, when off each seconds moves the meter in 1 second increments
Sync-Turns the Master Clock sync On & Off
Display-Turns the meter displays On or Off correct synchronised time is also maintained.
Chime Record Jack-Audio input to Sure Electronics Digital record and playback board for recording hour Chime
Using the Voltmeter Clock
When the clock is first powered up the PWM outputs will default to about 50% of max output. You will first need to adjust the scale of all three meters. This is done by operating the “Scale Adjust” switch. In this mode only the meter being adjusted will be powered.
- The first button “Hour/ Meter Select” (also used to advance the hours when in clock mode) is used to select which meter is to be adjusted.
- The second button (also used to advance the minutes when in clock mode) is used to decrease the full scale setting of the powered meter.
- The third button (also used to reset the seconds when in clock mode) is used to increase the full scale setting of the powered meter.
The goal here is to move all three meters to exactly full scale. When complete remove the scale adjust jumper to return to normal clock mode, at this time the settings will be saved to non-volatile memory.
The time will also need to be set. The time is adjusted using the three buttons.
- The hour button increments the current time by one hour.
- The minute button increments the current time by one minute.
- The second button resets the seconds.
Once set the time and the “Sync” switch is operated the time is checked against the Master Clock 30 seconds pulses on zero and 30 seconds. If the clock is not in sync then the seconds are corrected on chip and the second hand is moved to show the exact time.
In “Display Off “ mode the clock is also kept in sync but only on the 30 second pulse. The clock is chimed via chime pulses from the master Clock that operates a relay that in turn operates the chime board.
See the Winbond ISD1700 chip data sheet for operation details. The chime sound is recorded on the ISD1700 chip via an audio socket in the clock. The chime is turned ON & OFF by the “Chime” switch.
For more detail: Voltmeter Clock

