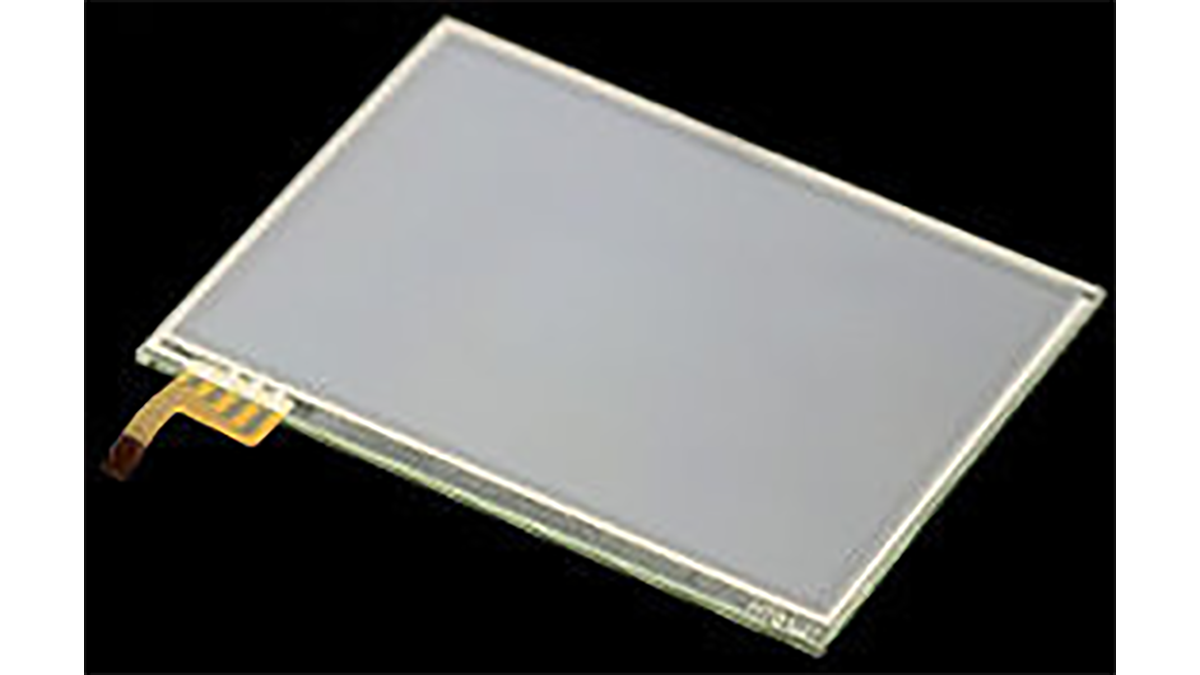
Small 4-wire resistive touchscreens are now amazingly cheap: they are produced in such enormous quantities for mobile phones, PDAs, and particularly handheld games such as the Nintendo DS that they can be bought brand new for under US$10.
Larger touchscreens are also rapidly falling in price. The popularity of netbooks with screens between 7″ and 10″ in size has resulted in a healthy market for touchscreens that can be retrofitted to them and plugged into an internal USB port. Despite the fact that they come with control electronics and a USB interface those screens are also predominantly 4-wire resistive devices, so if you dump the control module that comes with them and interface to the screen directly you can have a 10″ touchscreen on your Arduino! And if you want to go even bigger there are often 15″, 17″, and 19″ touchscreen kits available on eBay for under US$150.
Note however that what is advertised as a “touchscreen” is not actually a complete screen including an LCD. It’s just the transparent glass and plastic panel that fits onto the front of an appropriately sized LCD so the CPU can detect the point at which it is being touched. If you want your Arduino to display information on a screen and let you select or control it by touch you’ll have to do a bit more work to set up the LCD that goes behind the touchscreen overlay.
Even on its own though a touchscreen is a very handy device. They’re incredibly thin and can be mounted over the top of any flat surface, not just an LCD, so they’re great for creating little custom control panels with the “buttons” printed on a sheet that goes behind the touchscreen. All you have to do is map the buttons to X/Y coordinates and your Arduino can figure out which button is being pressed by matching the coordinates. Of course your control panel could represent anything, not just buttons. You could have a slider on it to select volume or temperature level by touching somewhere along a scale, or it could be a plan of a house so you can control lights in different rooms by touching the correct part of the floorplan.
In this project we mount a Nintendo DS touch screen on a blank electrical wall plate to create a touch-sensitive light switch that can link to a home automation system.
[box color=”#985D00″ bg=”#FFF8CB” font=”verdana” fontsize=”14 ” radius=”20 ” border=”#985D12″ float=”right” head=”Major Components in Project” headbg=”#FFEB70″ headcolor=”#985D00″]
| Qty | Description |
| 1 | Arduino Duemilanove, Arduino Pro, Seeeduino, or equivalent |
| 1 | Nintendo DS touch screen |
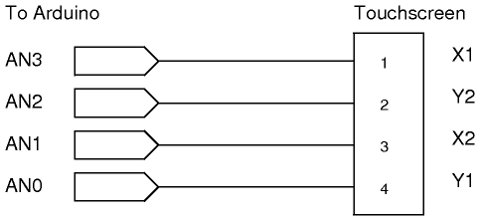
| 1 | Nintendo DS touch screen breakout board |
| 1 | Blank electrical wall plate |
| 1 | 4-pin male breakaway header |
[/box]
For more detail: Touch Control Panel using Arduino