I’m continuing working with Juan Brito and Danny Macancela from the blog Desafio Ecuador, developing new boards to bring near the technology and programming languages. Our last work is a board to use with the Raspberry Pi and focused to learn Python. The board has the basic elements to start with this language. Also, with the develop of the PCB we remove the wiring, avoiding troubles with connections, inversion polarity…So with this board you only focused in the software develop, because the hardware side will work!
The Hardware
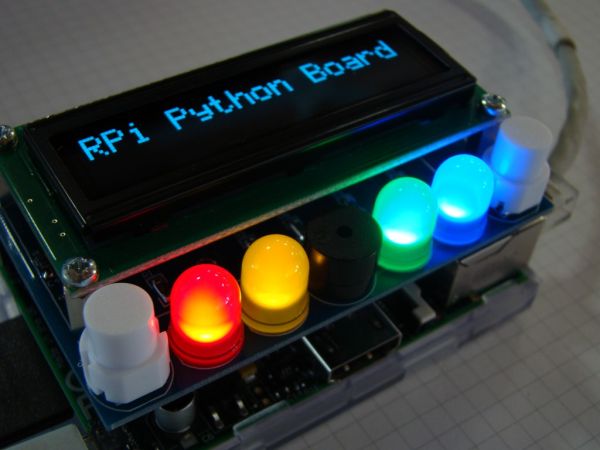
The RPi Python board is oriented for a educational environment, so the hardware is simple, and has the basic elements to start working with Python. We develop this breakout board to fit in the Raspberry Pi board using the GPIO’s to control the elements. Why Raspberry Pi? Because at this time, is the cheaper and powerfull board in the market. It has a lot of documentation and support behind it, in a future post, I’ll talk about it deeper. If you want more info about the Raspberry Pi now, you can look here, here or here (this last one in Spanish).
The schematics of the board can be download from here: RPI PYTHON BOARD SCHEMATIC
As you can see, the elements that the board includes are the following ones:
- Four 10mm difussed leds:
These leds are the same ones that I use previously on the K4S Keyboard. This leds are connected to a general GIPO’s of the board (see schematic) through a FDV301N mosfet transistor. These transistors are not necessary, because the current on the leds are small, but I prefer put it to protect the GPIO pins of the Raspberry. To activate, you must put the corresponding pin to HIGH, and for turn off, put the pin in LOW level.
- Two pushbuttons:
The pushbuttons allows send inputs to the Raspberry, so reading it you can know if they’re pressed or not and act according it state. By default, when the pushbutton is not pressed, you read a HIGH level, and when you press it, then you will read a LOW level.
- One buzzer:
The buzzer allows you send acoustic signals. You can program a continuous tone or beeps with a variable period, it depends how you program it. Like the leds, I put a MOSFET transistor to protect the Raspberry Pi pin. To activate the buzzer, you must send a HIGH level to the pin. And to turn off, simply send a LOW level!.
- One connector for a 2×16 LCD
This connector allows to put a standar 2×16 LCD display, to send messages ans show info. You can put a standard LCD module or an OLED one. I decide put this last ones, because are really cool and gives a modern aspect, instead or the traditional ones. And, because the OLED display makes its own light, no backlight is required. This reduces the power required to run the OLED and is why the display has such high contrast. I choose two colours, Red and Blue from Raystar, that also provides a good application note to manage these displays. From here, I want to giving thanks to Jorge Galán, from RC Microelectrónica for his help and support to obtain it.
For more detail: RPi Board, a board to learn Python with the Raspberry Pi