If you have two cats and one of them is on a diet but the other needs free food, you can build a feeder with RFID capability that only opens for the cat that needs free access. The free-food cat wears a collar with an RFID tag.
Features:
– An old CD-rom player is used as a sliding door
– Timer-controlled open duration
– Proximity sensor (Sharp GP2D120) prevents door from closing while the cat is eating
– Sensors detect whether the door is fully opened/closed.
– Automatic/manual mode switch (on manual it opens with a pushbutton)
– Arduino controlled
On the downside:
– Mine was made out of cardboard so it is easily broken into by smart/strong animals. One could use a stronger material and add a servo that slides a bar into the door to lock it into place.
– It doesn’t hold a lot of food.
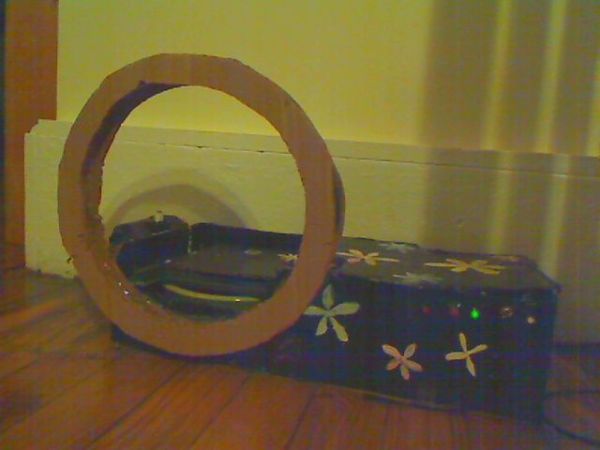
The first version (shown in the video) used an ID-20 (ID Innovations), which worked, but the range was limited. The cat’s tag sometimes hangs on the side, so it did not always activate the reader even when he was in the exact same place every time. Not that big a deal because the cat usually just tried from different angles, but my latest version (shown in the photograph) uses a SEEED studio RDM630 RF-reader with a self-made circular antenna. This antenna is large enough that the cat can poke his head through, which works 100% of the time. The antenna is described in step 7.
Little Cat Toos demonstrates cat feeder from champenoise on Vimeo.
The video shows the first version with the ID-20 as the reader.
Step 1: Materials
– A working CD player tray mechanism+motor from an old cd-rom player
– Sharp GP2D120 Proximity sensor
– 125KHz RFID reader (e.g. ID-innovations ID-20, SEEED studio RDM630, Parallax)
– 1.25″ diameter 125KHz RFID tag (or as large as can be worn comfortably on the animal’s collar. Tag size influences read range. Bigger is better in most cases)
– Arduino Duemilanove
– 1 adafruit motorshield
– 3 Pushbuttons
– 1 Toggle Switch
– 5 100-220Ω Resistors
– 4 10kΩ Resistors
– 1 Red LED
– 1 Green LED
– The material for the enclosure (such as cardboard, wood or plastic)
Step 2: Find an old CD-rom player
Strip an old CD rom player until you have only the tray with the DC motor that moves it back and forth. Alternatively, any other door with a dc motor would work.�
To ensure that Arduino stops turning the motor when an open/close action has been performed, I mounted two pushbuttons in the tray, which get pressed when the door is all the way open/closed. This also helps to keep track of what state the system is in at all times. I have mounted a metal strip on the tray in such a way that when the door is all the way open, the strip pushes on one button, and when it is all the way closed, it pushes the other button.
Put the Adafruit Motorshield on top of the Arduino. Connect the motor to the motor shield. I use m3 (digital pin 5). Connect pushbuttons to Arduino analog channel 0 and 1 (in Arduino code pin 14 and 15). Add a 10K resistor between each button and ground as a pull down resistor (http://www.ladyada.net/learn/arduino/lesson5.html) and a low one (100-220 ohm) between the button and the analog channel just so the resistance is not infinitely small. The button that is actuated when the tray is extended (i.e. door closed) should be on channel 1 and the button actuated when the tray is retracted (door open) should be on channel 0.
More info about the motor shield: http://www.ladyada.net/make/mshield/faq.html.
You can test the mechanism with a bit of Arduino code that is downloadable here:
http://www.writtensound.com/arduino/cat_feeder.htm

You have to be able to open the feeder without a tag, when you want to fill it with food for example. Thus, we add a switch that puts it in ‘manual mode’ in which the feeder opens by pressing a button. For clarity, the schematic shows only this latest addition without anything else. This can also be tested with the code that can be downloaded over here:
http://www.writtensound.com/arduino/cat_feeder.htm.
[box color=”#985D00″ bg=”#FFF8CB” font=”verdana” fontsize=”14 ” radius=”20 ” border=”#985D12″ float=”right” head=”Major Components in Project” headbg=”#FFEB70″ headcolor=”#985D00″]
Arduino Duemilanove
adafruit motorshield
Pushbuttons
Red LED[/box]
For more detail: RFID pet feeder using Arduino