Vinyl cutters are used in the sign writing industry, and are great for making stickers, signs and graphics. I would like to thank Instructable members silverjimmy and Groover for their fantastic laser cutter instructables, without which I would not of been able to complete this project.
My idea is to take an old printer and turn it into a vinyl cutter, as they are quite similar in there design and it would hopefully make the build just that little bit easier.
As most people find the electronics an software the most intimidating part of a project like this, I’ve gone into a fair amount of detail on how to set it up. Turns out the mechanical part of this project is far more challenging, as it takes quite a bit of tweaking, adjusting and general head banging to get the vinyl to cut properly.
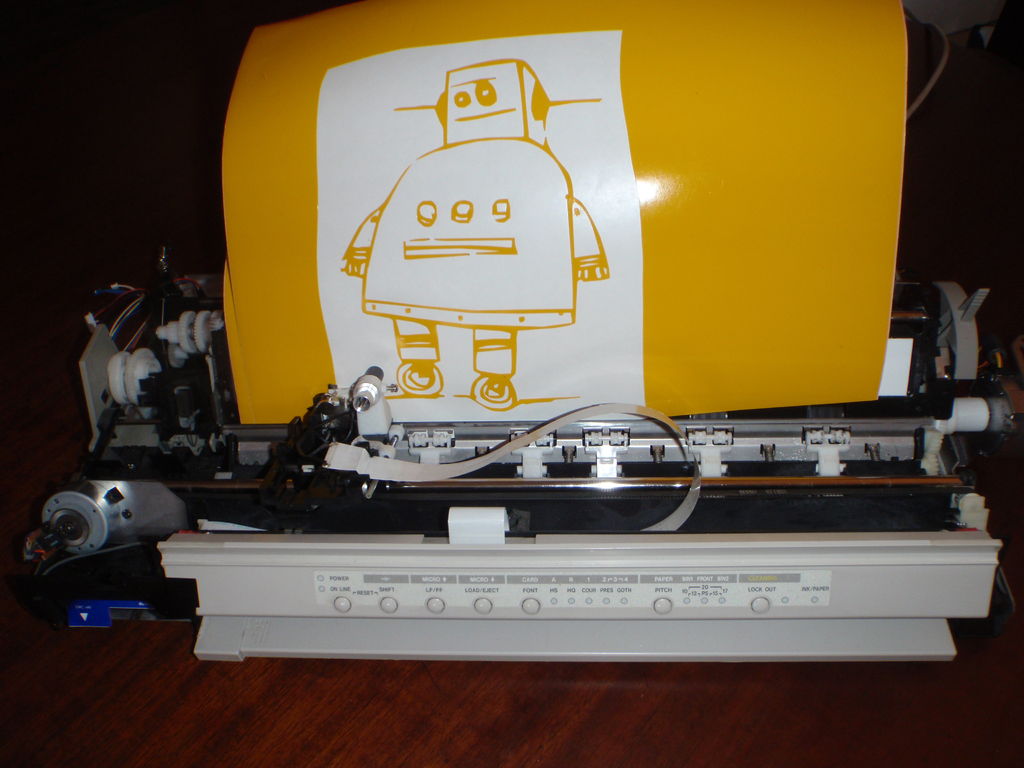
The video is of a test run with a marker pen.There is really not that much to see when Its cutting vinyl as its very hard to see where the cuts are until after the the vinyl leaves the machine. 
My idea is to take an old printer and turn it into a vinyl cutter, as they are quite similar in there design and it would hopefully make the build just that little bit easier.
As most people find the electronics an software the most intimidating part of a project like this, I’ve gone into a fair amount of detail on how to set it up. Turns out the mechanical part of this project is far more challenging, as it takes quite a bit of tweaking, adjusting and general head banging to get the vinyl to cut properly.
The video is of a test run with a marker pen.There is really not that much to see when Its cutting vinyl as its very hard to see where the cuts are until after the the vinyl leaves the machine.
Step 1: Parts you will need
I got quite a few of the parts from Core electronics who have lots of stuff and post it out really quickly. The rest I got from ebay which also has lots of stuff, but the post can take 2 or 3 weeks here in Australia especially if the parts come from Hong kong or China.
- dupont wires $8.18
- 10 X 40 pin headers $ 3.80
- Beginner kit for arduino At $65 it a great kit and worth a look, but you only really need the arduino to complete this project so the next link might be better.
- Arduino Uno R3 $29.95
- Standoffs $3.86
- 3mm nuts and bolts $1.07
- vinyl cutter holder 3pc blade $19.00
- 2X EasyDriver Shield stepping Stepper Motor Driver $4.09 each
- Relay Module Shield Board for Arduino $2.39
- Automotive relay $5.25 The voltage will depend on your power supply I used a 24 volt relay
Step 2: Checking out the printer
Of course you will also need a printer, an old one with stepper motors driving the roller and the slide. I pick up this old cannon A2 printer off ebay for $5. Back in the day it would of been worth $2000-$3000. Before I got to carried away striping the printer down I spent a few days thinking about what needed to be removed and what I could keep. First I removed the plastic cover and studied the internals of the printer, I printed a few pages and tried to get a good understanding on how everything works.
The covers came off quite easily just a knob on the side and a few clips and it all came apart.
If your not sure if you have stepper motors or normal dc motors they are quite easy to identify, steppers have 4 or more wires coming out the back and they are usually quite a large diameter and short. So look for short and fat motors with 4 wires.
Step 3: Mounting the arduino, easy drivers and relay
The first thing to do is to work out where the Arduino, relay and easy drivers are all going to fit, so I removed all the old electronics and made up a laser cut board for everything to mount on.
Once that was done it was time to start using some of those dupoint wires, they make every thing very easy to wire up Just pull a pin out of the headers and plug it in if you want to make the end of the wire male.
The next step will show you where all the wires go but first we need to identify the four wires on our stepper motor.
- Set your multimeter to the 200 ohms setting
- Grab any 2 wires on you stepper motor and check if you get a reading you should get either open circuit or a low resistance.
- If it was open circuit, grab another wire and check that, you are looking for a pair of coils inside the motor, so you need to match up to ends of each coil (which are connected to to each wire)
- Once that is worked out, I cut a dupoint lead in half and soldered each end on to the matching pair of wires. Because th leads are the same colour I know that is on coil.
- Repeat the process with other 2 motor leads and the other motor
- Next I identified the wires coming out of the power supply and the voltage which turn out to be 28 volts.
- Make sure that you check the polarity of your power supply and wire it up correctly or you will have lots of smoke and swearing. Use a red and black wire.
- I found that the easy drivers do get quite hot so a bit of thermal grease and an old heat sink helped keep things cool.
Step 4: Wiring up the ardunio
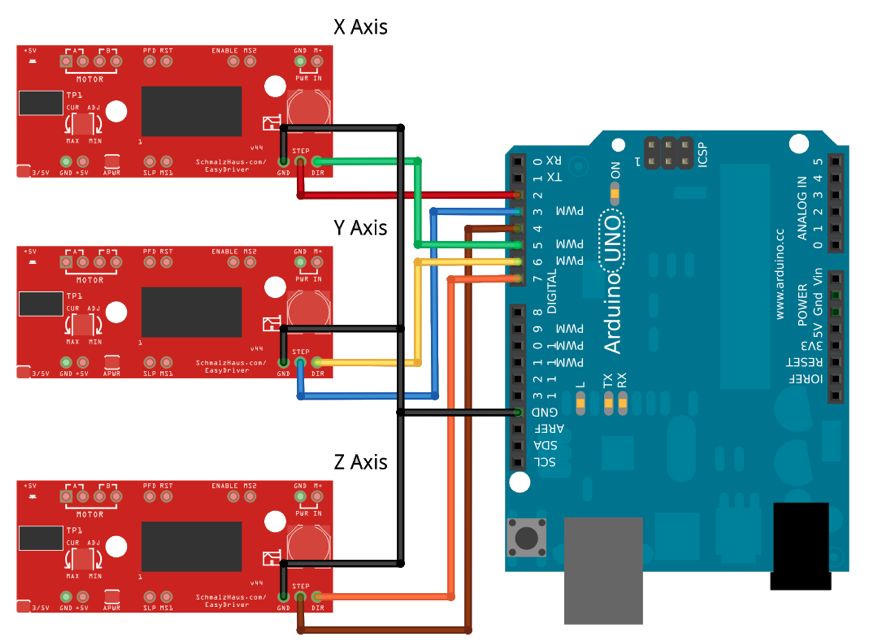
The wiring is pretty easy, use your dupont connectors and and start plugging stuff in. First we will look at the easy driver board, many of the pins are not used in this project. In step three we identified the wiring for the stepper motors, so we can plug them in first.
- Motor coil A and motor coil B connect to the stepper motor It doesn’t matter which way around as long as A goes to one coil and B to the other coil
- The Power in – + pins go to the power supply and you need to get these around the right way and up to 30 volts DC
- On the lower right there are 3 pins GND (ground) STEP and DIR(direction). GND goes to GND on the arduino
- Note there are usally 3 GRN pins on the ardunio board it doesn’t matter which one you use.
- On the X axis driver STEP goes to pin 2 and DIR goes to pin 5
- On the Y axis driver STEP goes to pin 3 and DIR goes to pin 6
- We wont be using the z axis in this project.
Next the relay
- The vcc pin goes to the 5V ( 5 volt) pin on the arduino
- The GND pin goes to GND on the arduino
- The IN1 pin goes to pin 12 on the arduino
All going well you should hear the relay click when you plug you USB cable in and start Grbl, and the easy drivers should light up when the power supply is turned on. If you haven’t installed the software yet you might want to leave the power off for now.
Step 5: Installing the software
If your not familiar with ardunio or CNC machines this is going to be a pretty steep learning curve, but once you have got your head around it, you will find that its not too hard.
Ive loaded most of the software on a Mac laptop, and it works, with the exception of the X Loader which I had to load onto a windows machine. (more on that later)
If you use windows I’m sure it would be easier.
so here’s the list
Ive loaded most of the software on a Mac laptop, and it works, with the exception of the X Loader which I had to load onto a windows machine. (more on that later)
If you use windows I’m sure it would be easier.
so here’s the list
- Arduino Software
- Grbl Controller
- Inkscape
- Xquartz Is needed to run Inkscape if you use a Mac
- Grovers Laser engraver add on (Ive put the file on the the bottom as the link is blocked from some schools)
- Xloader ( I was unable to get this to work on a mac so I used a windows machine)
- The hex file which can be a bit hard to find on the internet so its also zipped.
- instructions for setting up Xloader on different operating systems if you get stuck
- Eggbot May help if your Mac decides it doesn’t want to play with laserengraver
 laserengraver.zip39 KBgrbl.hex.zip26 KBXLoader.zip678 KB
For more detail: Printer to vinyl cutter hack