I’ve been wanting to get into robotics for awhile now, but it can cost at the very least 20 dollars to build a decent motor base, and I wasn’t willing to invest that much money into it, so I made a robot base using parts I had lying around. You’re not likely to build this exactly as I do, so this will require some creativity on your part.

Step 1: Tools/Materials
Major Components in Project
Tools
– Drill
– Screwdrivers
– Small bolt cutter or grinder
– Something that can cut plastic
– Soldering Iron & solder
– Wire Cutters
– Wood Saw
Materials
– Two Walkman cassette players (Or any two similar/identical cassette players)
– Plywood, 1/8 – 1/2 inch
– Two small wooden blocks
– Something to use as a wheel (I used wheels from an old dishwasher)
– Superglue
– Screws/Bolts
– Various electronics, depending on what you choose
– Miscellaneous other materials as needed
An ability to improvise.
Step 2: Disassemble Cassette Players
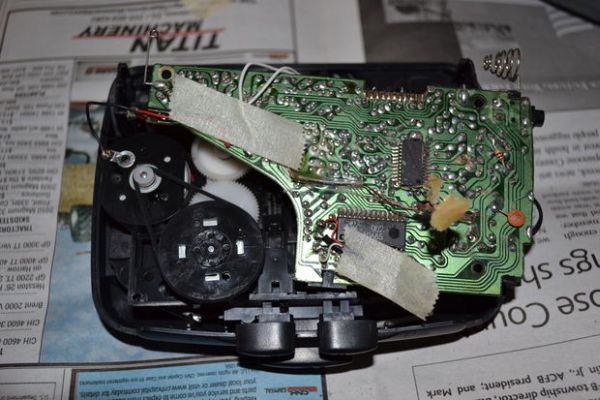
We will use the motors out of the cassette player as our motors. If you don’t care about about your cassette player (One of mine was broken) just ungraciously tear it open and get out what is in the second to last picture.
The other one had a decent digital radio in it, so I wanted to keep it working. Follow the steps in the pictures to remove the tape module but keep the rest of the player working.
Step 3: Prepare Modules for Mounting
Now that we have two identical modules, we need to remove all the unnecessary parts. Refer to the pictures for that.
We also need to cut off all the things that stick out. I used a cheap oscillating tool to cut the plastic pieces, and a bolt cutter for the shaft. A grinder also works well for the shaft. (It is very hard metal)
Step 4: Mount Motors
I mounted my motors on by screwing them to wood blocks, and then screwing the wood blocks on the wooden platform. Refer to the pictures for a better understanding.
If anybody has a better idea for mounting these motors and gears, I’d love to hear it in the comments.
Step 5: Wheels
Wheels can be tricky. If you want to remain true to the cheap parts theme, you’ll have to be creative and scavenge. You need something that you can easily mount on the motors.
I used two wheels from an old dishwasher. The cassette tape wheel gripper required some filing before they would fit in the wheel holes.
For a third wheel, I didn’t have a good caster, so I just used a curtain hanger and attached it so it would drag across the ground.
To make sure the wheels won’t slip, you need to add some glue in a spot meant for slipping if the pull was too great. I’ve marked it in one of the pictures below.
For more detail: Poor Man’s Robot Base