So, you have a CNC laser cutter but you want a CNC mill? Problem solved.
This project is a small CNC mill that can be assembled from store-bought and laser-cut parts for about $800 without machine tools. (If you have access to a shop with a chop saw and a drill press that’ll be helpful, but you can get by with a hacksaw and some wrenches.) As pictured it has about a 4″ x 6″ x 1.5″ working volume, but it can easily be expanded and modified.
The killer app for this is making custom printed circuit boards. But it can also make plastic and wood machine parts (including all its own parts), mill custom aluminum instrument panels, create stencils, and make artistic etchings for print-making.
I’ve included both Adobe Illustrator and Autocad DXF files for the custom parts, as well as an Arduino sketch for controlling the brushless motor.
The Steps:
(1) Setting expectations, and words of caution
(2) Buy parts and find tools
(3) Laser cut the custom parts
(4) Assemble the Z-axis and spindle
(5) Assemble the X-axis carriage
(6) Assemble the Y-axis and bed
(7) Assemble the frame
(8) Wire it up
(9) Tuning, tweaking, and milling tips
(10) Software you may find useful
Step 1: Setting expectations, and words of caution
Prior art:
openMill is really cool, but it’s not the first or the best table-top mill out there. We’re huge fans of the MTM projects at MIT (particularly the work of Jonathan Ward, Ilan Moyer, and Nadya Peek), and Othermill, which were great sources of inspiration and ideas, many of which we shamelessly duplicated. The Shapeoko is another great example, and there are tons of other people doing neat DIY CNC projects, each with their own strengths and weaknesses.
Expectations:
We focused on making openMill easy to source parts for, build, and modify – even at the expense of design elegance or performance. You’ll almost certainly see parts of this design you want to change – that’s the point! We’ve tried to make it easy for you to make the changes you want.
How well will openMill perform? It depends on how well you build it and how well you use it. If it’s well built, lubricated, and aligned and you keep the materials feeds low you should be able to get precision in the .001″ range. But if you don’t make sure the frame and rails are square and try to mill hard materials too fast then you’ll get backlash and chatter.
More generally, even though it may only take you a few hours to assemble the mill, this project isn’t really plug and play. Machining is hard, so expect a learning curve before you go from functioning mill to quickly making useful parts. You’ll probably break some bits by trying to run bad G-Code. You may not get the axes well aligned on your first try. openMill can’t stop you from doing things wrong (including things that will destroy the mill). But the fact that the parts are all cheap makes this a fun way to learn and experiment.
Budget:
We’ve also worked hard to keep the costs low and the design robust, so you can make an openMill for about $800. But you should budget some extra money for duplicate parts in case you make a mistake or break something. And once it’s working you’ll find that you want to buy a few more endmills and some raw material to experiment with. We’ve tried to make it easy to upgrade. For instance, if you want to add a fancy lead-screw and wear-compensating nut (and boost the project cost by about $200), the parts already include mounting holes for them.
Safety:
openMill is a high-speed super-sharp rotary cutting tool that moves robotically by itself without regard to the presence of valuable objects (read: fingers) in its path. It can easily put a hole all the way through your iPhone and the hand holding it, throw a metal shaving (or broken bit) clear through your eye, or set material on fire with friction. It also doesn’t have shields or safety interlocks. So respect the potential for injury and danger, don’t let it run unattended, wear safety glasses, and keep your hands away from it while the spindle is on. Seek adult supervision if you’re under, say, 40.
Step 2: Buy parts and find tools
I sourced the parts from:
McMaster-Carr (T-slot framing, acrylic, linear shafts, bearings, fasteners)
SDP-SI (Rotary shaft, timing belt pulleys, rigid coupler)
Inventables (Helical couplers, stepper motors, Arduino, GRBL shield)
Hobby king (Brushless motor and controller)
Digikey (Power supplies)
MSC Direct (Endmills and drill bits)
A full parts list is attached as a CSV file.
You can cut the laser-cut parts yourself, or send them off to an online service. I’ve had good experiences with http://www.pololu.com
Tools you’ll need:
Chop saw for aluminum framing (or hack saw and some elbow grease)
Drill press or vertical mill for boring out the rotary shaft (optional, but helpful)
Bench vise for press-fitting bushings (But you can get by with a 1/4-20 bolt and some wrenches)
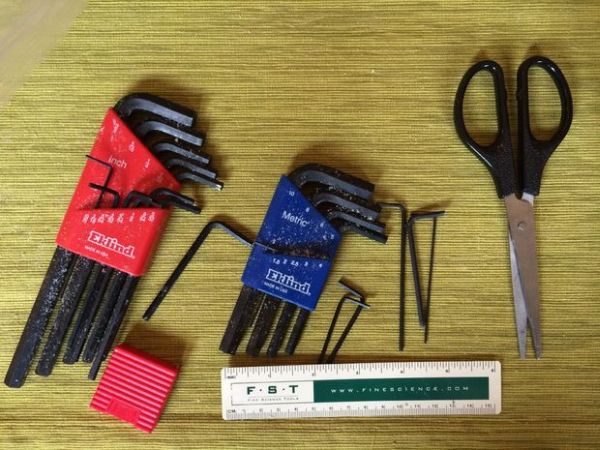
Imperial and metric hex wrench sets
Philips screw driver
7/32 crescent wrench
Soldering iron, wire clippers
Metric ruler
Step 3: Laser cut the custom parts
Now you’ll need to fabricate the custom parts from 1/4″ (6 mm) acrylic. Acrylic is a fantastic material because it’s cheap, it laser cuts great, and is very rigid. Most of the holes in the custom parts are clearance holes, so it doesn’t really matter if they come out a little big or a little small. But many of the bushings are press-fit, so these holes need to be the right size. This is tricky, because if your laser spot is bigger, out of focus, or just very hot you’ll get a slightly larger hole. I put the press-fit holes on a separate layer in each file so you can adjust their size (after cutting test-holes) until you get a nice firm press-fit. (Make sure the hole centers stay in the same place!) If you’re sending the files off, error on the size of holes that are too small. It’s much easier to open them up with some sandpaper than to make them smaller. (However, lining them with epoxy will work for this in a pinch.) You’ll notice that the top side of the cut hole is usually a little larger than the bottom side. This can act as a wedge to help you seat your press fit parts.
All of the 1/4″ thick parts can be cut from two 12″x24″ sheets of acrylic. White acrylic is easy to get and looks great, but you could use clear or any other color for a custom look. There are also a small number of 1/8″ thick parts (These are the captive teflon nut holders, in the layer “Thin”). These will all fit easily on a 6″x6″ sheet.
If you want to try making your parts out of a different material (MDF, aluminum, delrin) then go for it. But acrylic works pretty well…
For more detail: Make a CNC mill with a laser cutter