The technology behind Enigma machines and the work done to crack them has influenced cryptography, cryptanalysis, and computer science in general. If you’re unfamiliar with Enigma machines, it’s a device that was developed near the end of World War I, then used extensively by the Nazi regime in World War II, to encrypt messages. The allies (the British in particular) worked tirelessly to break the code. One of the father’s of modern computer science Alan Turing (of Turing Machine fame) worked on the British team that worked break the code. Some estimate that because the allies were able to crack the code the war ended two years earlier than it would have otherwise.
One thing to note, the Enigma’s encryption algorithm is pretty good, but not perfect. One weakness is that a letter can never be encrypted as itself which eliminates at least on character and can make it easier to crack. Most of the issues the Nazi’s had that made it crackable had to do with their processes as they used the machine. Key exchange is hard in a system like this where you don’t really have an out of band method to exchange keys.
If you want a detailed description of how Enigma machines work check out the Wikipedia article( http://en.wikipedia.org/wiki/Enigma_machine ), or the many other articles on the internet, I’ll just give a quick overview here.
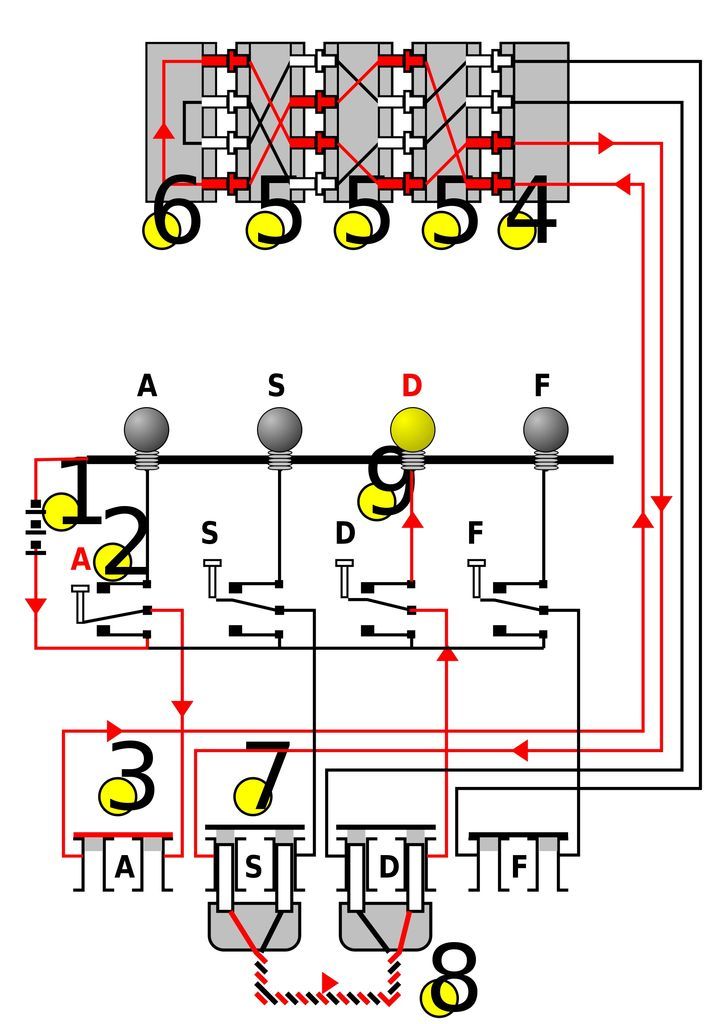
The Enigma machine basically consisted of three or more rotors that had contacts on both sides. The rotors are set to the encryption or decryption “key” then a button is pushed which goes through the wiring in the rotors, then lights up a lamp corresponding to the encrypted output (there’s a lamp for every letter in the alphabet). To decrypt you simply start with the same key that was used to encrypt the data and type in the cipher text. One thing significant about the Enigma machine is that the rotors rotate as each key is pressed, so the encryption key essentially changes with each character.
I was in a thrift store recently and saw a game with a screen and a keyboard and I thought, that would make a good Enigma machine (I’ve always wanted one, but I know my wife would kill me if I bought a real one $$$). In this instructable I’ll show how I gutted an kids game and used an Arduino to hook up to the keypad and speaker. The code’s not too bad (so far). This version is a simple three rotor Enigma machine. You can switch the rotors around and change the letters for the rotors. Future plans are to all for more rotors, allow changing out the reflector, allow for spinning the ring around a rotor, and a plug board implementation. This Enigma machine will be able to encode and decode messages to and from the real, old Enigma machines used during Wold War II.
Note: The image for this page is from the Wikipedia article on Enigma Machines
Step 1: Parts and Tools
Parts
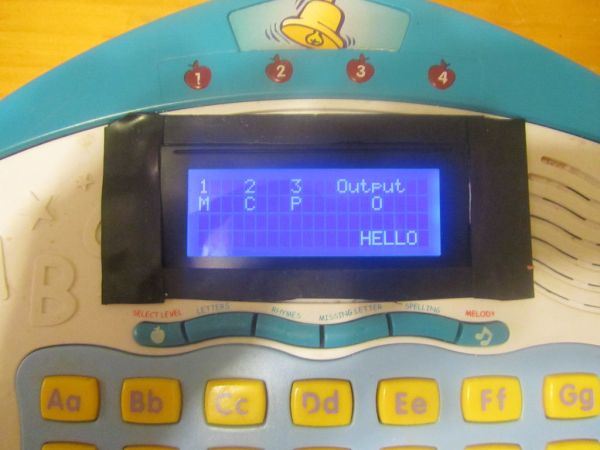
1. A kid’s game with a keyboard and a screen (I chose the Fisher Price game in the picture, got it at a local thrift store)
2. An Arduino (I used an Arduino Pro from Sparkfun).
3. Maybe a screen (you may be able to patch into the screen that comes with the game).
Tools
1. Mulitmeter
2. Soldering Iron
3. Maybe a Dremel type tool if you’re replacing the screen or doing other mods to the case
Step 2: Open It Up
First, grab the game, remove the screws and open it up. After I did that I had to remove a few more screws to get to the keyboard. I cut the wires that connected the keyboard to the other PCB inside the game.
Step 3: Figure Out the Keyboard
I pulled the rubber buttons off the keypad PCB so I could figure out how it was all wired up. To figure out how it’s wired up a used a multimeter on the Ohm meter setting to test for continuity. I put one lead on the row of pins on the cable the came off the keyboard to the “brains” of the game, and the other on the bare metal on the button circuit board for each button. I just used a sheet of paper to keep track of what button went to what pins.
[box color=”#985D00″ bg=”#FFF8CB” font=”verdana” fontsize=”14 ” radius=”20 ” border=”#985D12″ float=”right” head=”Major Components in Project” headbg=”#FFEB70″ headcolor=”#985D00″]1. A kid’s game with a keyboard and a screen
2. An Arduino[/box]
For more detail: Kid’s Game to Arduino Enigma Machine