Hate having to manually open and close your drapes? Hate getting back from work/school and your room is dark and dreary? Do you want curtains that open and close themselves? Then you need Dr. Drape!
Dr. Drape is an easy DIY project using an Arduino and servo to open and close your drapes at the tap of a button or on an automated schedule. The code included in this tutorial responds to your button press to open or close the drapes, as well as opens them at 10 am Monday – Friday.
Difficulty is easy, and anyone with some Arduino experience should be able to follow! This is my first instructable, so let me know if I should make any changes. Otherwise grab your soldering iron and C programming book, we’re gonna move some drapes!
Step 1: Before you begin…
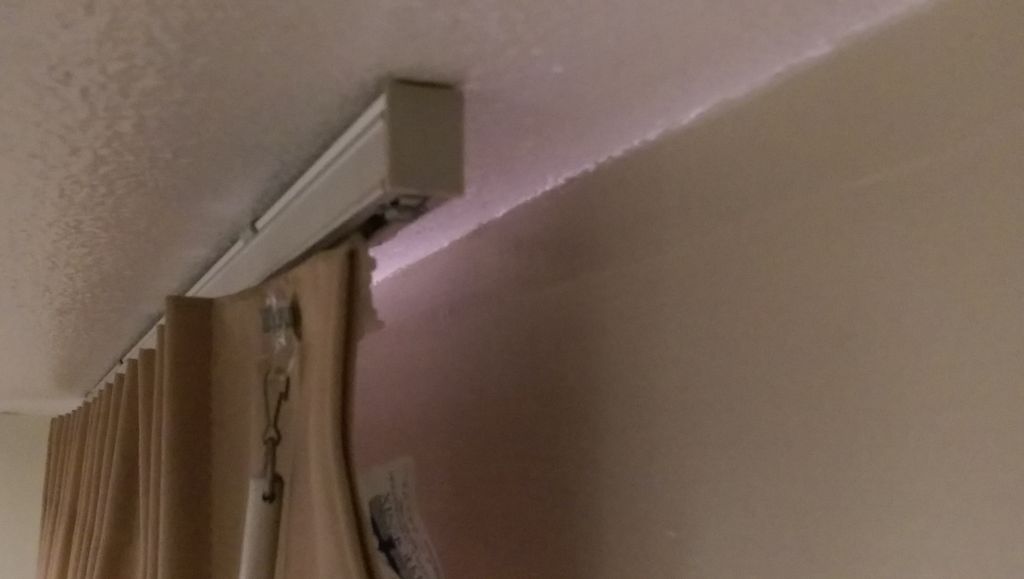
Attached are some pictures of my window before I began. There is a few inches of space between the wall and the curtain to fit the Arduino, motor, and pulley system so that they do not stick out. On the left side we are just going to mount a pulley that will hold the cord, while the right will have the wheel, motor, and Arduino.
Parts
Primary
Arduino Uno: http://www.amazon.com/Arduino-UNO-board-DIP-ATmega…
Arduino Power Supply: http://www.amazon.com/gp/product/B00BWA48AA/ref=oh…
Arduino Programming Cable (if you don’t have one): http://www.amazon.com/gp/product/B001TH7GUA/ref=oh…
Servo: https://www.hobbyking.com/hobbyking/store/__25456_…
Other Parts
Cord to pull curtain (at least 2x the width of your window)
A button
Command Strips for attaching stuff to the walls
Pulley for side opposite the Arduino
Connecting wires
Screws
Tools
3D Printer (I used this to print the mount, in the likely even you don’t have access to one you would have to find a workaround)
Soldering Iron
Screwdrivers/other basic tools
Step 2: Continuous Rotation Servo
Having the benefit of hindsight, you should probably order a servo that has continuous rotation out of the box. I forgot to check when ordering, so the servo I ordered did not. However, it is possible to modify the servo so it can rotate 360 freely. The tutorial I followed to do this is here: http://flitetest.com/articles/easy-9g-continuous-r…
For the servo listed in the parts list here, I had to cut out a plastic block that prevented the servo from over-rotating as well as cut off the potentiometer and solder on two 2.2k ohm resistors. At this point, the servo was no longer “centered” around 90 being neutral, 0 being left, and 180 being right. I had to go through and test lots of different options, and had to use Servo.writeMicroseconds() instead of just Servo.write(). My values I found were 700 for left, 1424 for neutral, and 2300 for right.
After making these modifications to the servo, the resistors stick out of the side of the servo body, for which I recommend you cut a hole in the plastic body to fit these through. For the 3D printed mount I made, I also made a hole for the 3-wire servo connect to thread through the side. This way, I could leave just 1 side of the servo exposed on the mount.
Step 3: The Servo Wheel
The wheel I attached to the servo I just found lying around in a parts bin, so I cannot tell you what it actually is. Just make sure your wheel is small enough that the torque of your servo can still handle the curtain. I would also recommend you have a hole in the middle of it so you can attack your servo arm before attaching the arms to the servo (like in the pictures above).
Step 4: (Optional) Prototyping the circuit
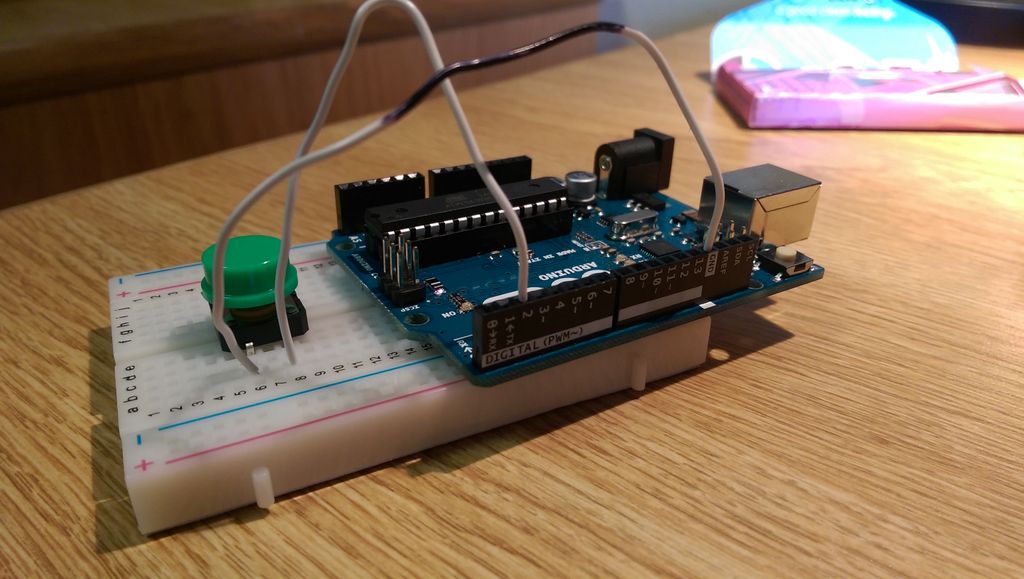
Before actually mounting everything together, it can be a good idea to make sure that all your electronics work. Here is a picture of me testing my button.
You should test your board with the servo as well. You can pick through the code attached at the end of the tutorial to find out how to operate the servo and detect button presses.
Read more: Home Automation: Drapes using Arduino