This walk-through will show you how to build a sensor to monitor your plant’s environment and use Stats in Sound’s ERC-20 app to turn this data into music, allowing you to listen to your plant’s reaction to it’s environment. For more information on this project, please visit www.statsinsound.org.uk. Below is a sample of music generated by the ERC-20 app, monitoring a happy healthy chilli plant.
You will need some basic experience with soldering, breadboarding and using the Arduino platform for this tutorial.

This particular instructable is for a sensor that will upload it’s data via an Ethernet connection. Your plant will preferably be indoors. It’s a bit cheaper and easier than the WIFI version, but if you’re feeling adventurous, you can check out the WIFI version here.
To build a plant sensor, you will need the following:
] 1 x Arduino Ethernet
] 1 x FTDI > USB cable
] 1 x Ethernet Cable (Cat 5E patch)
] 1 x DHT22 Temperature + Humidity sensor
] 1 x LDR (Light dependent resistor)
] 2 x 10Kohm resistors
] 2 x Nails (Any nails will do for now, galvanized is best though)
] Plenty of hook up wire (single core wire)
] A Soldering iron & plenty of solder
] A Mac or windows computer
We have provided links to some of the trickier parts to find.
Once you think you have everything, you can continue to the next step to get started!
Step 1: Connect up the DHT22
The DHT22 is a great temperature and humidity sensor for projects like this because it’s pretty accurate and very cheap.
Here’s a few specs:
– 3 to 5V tolerant
– Good for 0-100% humidity readings with 2-5% accuracy
– Good for -40 to 125°C temperature readings ±0.5°C accuracy
– No more than 0.5 Hz sampling rate (once every 2 seconds)
– Body size 15.1mm x 25mm x 7.7mm
There are four pins but only three are used as follows:
1- Power
2- Data
3- GND
4- N/A
So we just need to connect the Arduino 5V to pin 1, Arduino digital pin5 to pin 2 and GND to pin 3. Check the picture for the pin numbers.
As far a reading the data goes, there is a library included with the files in this intractable that will sort that out for you.
Step 2: Connect up the LDR
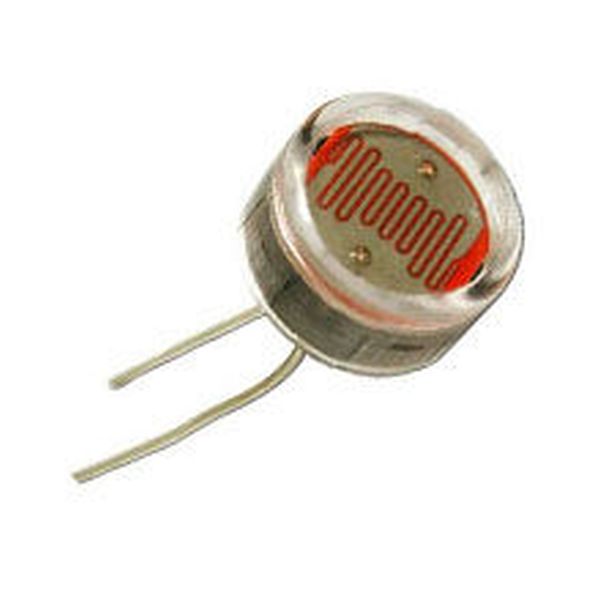
LDRs are really easy to use. They are basically just a resistor whose impedance is dependant on the amount of light hitting it’s surface. The circuit we use to read them is therefore just a simple voltage divider using and LDR as one of the resistors:
Hook it up as in the digram below.
Step 3: Connect up the moisture sensor
The theory behind measuring moisture is simple. Since water conducts electricity, if soil is moist it will have a lower impedance than when it is dry, therefore it acts as a resistor and we can measure it in a voltage divider circuit just like an LDR.
Unfortunately if we just stick two wires into the soil and pass a DC current through it, we will be performing electrolysis, which causes the water molecules in contact with the wires to breakdown, releasing oxygen and hydrogen. Not only does this cause little bubbles to appear over the wire’s surface thus reducing it’s ability to pass current, but it will also rapidly erode the wires.
The ‘solution’ (I use inverted commas since it doesn’t solve the problem as much as to slow it..) is to alternate the current. This means you send the current through the wires one way then the other way, in theory preventing electrolysis. In practice, it doesn’t work forever, so we may have to change the soil contacts every couple of months, but that’s a small price to pay for the simplicity of this method of moisture measurement.
Below is the circuit we use to connect it up.
The code to alternate the current and take a reading is all in the Arduino sketch later in this instructable.
Step 4: Create a Cosm feed
We want to record our sensor readings over time so that we can play back through them later on. Cosm is great online platform for doing just that, allowing you to upload data to ‘datastreams’ and query it later on to visualise or sonify your data.
You will need to set up a ‘feed’, which will hold all the sensor data for your plant.
Head over to http://cosm.com set up an account. The website will guide you through this process.
Create a new feed and make a note of your api key, feed number and project title.
We can then put these in your arduino sketch so that the data ends up in the right place.
For more detail: Hear your plant make music! – Ethernet version