A couple of years ago i was learning to use the Ardiuno and started playing around with an Hitachi HD44780 based 16×2 LCD screen. I soon learned that the screen has 8 customizable character slots. I had found a project where someone used those slots to create there own custom characters that could then be used to form large character font using both rows of the screen. I didn’t like the look of those characters and couldn’t make since of the sketch that person wrote. So i decided i needed to create my own set and use my limited programming skills to create a more user friendly sketch to support my large character font.
In this Instructable i’ll show you how i designed my large character font and break down the sketch to make it easier to understand. But first we need to set up the Arduino and LCD.
Materials Needed:
– Arduino (i used a Nove)
– Hitachi HD44780 based 16×2 LCD
– Breadboard
– 5K Potentiometer
– button or switch
– jumper wires
Step 1: Connecting the LCD to the Arduino
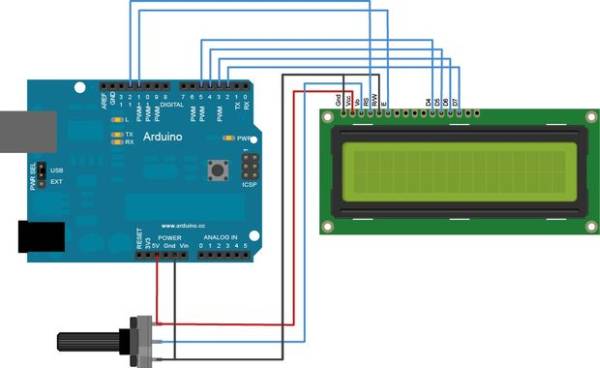
First i want to cover how to connect a Hitachi HD44780 based LCD screen to an Arduino. The first thing you need to do is identify Pin 1 on your display and figure out which pins you need. The first image shows a very simple layout for connecting the LCD to your Arduino. Here is the pin Layout for the LCD.
- Pin 1 – Grd
- Pin 2 – VCC
- Pin 3 – Vee (controls screen contrast)
- Pin 4 – RS (controls where in the LCD’s memory your writing too)
- Pin 5 – RW (controls weather your Reading or Writing to the LCD)
- Pin 6 – E (enables writing to the register)
- Pin 7 – D0 (not used)
- Pin 8 – D1 (not used)
- Pin 9 – D2 (not used)
- Pin 10 – D3 (not used)
- Pin 11 – D4
- Pin 12 – D5
- Pin 13 – D6
- Pin 14 – D7
- Pin 15 – LED+ (LCD back light)
- Pin 16 – LED- (Grd)
My LCD only had 15 pins which is fine since 16 should be tied to ground anyway. As you can see in the picture Vee is tied into a potentiometer. This controls the contrast of the screen. The data pins are the individual bits your writing to or reading from the register.
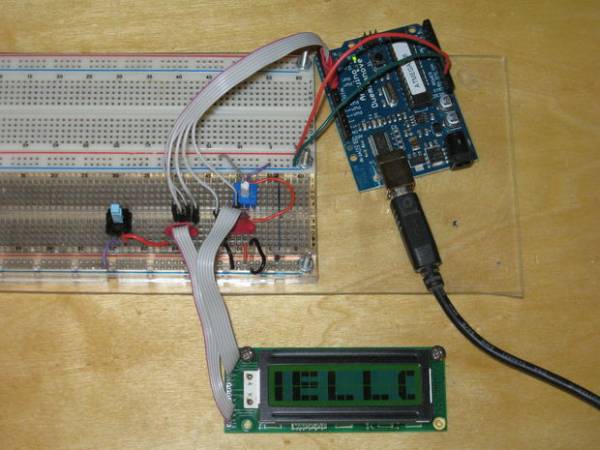
For the purposes of keeping things simple i wired mine up a bit differently. I like to use ribbon cable whenever possible to keep the clutter of wires down. I makes keeping track of the connections allot easier too.
- RS pin to D7
- E pin to D6
- D4 pin to D5
- D5 pin to D4
- D6 pin to D3
- D7 pin to D2
- V0 tied to a pot to control brightness
- Grd and R/W tied to ground
- Vcc to +5V
- pin 15 to push button/switch that is tied to ground for control of back light
With everything connected we can now go over how i created the fonts.
Step 2: Numerical Font Design
It then came time to think about the font design. What kind of segments would i need to create to make a nice and sharp looking large character font for this screen?
I wanted to start simple and get numbers out of the way first. I figured people would be looking for a good large font to use for an Arduino based digital clock or other project. So logically i started by designing the number 8 since all the segments that comprise the 8 can be mixed to create most of the other numbers. This used up only 6 of the custom blocks. But i still needed one more custom block to be able to display a 0, 1 and 7.
The images show the first generation of numbers i produced. A couple of changes where made in the custom blocks to make the numbers look better. I’ll show them in a later step.
Step 3: Letter Font Design
After i had created the numbers i moved on to designing letters. I got request from people for letters that are commonly used in Temp, RPM, and Speed displays. So i went ahead and created the full alphabet. To get everything looking right i needed to use the final available custom character block.
The images show the first generation of letters i produced. A couple of changes where made in the custom blocks to make the letters look better. I’ll show them in the next step.
Step 4: Refining the Look
My first design for the letters where too rounded for my taste. I then learned how to call up the various predefined characters the LCD is able to display. So i pulled up the Data sheet on the Hitachi HD44780 driver so see the available characters.I noticed the last character is a solid block so i decided to use that in conjunction with the custom characters. I also need the blank character right above the full block. I made a slight adjustment to the custom characters i created and we where ready to build a sketch.
Here is a video of the original characters scrolling across the screen. Some changes have been made since this video was taken.
For more detail: Custom Large Font For 16×2 LCDs