Sous-vide cooking is a great new way of cooking food. I will not explain why and how it works here… for great recipes and explanations, you can check out those guys :
http://modernistcuisine.com/2013/01/why-cook-sous-…
Unfortunately, a good (and I mean precise to the half °C) sous-vide machine is very very expensive (500, 1000$ or more). If you wonder why you need such precision, I suggest you check this out :
http://hoerup.dk/how-to-cook-an-egg-sous-vide-the-…
Some Arduino-based designs come cheap (50, 60$), but as they are based on PID regulation , they require adequate tuning to perform well. Good PID tuning is very hard to achieve in practice, so those designs don’t hold well against reality (at least, in my experience). Also, who needs a 20$+ LCD screen when a cheap 5$ led 8-digits display does a better job in terms of readability.
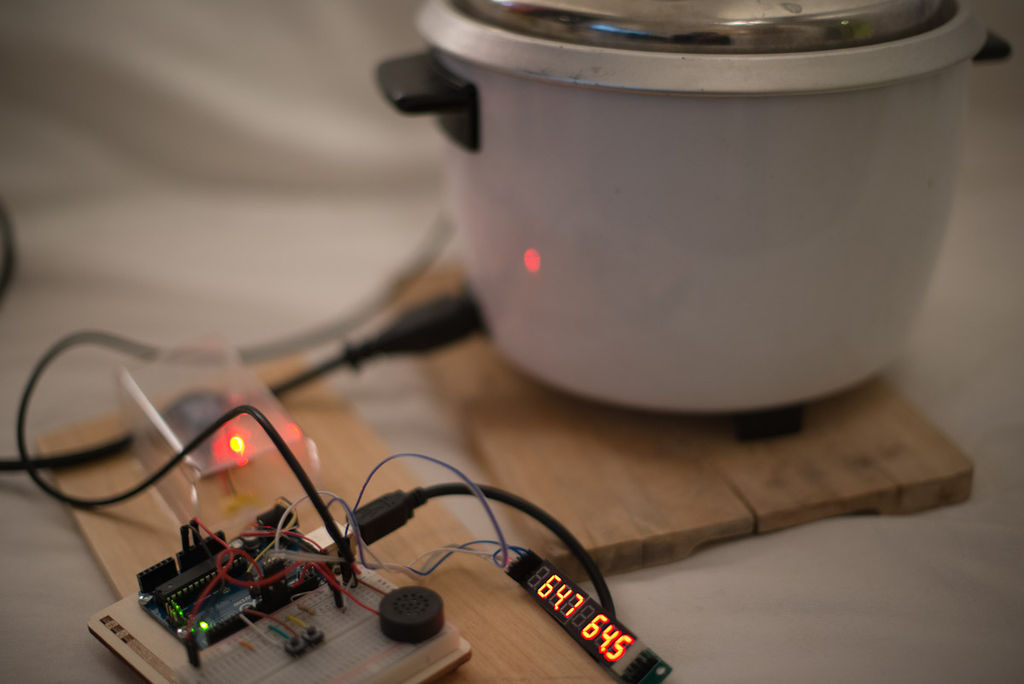
After weeks of work and tests, I came up with my own design, with the primary goal of useability in mind. Behold the “Adaptative regulation sous-vide cooker”
Features :
- Works out of the box : no need for tweaking or tuning, the software adapts itself to the characteristics of your cooker : whether it is big, small, full of water, half-full, whether room temperature is low or high, it works.
- Efficient regulation in the range of 0.5°C
- Sound alarm warns when target temperature is reached
- Automatic detection of lid opening and closing : regulation does not get mad when temperature probe is taken out of the water (which is a thing you need to do if you want to actually put food in your cooker)
- Safety features :
- automatic cut-off after 5 minutes of continuous heating providing no change in temperature
- automatic cut-off after 24 hours of operation
- automatic cut-off when temperature reaches 95 °C
- allows target temperature only in the safe 50°c to 90°C range
- Dead cheap and simple : no expensive LCD or Solid State Relay
Step 1: Gather your stuff
Parts needed :
- Arduino board – approx 20$
- Integrated 8 digits led display with MAX7219 control module (3 wire interface) – 5$
- Pushbutton x 2
- Piezo buzzer – 3$ (optional)
- Waterproof DS18B20 Digital temperature sensor – 10$
- 4.7K ohm resistor
- 5V Relay module for Arduino, capable to drive AC125/250V at 10A – 4$
- Rice Cooker
- A wood board, plastic box and silicone sealant for protection of the high current part of the circuit
- Drill
You’ll be set for approx 40$, maybe even less. That’s not counting the rice cooker.
Step 2: Attach temperature sensor to the lid
- Drill a hole through your lid to put the sensor. It should be pretty central
- Find the adequate length of cable to let the sensor sit in the middle of the water when immersed
- If you can, put the sensor in a “cage” which will isolate it from potentially cold food and let it do its job of measuring water temperature. It should be stainless steel. I used a metallic honey spoon.
- Stick some silicon to hold together sensor cable and lid
- Let it set for a night or so
Step 3: Relay enclosure (updated for safety!)
Since you’ll be having a rice cooker full of water when in operation, you’d better protect the high voltage part of the circuit against spills.
I choose to put the relay under a transparent plastic box and to seal the whole thing with silicon.
- Rip-open the high voltage cable (please make sure it is not plugged) and cut the Phase wire (not the ground or neutral one). You can check on this page which is the color code you’re looking for depending on the part of the world you’re in. Many thanks to Sembazuru for pointing that out. You can notice that I choose wrongly to cut the blue wire which is the Neutral. As I live in europe, I should have picked the brown wire.
- Connect the two parts of the wire to the high voltage part of your relay. Make sure the relay is Open by default.
- Use screws and cable holders to solidly maintain the relay and cable
- Put your plastic box over it and seal with silicon
- Let it set for one night
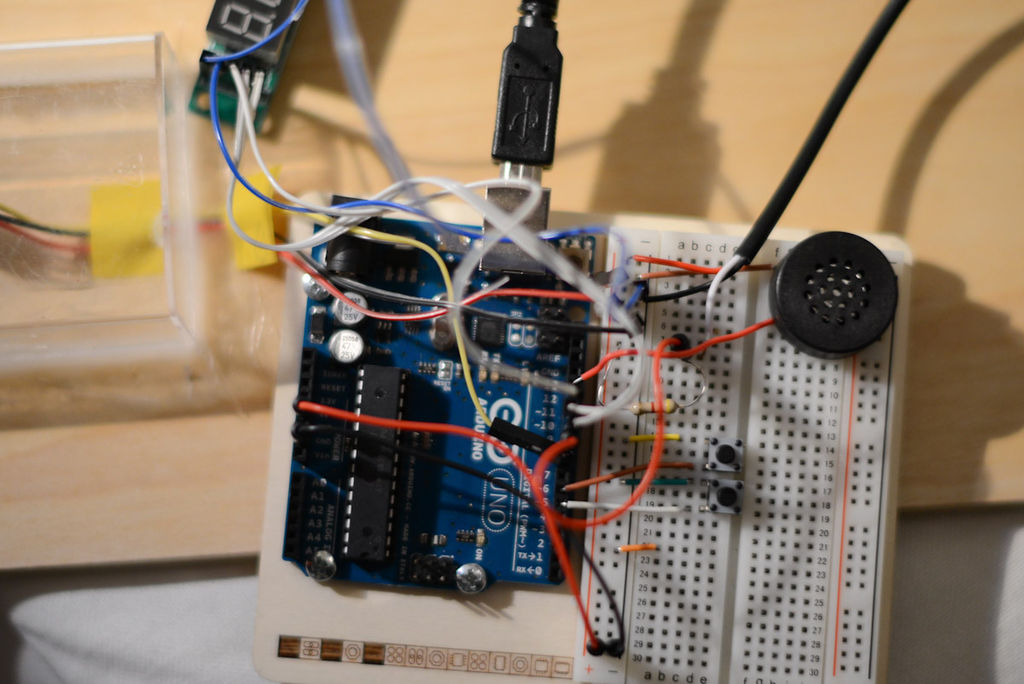
Step 4: The circuit
Wiring is pretty easy :
Inputs :
Pushbutton 1 :
- one end on pin 6 , the other to ground
Pushbutton 2 :
- one end on pin 5 , the other to ground
Temperature sensor :
- red wire to 5V
- black wire to ground
- other wire (yellow or white) on pin 9 (data pin of OneWire sensor). Also linked on pin 9 is a 4.7K ohm resistor whose other end goes to 5V.
Outputs :
Piezo buzzer :
- one end on pin 13 , the other to ground
Relay :
- VCC to 5V and GND to ground
- Command wire on pin 8
8-digit LED display :
- VCC to 5V and GND to ground
- DataIn on pin 12
- CLK on pin 11
- LOAD on pin 10
For more detail: Cheap and effective Sous Vide cooker (Arduino powered)