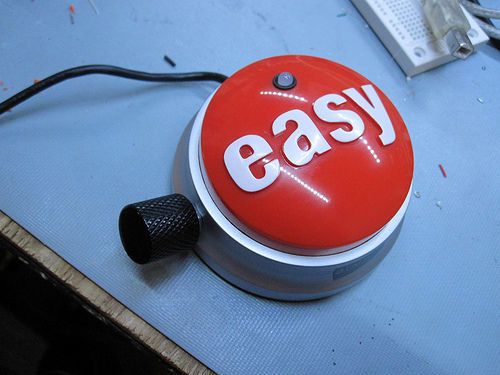
Many of you have probably seen the Awesome button done by Matt Richardson of Make Magazine. If not here is his video which was very well done and was the inspiration of my project.
I liked the idea of having a button to press for a certain function on the computer, however i wasnt such a fan of having a $5 button, and a $16 microcontroller operating only one function.
So my project differes in a few ways.
I added a RGB LED on top of the button, I also added a rotary encoder on the side of the button.
The idea being this:
the encoder switches the function the button preforms, and the LED gives you feedback telling you what mode it is in now so you know what function will be preformed by pressing the easy button.
Step 1: Supplies
- Teensy 2.0(http://www.pjrc.com/teensy/) $16
- Staples easy button ~$5 (if you can find a older one get that, becuase the new one has a different circuit board thats difficult to access the button on)
- RGB LED (http://www.sparkfun.com/products/9264)
- 5mm LED holder
- Rotary encoder/knob(I got a bag of 10 encoders for $10 off ebay, and the knob i am using is from a guitar)
- Wire ~18 gauge
- Soldering iron
- Dremel or other rotary tool to cut though plastic(youll be coping alot lol)
- Drill w/ assorted drill bits.
- Hot glue
- Heatshrink
- USB mini cable
Step 2: Take it apart
First things first, take the easy button totally apart. Just like in the Make video we are going to need to take it all apart.
Once you have it in pieces there are some more things you can remove
Cut both the wires to the speaker and the battery compartment, Also remove the springs in the battery compartment
Remove the weighted bars, also go ahead and remove the capacitor on the button circuit board, we wont need it either.
At this point you should have a pile of things that wont be going back into the button(speaker,batterys,battery spring, wire, capacitor)
Step 3: Circuit Board
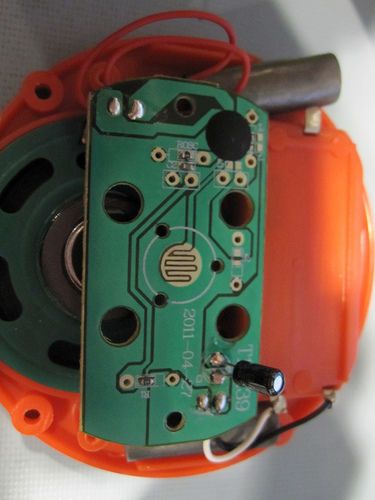
Staples earlier this year changed the circuit board in the teensy which made it alot tougher to hack. The change removed the thru hole resistors and replaced them with surface mount resistors. This means there is no longer a ‘easy’ place to solder to to have access to the button.
But not all hope is lost. if you look though my pictures you will see you need to drill a hole in the PCB and then solder to it. Becareful that when your scraping away the coating you only scrape whats in between those two narrow lines.
For more detail: Awesome button, and then some.


