Hello welcome back . In previous part we have made a visitor detector by using PIR sensor . This application can be used on night because PIR sensor gives output based on thermal object movement . In this tutorial we are going to extend that project with visitor counter part .
First of all i want to apologize that I am unable to add seven segment without adding extra IC as promished, it’s because we are out of pin on arduino board if we do not add extra IC as explained in this project of simple counter with multiplexed seven segment display . So I decide to ad 4033 decade counter IC which make project simple and efficient although it is not cost effective .
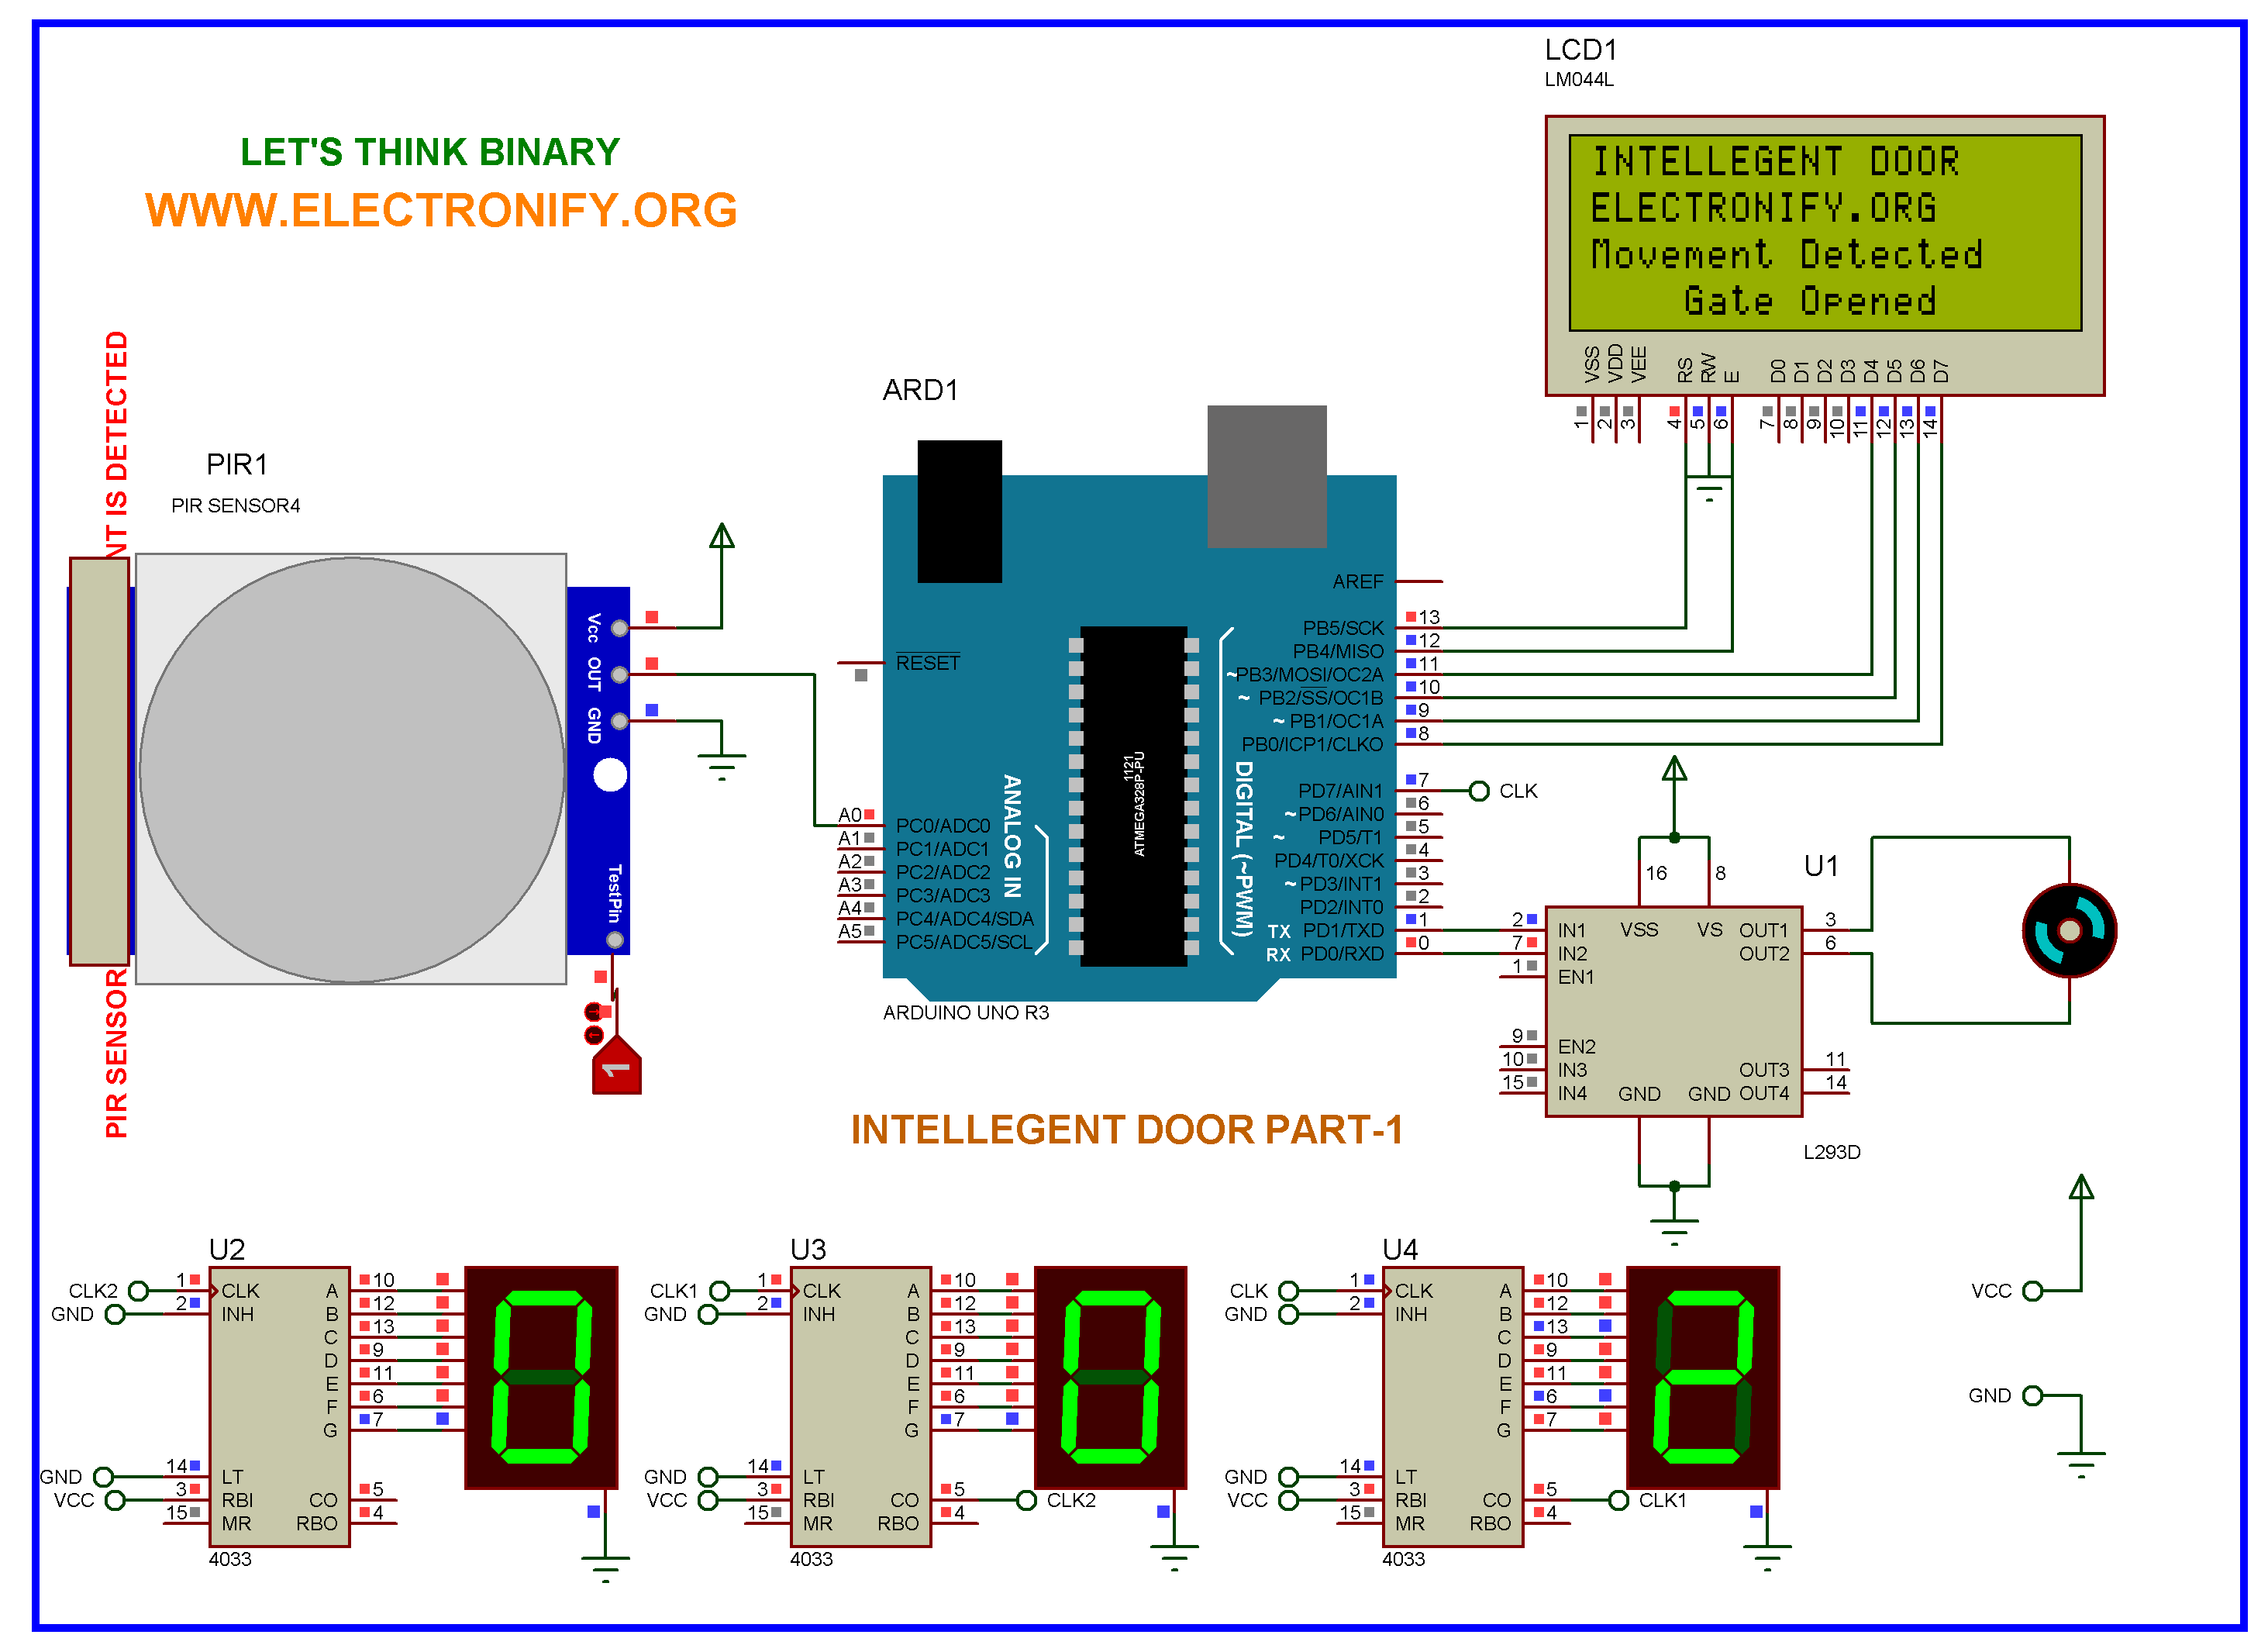
By adding 3 seven segment IC with their drivers we can count object upto 999 and if you want to count more than 999 you can cascade another seven segment as shown in schematic diagram above . Now let’s start the project making circuit diagram above and writing code for it as shown below . You can download complete project file with proteus 7 file circuit diagram and arduino code from this link visitor counter with automatic door opening. and the code explanation is shown after the code .
Automatic Door Open System With Vistor Counter Part-2 Using ARDUINO UNO R3 (Code)
//created and modified by prasant

//All right reserved to electronify.org

//you can modify and share this code freely

#include

LiquidCrystal lcd(13, 12, 11, 10, 9, 8);

#define PIR_sensor 14

#define counter 7

#define m11 0

#define m12 1

void setup()

{

lcd.begin(20, 4);

lcd.clear ();

pinMode(m11, OUTPUT);

pinMode(m12, OUTPUT);

pinMode(PIR_sensor, INPUT);

pinMode(counter , OUTPUT);

lcd.print("INTELLEGENT DOOR");

lcd.setCursor(0,1);

lcd.print("ELECTRONIFY.ORG");

delay(1000);

//initialize visitor counter as int visitor =0

}

void loop()

{

if(digitalRead(PIR_sensor))

{

digitalWrite(counter,HIGH);

digitalWrite(counter,LOW);

lcd.setCursor(0,2);

lcd.print("Movement Detected");

lcd.setCursor(0, 3);

lcd.print("    Gate Opened    ");

digitalWrite(m11, HIGH);         // gate opening

digitalWrite(m12, LOW);

delay(1000);

digitalWrite(m11, LOW);          // gate stop for a while

digitalWrite(m12, LOW);

delay(1000);

lcd.setCursor(0, 3);

lcd.print("   Gate Closed    ");

digitalWrite(m11, LOW);           // gate closing

digitalWrite(m12, HIGH);

delay(1000);

digitalWrite(m11, LOW);            // gate closed

digitalWrite(m12, LOW);

delay(1000);

//display visitor count to seven segment display

//please increase visitor count ++

}

else

{

digitalWrite(counter,LOW);

lcd.setCursor(0,2);

lcd.print("   No Movement   ");

lcd.setCursor(0,3);

lcd.print("   Gate Closed   ");

digitalWrite(m11, LOW);

digitalWrite(m12, LOW);

}

}
Automatic Door Open System With Vistor Counter Part-2 Using ARDUINO UNO R3 (Schematic Diagram)
Short Description
The code is simple and easy to understand . Since I have added extra IC and just added two lines of extra code to give high pulse to the counter so this project is very much similar to the previous one .
Just adding CD4033 which is 5 stage Johnson decade counter . This IC gives output of decoder which converts the Johnson code to a 7 segment decoded output for driving one stage in a numerical . Please download a datasheet of this IC and learn more about it’s functionalaity before using it .