This is just a fun project I have been working on in the last little while. If you like this instructable, consider voting for it in the Arduino Challenge!
Anyone who has experience with programming will have probably used random numbers in their code. These random numbers aren’t actually random though. They are actually generated using an algorithm that produces numbers that appear to be random, but the numbers actually follow a sequence. While these “pseudo-random” numbers are fine for some purposes, they just won’t do for others. Cryptography is a case where the predictability of pseudo-random would allow someone to break codes with ease.
True random numbers on the other hand rely on quantum phenomena, or chaotic systems. Quantum systems include things like radioactive decay, and shot noise in electronic circuits, and are fundamentally random processes. Chaotic systems are things like atmospheric noise, which is so chaotic, that it can effectively be used as a source of randomness.
I wanted to build a true random number generator just for fun, and to see how well it would work considering that it is fairly cheap and easy to set up.
Step 1: Materials
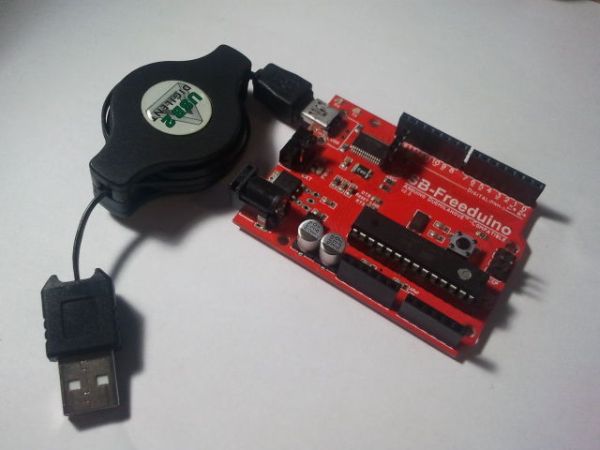
Arduino – ~$30
MightyOhm geiger counter – $100 without case, $115 with acrylic case (or any geiger counter with a pulse out)
http://mightyohm.com/blog/products/geiger-counter/
22 gauge solid core copper wire – $4 (for a whole roll. You can probably even use some multi-strand wire)
3 pin female header – found for free
salt substitute (optional) – $4
Step 2: Assemble the Geiger Counter
A geiger counter is a device that is capable of detecting radioactive particles. A particle passes through the geiger tube and ionizes the gas inside. The tube is connected to a high voltage supply, and the ionized gas allows a small current to flow. This pulse is detected, indicating that a radioactive decay has happened. Because it is impossible to predict when a radioactive atom will decay, we can use the time between pulses to generate random bits.
I bought my geiger counter from mighty ohm (www.mightyohm.com). It comes as a kit, so you need to solder it up yourself. It didn’t take me long to put it together and it worked perfectly on the first try. Full assembly instructions can be found on their website. Although the geiger counter doesn’t come with a display, it does have an LED indicator and a peizo speaker that beeps whenever it detects a particle. The board also has a pulse out pin that we’ll use to hook it up to the arduino.
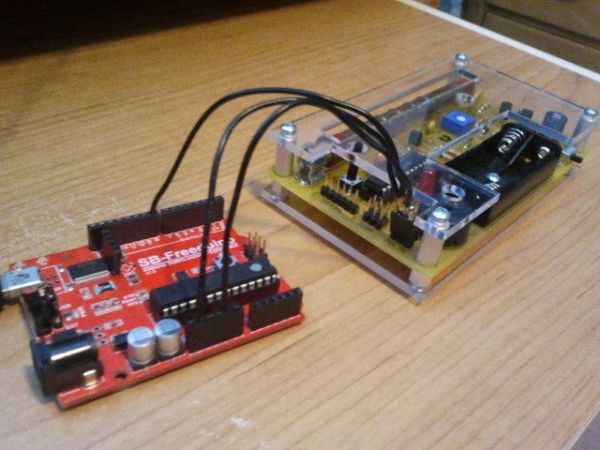
Step 3: Connecting to the Arduino
As I said in the previous step, the geiger counter board has a pulse out pin. The pulse pin is a part of three pins, and the other two provide access to ground and to power. I used a 3 pin female connector to connect to the pins, and soldered a piece of wire to each pin. The geiger counter typically runs off two AAA batteries and draws about 10mA. I chose to save the batteries and run the board off the 3.3v line on the arduino board, which can handle about 50mA of current. I have let it run overnight and it works just fine.
These instructions are specific to the mighty ohm geiger counter, but should be similar to connecting any other geiger counter with a pulse out.
If you want to run the geiger counter without batteries
1. Locate the 3 pin connector labeled PULSE
2. Connect the first pin (marked with an arrow on the board) to the 3.3v output on the arduino.
3. Connect the middle pin (pulse out) to digital pin 8 on the arduino.
4. Connect the last remaining pin to a ground pin on the arduino.
If you want to run the geiger counter with batteries, only do steps 3 and 4, leaving the first pin unconnected
[box color=”#985D00″ bg=”#FFF8CB” font=”verdana” fontsize=”14 ” radius=”20 ” border=”#985D12″ float=”right” head=”Major Components in Project” headbg=”#FFEB70″ headcolor=”#985D00″]Arduino
MightyOhm geiger counter
22 gauge solid core copper wire
3 pin female header
salt substitute (optional)[/box]
For more detail: Arduino True Random Number Generator