Another project I’m working on required a good timer, but the more I read about Arduino, I realized that I couldn’t make an accurate timer using an Arduino that was already devoted to other tasks. The Arduino will always lose time if you perform other tasks. The solution was a Real Time Clock module that keeps perfect time and has a battery backup so it won’t reset if the Arduino loses power.
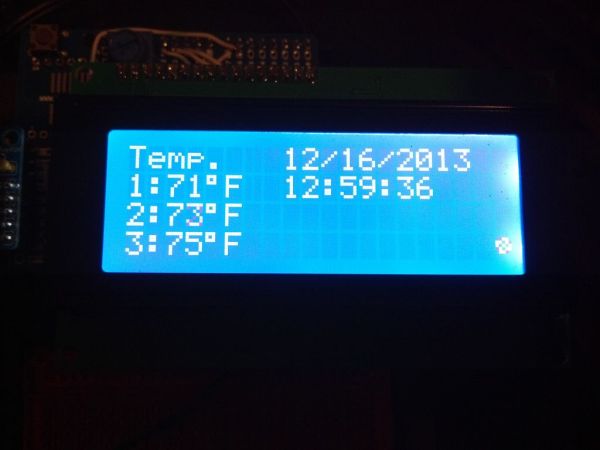
I like to make things modular, so I decided to combine the Real Time Clock module, an LCD screen, and a few thermistors together on one shield to make a sort of all in one “Atomic clock”/Weather station shield.
Step 1: Parts & Materials
I started with an official Arduino protoboard as a base. On other projects, I have tried to use the perf boards you find at Radio Shack and other electronics stores to make shields, but its nearly impossible to solder on the back side of those boards. For some reason, its very expensive to get protoboards that are through-hole plated unless they are about an inch across. These blank protoshields are the easiest way to make a shield if you need to solder on both sides. They also have bus lines for 5v and ground built right in that are already tied to the correct header pins. There is also a spot for a tactile switch that is tied to the reset pin and there is a spot for a surface mount chip.
Arduino Protoshield or Mega Protoshield
LCD
RTC module
Right angle headers
Straight headers
Female headers
Thermistor
Epoxy Covered Thermistor
10k Ω Resistors
Speaker or Buzzer (I grabbed this one out of an old PC)
Wire (I use single stranded cat5 cable that I untwist and separate)
Sugru or hot glue
Step 2: Mocking Up
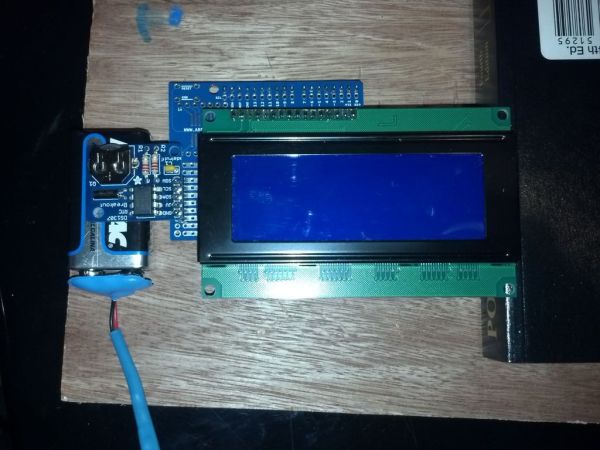
I propped up the RTC and LCD modules to see how they would fit on the finished shield. The screen is nice and large, but it is only supported by the header pins coming out of the top left corner. I will show how I support the rest of the device a little later.
Step 3: LCD and RTC
LCD
I buy these female header pins in strips of 40 and cut them down as needed. I use an X-acto knife to score the plastic over the hollow of one of the header slots. I flip the headers over and score the other side the hold the set tightly with pliers while I snap it along the score. The little metal fork that makes up the internal and external contact then falls out and I clean up the edge with the X-acto knife.
I made one set of female pins for the 16 pin connector coming from the LCD screen and another with 5 pins so I can plug the RTC module into it.
I made another set of female pins with some scrap pieces I had laying around. This set is just to give the screen something to rest on and take a little strain off the male and female header pin connections. I soldered the female pins to the board, stuck some male headers into them and trimmed off the excess metal. I then covered the tops with some Sugru I had laying around. The Sugru makes the LCD board tilt up a little bit, so it is now a pretty snug fit and keeps everything from moving around.
For this LCD, I had to connect pins 1, 5, and 16 to ground and pins 2 and 15 to 5v. I then connected pins 4, 6, 11, 12, 13, and 14 on the LCD to Arduino’s pins 7, 8, 9, 10, 11, and 12 respectively. You also have to connect the trim pot to 5v, ground and pin 3 on the LCD. For better instructions go here.
RTC
The RTC was much easier to connect. I soldered the 5 pin female header to the short bars next to the power and ground buses. The pins on the RTC module are labeled, so I just connected GND to ground, 5v to 5v, and SDA and SCL to Arduino’s A4 and A5 respectively.
For more detail: Arduino Time & Temp Display Shield