Have you ever wanted to impress your friends by saying something crazy like, “I think there’s going to be an earthquake soon” moments before an earthquake hits?
Or do you just want some warning, a few seconds that could save your life.
This project will allow you to hook up a seismic sensor to a router through the Ethernet shield and host a webpage off of the SD card on the shield. This webpage will then display information about the seismic sensor and the history of its activity.
All the data for the seismic sensor is stored in a Pachube feed and then displayed on the webpage as several graphs.
You will need:
– Arduino
– Preferably an Arduino with large memory, I used the Arduino Mega 2560
– You can use one with less memory, you just might have to remove some stuff from the sketch
– Ethernet Shield
– Micro SD Card
– Pachube account:
– Piezoelectric Sensor
– Breadboard
– Resistors, Capacitors, Diode
– Check the section on building the circuit for more details on values
– 5 x Op-Amps – Single-supply compatible
– or you can build it with dual supplies, whatever floats your boat :p
– You can get away with using only 3 – 4 op amps, the rest I use is for amplification
– Solid Wire of course!
I assume you already have:
– Router
– Computer
– Would be pretty magical to surf the net without these
– Extra Ethernet cable
– USB cable for the arduino
– Un-destroyed analog pin on your arduino
Step 1: The Circuit – Sensor
The sensor I used to capture seismic vibrations is a Piezo Film vibra-tab.
They come with an optional weight attached to the end, but I found that the weight was not enough.
The frequency of earthquakes is between 1 – 20 Hz, but with even the heaviest weight the resonant frequency was in the KHz.
So to reduce the resonant frequency and get some useful signals, I took some washers slapped them on a bolt and some nuts and experimented. I used a Oscilloscope with FFT and changed the weight on the tip of the film until frequencies of around 40Hz were the largest. If you don’t own an oscilloscope, just add a little weight and then hit the sensor. It should flop around for about half a second to a second before coming to rest.
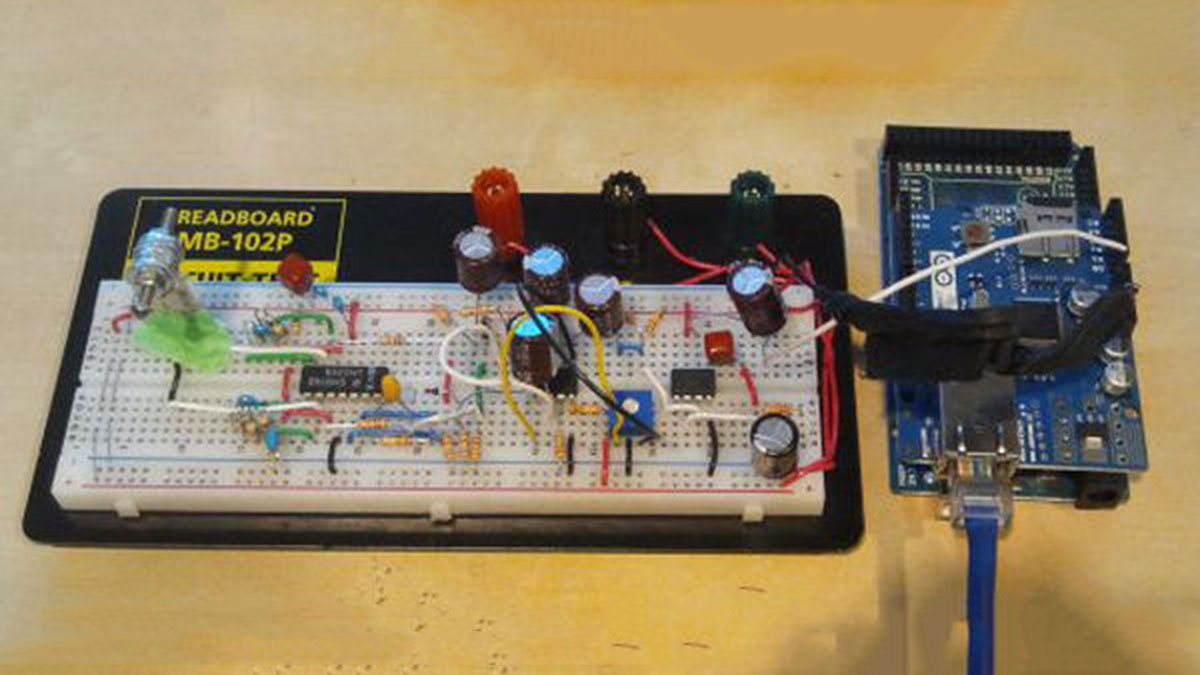
Once you have the sensor tuned to the right frequency, place it in your breadboard at one end, you’re going to need the space for the rest of the circuit.
As you can see from the picture, I taped down the base of the sensor. This is because the leads on the piezo film is flat, and tends to be loose inside the breadboard, so any vibrations tend to get lost in the movement of the leads.
Taping it so that the base can’t move will ensure that your data is accurate!
Step 2: The Circuit – Charge Amp
Since a Piezoelectric Film isn’t just a simple signal source, some circuitry is required to accurately and predictably measure the sensor’s output.
A Charge Amp takes the charge across a capacitor and translates it into a voltage. If you know your electronics you can see that it is essentially an integrator, which prevents the charge across the Piezo film, which acts like a capacitor, from discharging quickly.
This allows you to turn it into a stable voltage signal.
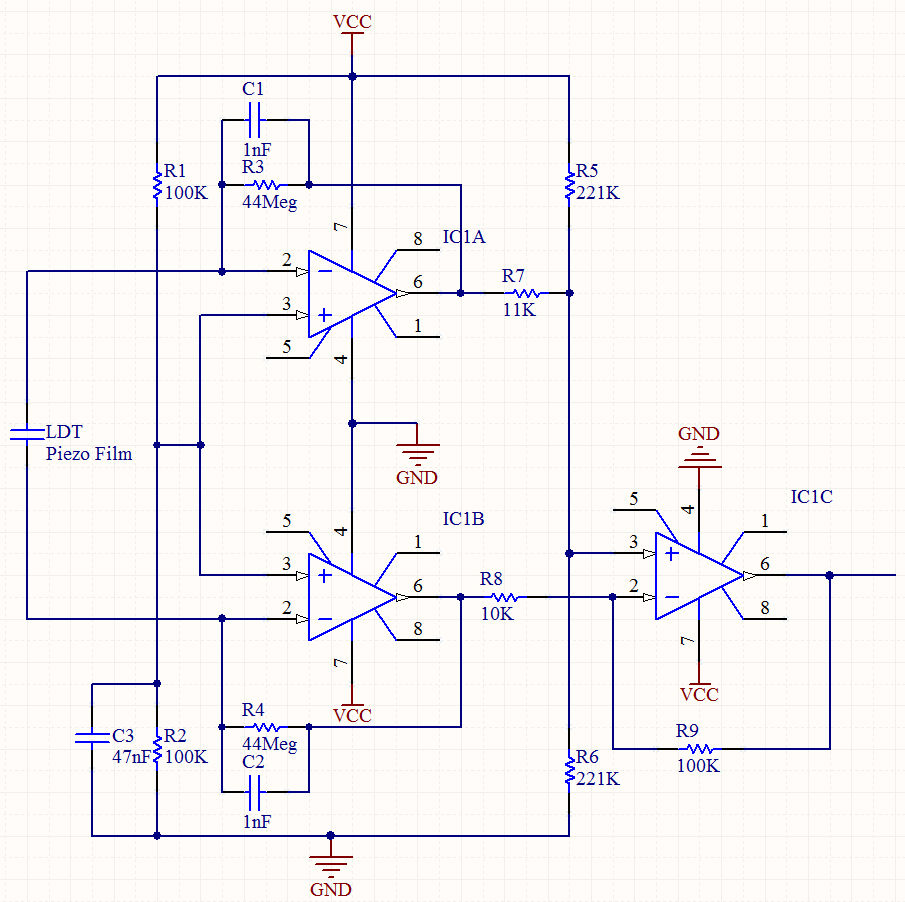
I used an LM324N, a quad op amp, to create the charge amp portion of the circuit.
If you follow the schematic on the last picture, you should get an AC signal at the output floating on 2.5Vdc [ If you are using a 5 volt supply ]
[box color=”#985D00″ bg=”#FFF8CB” font=”verdana” fontsize=”14 ” radius=”20 ” border=”#985D12″ float=”right” head=”Major Components in Project” headbg=”#FFEB70″ headcolor=”#985D00″]- Arduino
– Ethernet Shield
– Micro SD Card
– Pachube account: [/box]
For more detail: Arduino Seismic Activity Monitor – Ethernet Shield