We have built quite a few projects using the Bi-color (Red and Green) LED Matrix Driver Module kits from jolliFactory and have published them as instructables here. Each of these modules uses two MAX7219 Display Driver ICs to drive a Bi-color LED Matrix. These ICs are excellent because they take a lot of work off the micro-controller and simplify the wiring and logic design. These modules are designed to be chainable so you may daisy-chain them together to form a longer display for your project.
The following are some of our instructable projects built using this Bi-color LED Matrix Driver module:
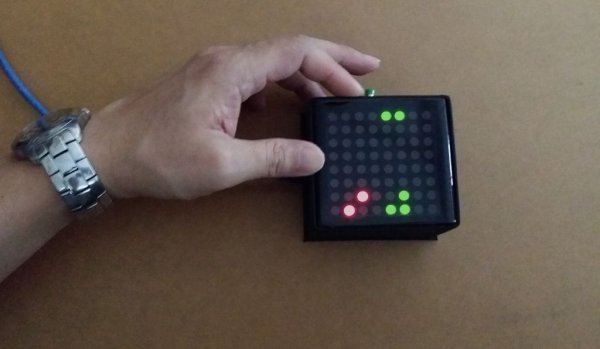
7 Bi-color LED Matrix Scrolling Text Display
- 7 Bi-color LED Matrix Scrolling Text Display Arduino (SPI)
- Voice Input Arduino Bi-color LED Matrix Scrolling Text Display (Bluetooth + Android)
- Arduino based Bi-color LED Matrix Audio Spectrum Visualizer
- Arduino based Bi-color LED Matrix Tetris Game
- Arduino based Bi-color LED Matrix Snake Game
- Arduino based Bi-color LED Matrix Pong Game
Quite a handful of these instructables are games built using more than one Bi-color LED Matrix Driver modules. We were thinking of building another game and wondering what game could be engaging using just a single Bi-color LED Matrix Driver module. We did some research online and we came to the conclusion that the Flappy Bird game could be a good choice to work on. Flappy Bird is one of the more recent popular games around which is created by Dong Nguyen. It is a simple one-button game in which you have to navigate the flapping bird past obstacles.
 As usual, we check out projects on instructables to see if anyone had created something similar and sure enough there is one. You may check out this instructables at http://www.instructables.com/id/Flappy-Bird-homage-for-Arduino-og-64-LEDs/ by August Z. Flatby in which the game is built using a single color LED Matrix for game display.We love the way the game was created especially the movement of the bird’s tail when the bird is flying up and down as compared to others who have attempted to re-create the Flappy Bird game using LED matrix modules. We believe the man deserves kudos for animating the tail which makes the game look livelier.
However, we think the game score display should be enhanced as it is currently limited to a static display of 2 digits with an ‘E’ displayed if the score is greater than 99. We also believe a Bi-color LED Matrix should be able to deliver better visual effect for the game than the single color LED Matrix used. Our instructable here is to build an Arduino driven Bi-color LED matrix Flappy Bird game which is able to display game score of more than 2 digits by scrolling the score display based on the game code from August Z. Flatby’s instructable.
To build this project, basic electronics knowledge with electronics component soldering skill and some knowledge on using the Arduino are required.
You may view the following YouTube video to see what we are building.
Step 1: Building the Flappy Bird Game
We will be building a single Bi-color LED Matrix Flappy Bird game here driven by an Arduino Nano. This project uses the Bi-color (Red and Green) LED Matrix Driver Module kits from jolliFactory.
You can find this Bi-color LED Matrix Driver Module kit here.
This kit comes with all through-hole components and someone with basic soldering skill should be able to assemble it without much difficulty.
See the following YouTube video on how to assemble the LED Matrix Driver Module Kit:
Follow the video to assemble the kit but do not solder the header at J4 for this project.
Note that for this project, we will not be soldering the provided 6 way 90 degrees angle headers at J4. Instead, we will be using a straight 6 way header which is not provided with the kit set. See the pictures above for the assembled module.
For the game audio, we will be using an 8 ohms 0.5 watt speaker. The audio volume is amplified a little using a simple BJT transistor circuit.
A SPST Panel Mount Momentary Push Button is required for the project for triggering the Flappy Bird to fly higher.
Step 2: Wiring
After the kit is completed, they are connected together with the micro-controller as shown in the wiring diagram (LED Matrix not installed for better view). We use one 8 ohms, 0.5W speaker for the game audio output and a push button for game control. One Arduino Nano or compatible microcontroller is used here to drive the electronic circuit setup.
Note the use of the 12Kohms pull-down resistor on the LOAD input pin. When power is first applied to the micro-controller or when they are reset, their I/O lines float. The MAX7219 can see this as valid data and display garbage until the micro-controller gains control. The pull-down resistor prevents this problem. If you prefer something more professional looking without all the wire connections, you may purchase the JF Interface Board 1 from here and solder all the required parts onto it.
See picture above to see how all the required components are soldered onto the JF Interface Board 1 with the speaker and Push Button connected and Arduino Nano mounted.
Step 3: Programming the Arduino Board
The Arduino board needs to be loaded with the Arduino sketch to run the display.
We used Arduino IDE V1.03 for our project. Download the Arduino sketch and required header file for this project below and upload it to your Arduino board.
Download jollifactory_Flappy_Bird_V1_0.ino & Header file
We adapted the sketch from http://www.instructables.com/id/Flappy-Bird-homage-for-Arduino-og-64-LEDs/ created by by August Z. Flatby.
You may amend and enhance the sketch and to produce a more engaging Flappy Bird game.
For more detail: Arduino based Bi-color LED Matrix Flappy Bird Game