2000 pictures compose this piece- that is, 2000 perfect different water drops into which we mapped an animation. Droplets that behave and look strangely similar at the stage of less entropy, and become more disorderly as they splash.
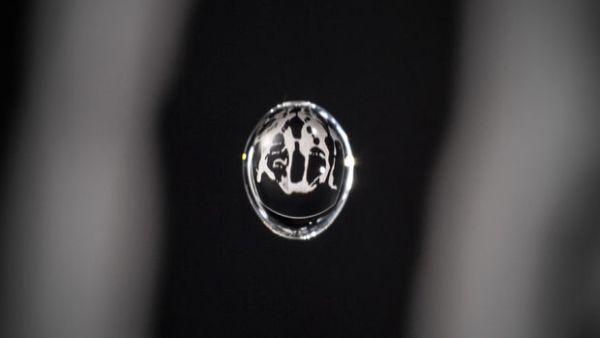
The final result of the piece you have seen has absolutely no CGI, and was shot in stopmotion so as to be able to project inside the waterdrop the logo formation, previously animated in 3D and then printed in paper and placed behind the water drop falling. There were 320 frames printed and replaced frame by frame in the animation, and over 2000 frames compose the final shot- this meaning that the drop you see is never the same, there are 2000 different drops in the piece. In order to be able to photograph each one in exactly the right place as to be able to see a fluid fall, we created an Arduino-based system in which, after having the drop cross a laser pointer, we would have the absolute precision of when to trigger the flashes and camera to see the drop in the right position. We worked very hard to synch this mechanism to our Motion Control system, and the final piece is the result of a 3-week testing process in which we shot about 45 splashing tests with over 20000 pictures taken, before we produced the final shot.
Step 1: Detecting the water drop: laser beam-photodiode
There are several ways to detect a droplet by using sensors: infrared barriers, laser beams… In this case, we chose a laser pointer to which we added a switch to make it easier to turn on/off.
We also investigated the fastest electronic component that measures interruption of a laser beam. Among a choice of photoresistors, phototransistors and other components capable of measuring light variations, we ended up using a photodiode. After some testing, we added some resistances in parallel so as it wouldn’t be so sensitive and would only be affected by interruptions of the laser beam, and not ambiance light for example. This tiny circuit is enough to allow the photodiode to work as a digital switch putting out 5v when the laser hits the photoreceptor, and 0 when a water drop interrupts the laser beam. We also placed a cinefoil (a black matte aluminium sheet used in photography) pierced with a needle was placed in front of the laser pointer so as to make it even more precise to the dripping.
Step 2: Triggering the flashes
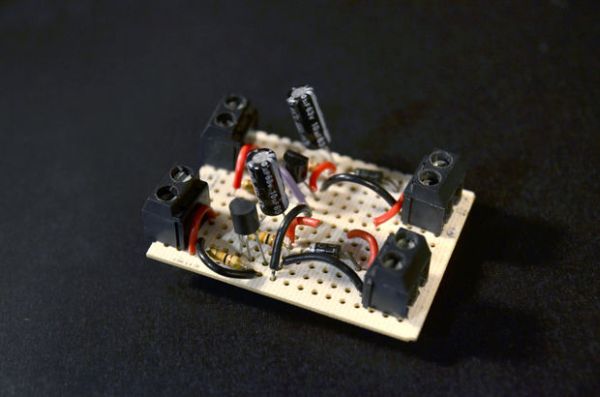
We’ve been triggering digital cameras using optocouplers for years. Without a second thought, we connected an old-ish flash to an optocoupler (4n28) output and tested the triggering with Arduino. Flash! It worked! But then, and the second try… it DIDN’T. No problem, we changed the chip: Flash! It worked! But then, and the second try… it DIDN’T. AGAIN. So we tried again and again until we run out of optocouplers (burned them all, more like it!). We searched for possible reasons, and we found out that some flashes (especially the old-ish ones) are capable of generating voltage peaks of 300v… and more! That’s why we decided to implement the circuit board descripted in the Photoduino schematic, and it worked like a charm.
One of the big limitations we also encountered to this effect were the number of flashes used to light the set. Shortly after starting, we realized that lighting the water drops with just two flashes for the whole downward course of the drop was nearly impossible. The picture was underexposed either at the beginning or the end of the journey, and proper constant lighting was impossible to achieve. We decided then to rent two more flashes and build two more flash-trigger circuit boards, but after a new picture, a new problem ensued: the older flashes were much faster than the rented, newer Canon flashes, with the result of a double-exposed picture.
We tried to solve this by programming a delay in the old flashes, and although we almost matched the two speeds, they never really flashed at the same time. So, in the end, we had to make do with just two flashes. The conclusion was that, for a project like this, where a difference of microseconds is paramount, same model and brand flashes are needed. This, added to the limited space in our Lightbox, compromised the final result of the piece.
Step 3: Triggering the camera (any DSLR or remotely triggered camera)
As usual, a 4n28 octocoupler was used, and don’t be put off by the name- it sounds more complicated than it really is! It is basically a 6 pin IC that acts like a switch. It has a small led inside that is lit when voltage is received and a photoreceptor that reacts, closing the circuit- so basically a switch that can activate or deactivate whatever we connect, with the added bonus of having an isolated input and output. If you are lucky enough to own a digital DSLR or a camera with the choice of connecting a remote trigger, you can use this ic to trigger it for less than 2€. If the camera has a standard audio input for this purpose, so much the better. If the camera has its own brand connectors or different than the usual ones (such is the case with our Canon 7D), we would need to implement any cheap Chinese remote trigger, starting by cutting the cable. After peeling it, we will find 3 wires: a common one and two more. In order to distinguish them, we know that the common one touching the first one will activate the camera focus and the second one will trigger the camera. The common wire and the trigger one connected to the octocoupler output will trigger the camera once the 5v impulse is received. With a second octocoupler, we could also keep the auto-focus function.
When considering the present exercise- shooting a water drop- we need to bear in mind that, although the camera is capable of shooting really fast, it is much easier to work in complete darkness and work with the shutter in B, letting the flash be the one capturing the droplet in the air. For minimizing synch problems, we programmed it so the shutter opens when the first droplet passes through the laser beam and the flashes are triggered when the second droplet is in the desired position.
Step 4: Water course
In our first attempt, we used a small water pump capable of taking in water from a plastic tray and pumping it to a regulable medical drip. This direct connection made the water drop tremble when falling because of the motor vibration, which isn’t a very desirable effect when you need two different droplets to look the same! We solved this by using a small recipient in the middle of the set-up that absorved vibration and pressure on the medical drip.
Step 5: Following the water drop – Motion Control
In order to follow the droplet in its downwards course, we needed two basic controls: vertical axis (tilt) and follow focus for the macro lens. We had the Motion Control set up in a different way, so we modified the horizontal axis to be able to control the focus. It ended up being quite ugly aesthetically and the motor was way too big for the purpose, but it worked perfectly. With the lack of the extra pair of flashes, which didn’t allow us to close the shutter a bit more, and the incredibly short depth of field for the macro lens it would have been impossible otherwise to keep focus on the water drop without this adjustment.
Step 6: Communicating with the Motion Control
Given that we needed to synch the droplet fall to a downwards camera movement, we tried to communicate Arduino with our control software by sending serial prints so the aackeys software would turn it into a keystroke. What we wanted was to get the motor to move in predefined increments so as to follow the droplet falling. It all seemed to work at first, but after some pictures the Arduino would suddenly restart, so we lost the movement. After double-checking all components, changing the programming and pretty much going crazy and wanting to crash the whole set-up, we decided to go ugly and wild, but functional. So we wanted Arduino to simulate a keystroke and we were having serial communication trouble, right? We could also get an innocent soul to press that key 2000 times (as many as frames we wanted to get), and believe us, we tried that for a couple tests and it was pretty painful. But we could also try to emulate Homer’s keystroke bird and build one ourselves with a small servo motor! We did, and worked like a seamlessly.
The servo would then press the spacebar after each picture, while the Motion Control would move in small increments and adjusting focus at the same time. We will get into more detail about the Motion Control in a future post, but building a two-axes rig (tilt and focus) is not so difficult, in case you want to attempt the same experiment. The internet has loads of information about it and there are Arduino AccelStepper libraries that make the job much easier. The ingredients would be two stepper motors, two drivers, power supply and an Arduino. The only thing left would be to build a camera rig to your fancy.
For more detail: An animation inside a water drop by Physalia