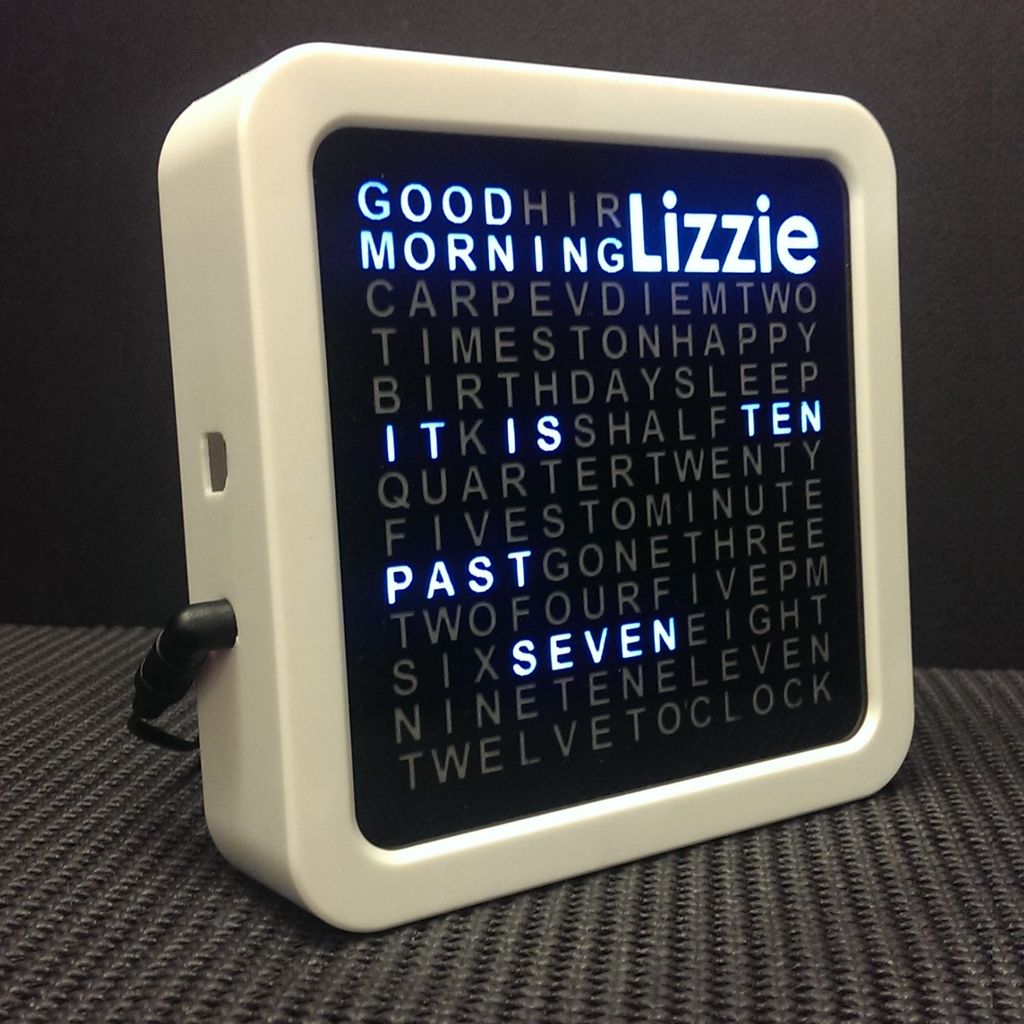
Build a unique personalised gift that’s cool and reflects the character of the recipient.
What’s different about this Word Clock is that it is small enough to sit on a bedside desk, displays the recipients name and has personalised messages that appear at different times ie. Happy Birthday, Carpe Diem, Good Morning or whatever you choose.
Great for people of all ages who enjoy something a little unique.
Please note: This a variation of the traditional word clock design. Credit must be given to the guys who came up with the original design. In particular these two instructables provided inspiration for this project
http://www.instructables.com/id/The-Word-Clock-Arduino-version/
http://www.instructables.com/id/Javelins-Word-Clock/
Step 1: Gather Materials
The most important component for this project is a good enclosure. Most department stores will have a variety of low cost clocks that would be suitable. Look for funky looking clocks that have a glass front with a depth of at least 4cm.
Ideally you are looking for something that is a “shadow box” style enclosure which has a front aperture of at least 13cm x 13cm. The enclosure also needs to be able to be easily dismantled and the internal clock removed.
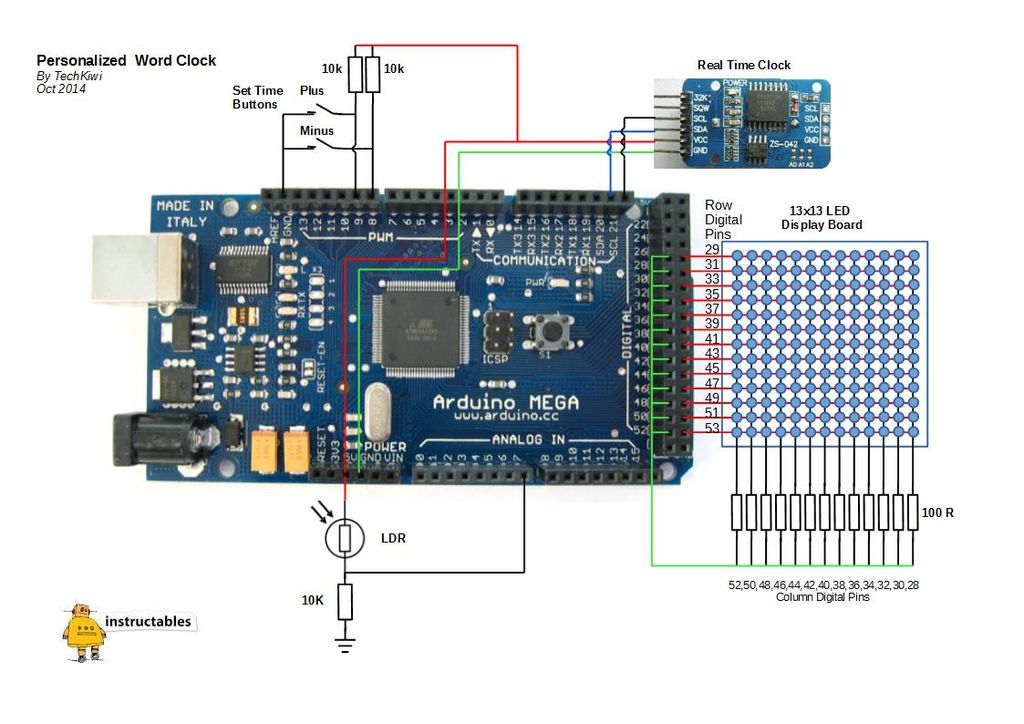
The electronic components are included in the list above. I tried to minimise the number of the components so went for an Arduino Mega to drive the LED array directly. See the circuit section for further details.
Step 2: Build Arduino Shield
Arduino Shields are boards that can be plugged on top of the Arduino PCB extending its capabilities.
Building this simple shield enables you to connect the Arduino to the LED array, buttons, RTC and other components without having to solder directly to the board.
Cut the header pins to size and push into the Arduino board in the correct position as per the Circuit Diagram.
Then push the header pins into the shield to position the pins in the correct holes as per the picture above. Once you are sure they are in position solder the pins into the shield.
Remove the shield from the Arduino Board and Solder the 100 ohm resisters as per the circuit diagram and be careful to ensure that you have enough clearance when its plugged into the Arduino.
Step 3: Build the LED display board
1. Cardboard Cutout
The Word Clock display is made up of an array of 13×13 LEDs that are mounted on a cardboard cutout that fits snuggly into the front of the Clock Case. It is best to use cardboard because it wont melt when you are soldering wires to the LEDs and its easy to work with.
Use the dimensions of the aperture of the Clock case to trace out the required shape and cut out a piece of 3-4mm thick cardboard.
2. LED Grid
Use the enclosed template file to create 11cm x11cm grid to position the LEDs on the display board. Enclosed is a template that can be modified and printed out then glued onto the cardboard.
I used a free version of a draw program called LibreOffice Draw that you can download from here. LibreOffice The files can be modifed and resized using this tool. You can use the export feature to get different formats.
3. Mount the LEDs
In the example I used high intensity white surface mounted LEDs that I cut from a 3v LED strip. My advice is just use 5mm high intensity 3v LEDs as they are easier to mount and don’t require as much soldering.
The key point is that you join the Cathode (-ve) side of each LED in each vertical column together on one side of the cardboard. Then pass the anode (+ve) through to the other side of the cardboard through a hole and join each row together on that side.
What you end up with is 13 Cathode strips on one side vertically and 13 Anode strips on the other side horizontally.
These are then connected to the Arduino Shield from the previous step as per the circuit diagram.