Lite Brite pegs look like LED’s don’t they? That’s what I though the other day after working on an LED cube for a few hours. I happened to see my daughter’s Lite Brite sitting there, and I looked at the pile of LED’s on my desk. What a perfect match!
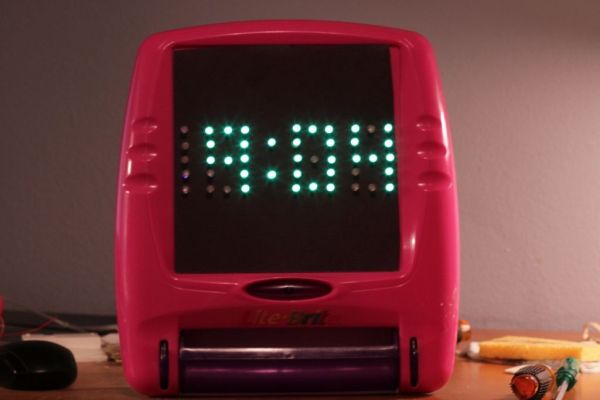
In this instructable I will show you how to make a Lite Brite clock using a Lite Brite, an Arduino, 46 LED’s and a few other miscellaneous parts.
This project is an upper-beginner level project. The most difficult part of building the Lite Brite clock is the soldering. The soldering is fairly detailed and intricate. You can very easily short two leads or two wires together, or break solder joints when you’re closing the project up. You need to be very precise and detailed in your inspection of your work.
The code I wrote is fairly straightforward, and you can either just use my code, or use it as an example to come up with your own. I don’t claim to be a programmer, but i get by.
You can find more about the Lite Brite clock at my blog at http://www.meanpc.com/2012/08/arduino-lite-brite-clock-project_3.html
Ready to build? Let’s go!
I documented nearly the entire build with a video camera and photos. Watching the video is not necessary if you follow the steps, but it might help you through some tricky parts. Always be sure to defer to the written instruction when there is a difference. I changed my mind about several things during the build and they had to be redone – but I left the video intact so you could see the entire process.
Step 1: Parts and Tools
Note: The parts in the following list have changed since the video was shot. Use the parts below.
Parts
1 Lite Brite
1 Arduino Uno or equivalent.
46 LED’s – I used 5mm. Diffused LED’s will save you some work.
Twelve 100 ohm 1/4 watt resistors
Hookup wire – 20 or 22 gauge, or both. For wires connecting to the Arduino, I recommend 20 gauge for a tight fit.
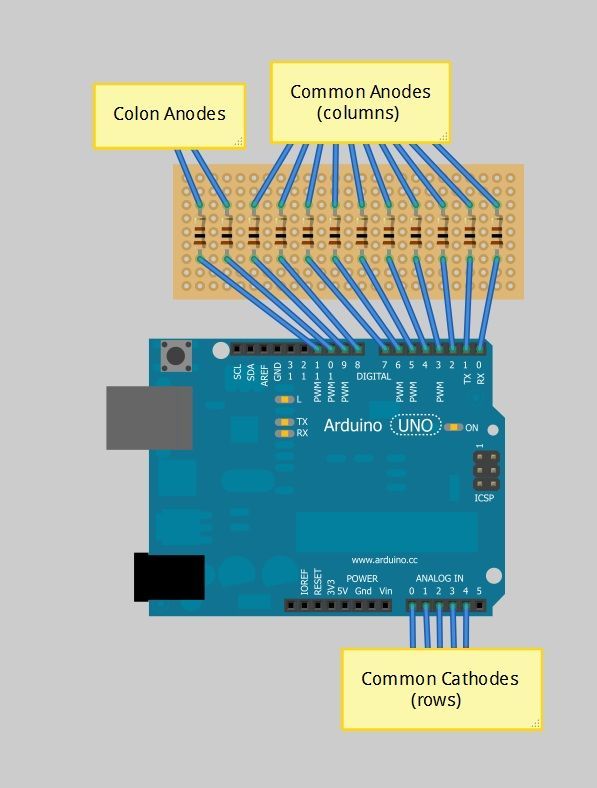
Small perfboard, breadboard or whatever you would like to use to mount the 12 resistors feeding each column of LED’s. I used a small piece of perfboard.
Velcro – applied to the back of the Arduino and perfboard and the inside of the Lite Brite to secure the electronics.
Black construction paper – alternatively, you could use some of the paper that came with the Lite Brite if you still have it.
Solder
Tools
Needle nose pliers
Diagonal cutters
Wire strippers
Scissors
Soldering iron
Multimeter
Sandpaper or sanding block if you don’t use diffuse LED’s. I used a 320 grit sanding sponge.
Optional – alligator clips – I found these very helpful when testing the LED matrix.
Step 2: Diffuse the LED’s
If you bought diffused LED’s, you can skip this step. If not….
We want to use diffused LED’s for a couple of reasons. If the LED’s are clear, they will shine outward instead of just lighting themselves up. Shining outward will make them too bright and can also illuminate surrounding LED’s, which will make it difficult to tell which LED’s are actually lit up. The desired effect is for the LED to glow instead of shine.
Take your sandpaper and vigorously buff the the entire surface of each LED. The LED should look cloudy all over when you are done. Please reference the photos and video below to see how it is done and how your finished product should look. It took me around a half hour to diffuse 46 LED’s. If I had planned properly, I think I would have bought them already diffused – it would have been worth it.
Step 3: Cut construction paper to size
If you have the paper that came with the Lite Brite, you can skip this step.
Cut a piece of black construction paper to fit the Lite Brite.
Step 4: Layout and place LED’s
Now we are going to layout the LED’s on our Lite Brite. I did a quick drawing on the white board that you can see below. With this design, you will need 13 LED’s for each of three numbers, 5 LED’s for the one, and two LED’s for the colon.
The first step is to use your Lite Brite pegs to figure out how you will position your LED’s.
Once you have a very good idea how you will position the LED’s, put your black paper in. Now we will punch holes in every position that an LED will be in. Use a Lite Brite peg to make the holes. Be very careful to make sure you are punching holes in the right places. As you can tell from the picture below, I was not careful enough, and had several mistakes. I ended up patching these holes with very small pieces of construction paper and glue, and it came out fine.
Once you have all the holes punched, go ahead and stick your first row of LED’s in, and splay the leads to hold them in place.
[box color=”#985D00″ bg=”#FFF8CB” font=”verdana” fontsize=”14 ” radius=”20 ” border=”#985D12″ float=”right” head=”Major Components in Project” headbg=”#FFEB70″ headcolor=”#985D00″]1 Lite Brite
1 Arduino Uno or equivalent.
46 LED’s – I used 5mm. Diffused LED’s will save you some work.
Twelve 100 ohm 1/4 watt resistors
Hookup wire – 20 or 22 gauge, or both. For wires connecting to the Arduino, I recommend 20 gauge for a tight fit.
Small perfboard, breadboard or whatever you would like to use to mount the 12 resistors feeding each column of LED’s. I used a small piece of perfboard.
Velcro – applied to the back of the Arduino and perfboard and the inside of the Lite Brite to secure the electronics.
Black construction paper – alternatively, you could use some of the paper that came with the Lite Brite if you still have it.
Solder[/box]
For more detail: Lite Brite LED clock using an Arduino