My mailbox is across the street from my house because our mailmen don’t walk door-to-door, so I never know when the mail is delivered. Sometimes, I’m waiting for something and I’d really like to know when it arrives. I got my first Arduino last week, and thought it might be a neat toy project to build a notifier that would tell me when the mail is delivered.
It’s designed to live inside the mailbox (I have a big one) and detect changes in the ambient light level. When the mailbox is opened, it triggers a wireless doorbell transmitter, ringing the house’s doorbell and letting me know the mail’s there.
Step 2: Disassemble the transmitter.
Take the back cover off the transmitter. Remove the battery and any screws holding the board in the unit. Your transmitter may look a little different than mine does.
Remove the board from the enclosure.
Step 3: Remove the switch.
Power up your soldering iron and break out the solder sucker and wick. Remove the switch from the back of the board.
Note which terminals on the switch were connected where. That’s important for the next step.
Step 4: Install a jumper and new leads.
On my unit, the switch, when depressed, connected the negative battery terminal to the rest of the circuit, causing the transmitter to send a signal. Since I took the switch out, the transmitter won’t fire until we give it a new means to close the circuit.
Solder one wire onto the solder point connected to the negative battery terminal. In the photo above, that’s the black lead.
Strip enough wire to connect the other two points formerly connected by the switch (on my transmitter, only three points connected to anything — the two shown soldered together above and the negative battery terminal). Solder the end of the wire to the first terminal, then solder it to the second terminal. Then carefully bend the wire so that it more or less follows the other lead you soldered on.
Now, instead of a switch, the transmitter can be triggered by connecting the two leads you just soldered onto the board.
[box color=”#985D00″ bg=”#FFF8CB” font=”verdana” fontsize=”14 ” radius=”20 ” border=”#985D12″ float=”right” head=”Major Components in Project” headbg=”#FFEB70″ headcolor=”#985D00″]
Get the stuff.
Things you’ll need:
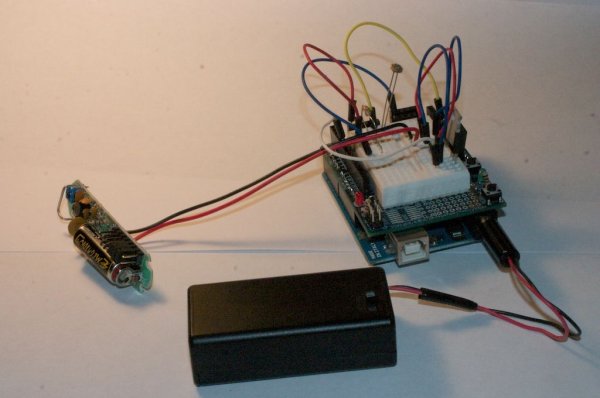
-Arduino (I used an Uno)
-9V battery pack
-Breadboard/Prototyping shield
-Wireless doorbell transmitter
-Transistor (I used an IRF510 MOSFET from RadioShack)
-Photoresistor
not pictured:
-10k resistor
-jumper wires for breadboard
[/box]
For more detail: Arduino Snail Mail Notifier