Hello, this is my very first step-by-step instructable, and today, we’re going to learn how the sensors in your android smartphone can communicate with your arduino.
In modern smartphones, there are a lot of useful sensors for an ingenious arduino project. I have a motorola DEFY, for example and it has (at least) 6 sensors :
– light sensor
– proximity sensor
– aGPS (assisted gps)
– compass/magnetometer
– accelerometer
– orientation sensor
This instructable’s purpose is to get you started using these sensors from your arduino. For this, we’re going to use an application that was made for that single purpose : Amarino 2.0 . This app was first started by Bonifaz Kaufmann during his visit at the High-Low Tech Group in 2009 at the MIT Media Lab in Cambridge, USA and further developed at the University of Klagenfurt in Austria.
The overall cost of this project, considering you already have an arduino and an android smartphone, can be pretty low (it cost me about 12$).
If you liked this instructable, please rate it !
Step 1: Required Parts/Tools
Required tools :
– solder iron with fine tip
– tiny solder wire
– good magnifying glass
– “Third hand” helping tool
– good soldering skills
Required parts :
– Arduino
– Android smartphone
– Bluetooth serial adapter (not needed if you happen to have an arduino BT)
– 10 and 20 kOhm resistors
– Breadboard
– Standard servo motor
– jumper wires and/or small wires
Since the ArduinoBT has Bluetooth functionality built-in, setup is much easier (no soldering, risks of messing up bt adapter, etc…) but since it costs pretty much, I went the cheap way, and bought a bluetooth to serial adapter from ebay.
Okay, so where do you buy those parts/components…
– Arduino : you can get this at sparkfun : (http://www.sparkfun.com/products/9950 ), from ebay or you can check the arduino website for other distributors (http://arduino.cc/en/Main/Buy )
– Android smartphone (I guess you already have that…)
– Bluetooth serial adapter : You can get this from sparkfun too, with a breakout board (http://www.sparkfun.com/products/10269 ). These don’t need level shifting so if you buy this product, you don’t need to buy the resistors. You can also get it from ebay, like I did, but they are more complex to set up and documentation isn’t always accurate (mine was wrong on the default baud rate, for example) Here’s the link to the one I bought : Bluetooth adapter.
– 10kOhm and 20kOhm resistors : these are needed to shift the 5v from the arduino serial pin to the 3.3v on the bluetooth adapter. You can get these at your local electronics shop.
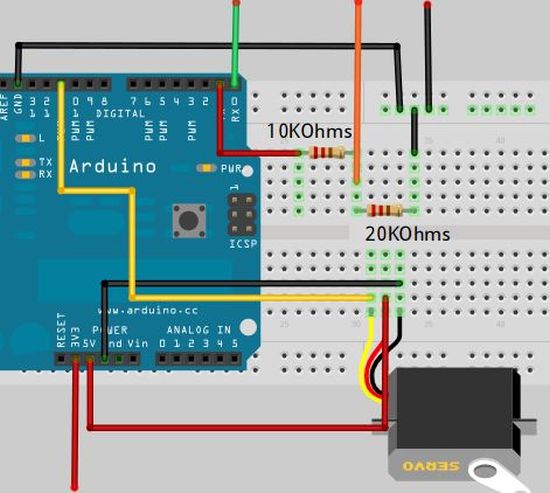
– Breadboard : Not really necessary, but it is much easier (and cleaner) to wire the voltage divider on a breadboard, than to solder it and have wires everywhere. The breadboard isn’t required if you choose to get the arduino BT or the bluetooth module from sparkfun. You can get a breadboard on ebay or again at sparkfun.com
– Jumper wires/small wires : you can get this from sparkfun too, but you can also salvage small wires from old electronics to keep the costs down.
– Servo motor : Not really required, but used in this instructable for an example with the accelerometer sensor. I’m using the futaba s3003. You can get this at your local hobby shop, ebay, or sparkfun .
Now It’s the time to choose :
– you can go the pretty expensive, but also pretty easy way (no soldering) : go get an Arduino BT . (more than 100$)
– you can go the less expensive way, but less easier (a little soldering but no level shifting) : get a bluesmirf silver breakout board from sparkfun (approx. 40$)
– you can go the cheapest and hardest way (soldering AND level shifting required) : get a bluetooth module from ebay (less than 10$).
In this instructable,I’m going to get you started with the Bluetooth module from eBay.
So make your choice, get the parts/tools, and head to Step 2.
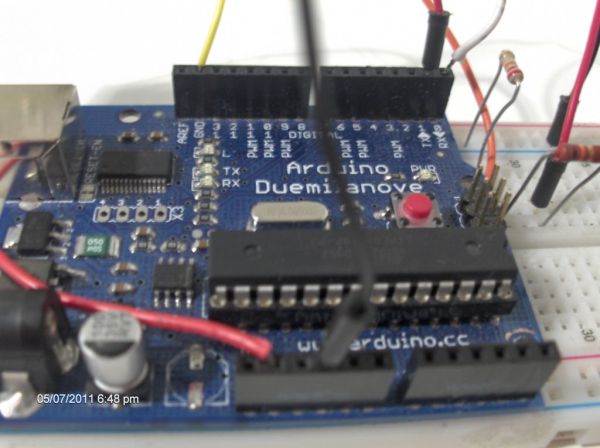
Step 2: Solder the Bluetooth adapter
We are going to solder the necessary wires on the Bluetooth module :
– Grab the small wires
– Strip them a little bit
– Tin them
– Use the third hand tool to keep into place the Bluetooth module
– Solder carefully the four wires as shown in the photos (Tx, Rx, 3.3v, GND)
Let the Bluetooth module cool down a bit, and head over to the third step : The level shifter
For more detail: Use your android phone sensors on the arduino