As hard as it might be to believe, I had never built an electronic clock of any kind. I’ve always thought electronic clocks were passe and not worth the time to design and build one. In addition, I thought that all interesting electronic clocks designs had already been built so why bother building an also ran. However as I was looking around for something to do with the 15′ of RGB LED ribbon (LPD8806) I purchased from AdaFruit it occurred to me that I could use a short segment of the ribbon (14 LEDs worth) to build a unique electronic clock which used the RGB LEDs to display the time, date and a few animated patterns. I already had a SparkFun Pro Micro Arduino compatible micro controller module handy so the only part I was lacking was a real time clock (RTC) module. I wanted to use a battery backed up RTC module to make the clock accurate, reliable and impervious to power failure. I chose the ChronoDot ultra precise RTC module from Adafruit speced at less than a minute of drift per year. Designing the LED clock circuitry was easy because of the small number of parts involved. See the schematic at the bottom of this page for the details. To simplify the design I decided to power the clock via USB so no power supply components were required.
With all of the parts in hand I breadboarded the circuitry and wrote the software for the LED clock using the Arduino 1.0 IDE. The software for the LED clock is freely available here. If you use and/or modify the LED clock software and redistribute it, I would appreciate an attribution.
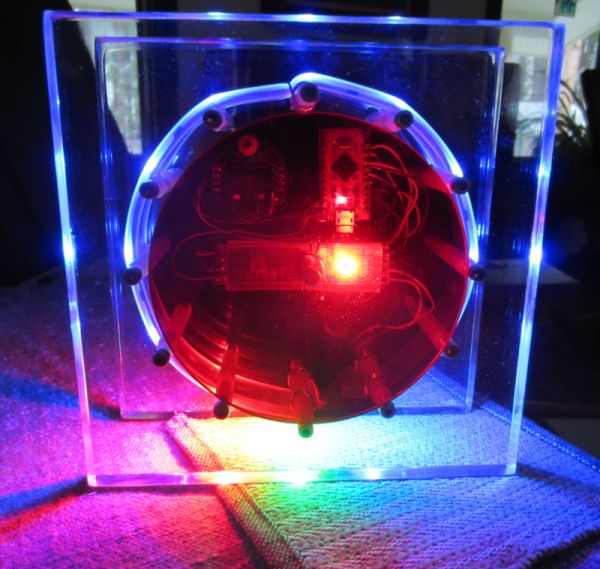
With the hardware and the software complete I turned my attention to packaging the clock. I wanted a modern looking clock that anyone could read. That meant the clock would have to resemble a normal clock with hands to some degree. My clock would not read out in hex or binary like many nerd clocks I’ve seen. After a lot of ideas and sketches I came upon the idea of building the clock out of clear Lexan and colored acrylic discs. This choice of materials resulted in a modern/contemporary look for the clock as can be seen in the images below.
One pleasant but unanticipated side effect of the clock’s packaging geometry is that in the dark the clock projects a collage of colors on the wall behind it. The color and the shapes change with the time in very pleasing ways.
Details, Details
Two momentary pushbutton switches mounted to the rear of the clock are used to set the time and date. The top pushbutton is the increment button and the bottom button is the decrement button. If both pushbuttons are pressed at the same time the value of the item being set is accepted and the clock proceeds to the next settable item. The order of settable items is: hours, minutes, month, date and year. The seconds count is always reset to zero when the minutes are set.
Each settable item has a specific LED color associated with it. The colors are:
hours – red
minutes – green
month – yellow
date – magenta
year – cyan
Pressing both buttons at the same time puts the clock into the time and date setting mode. All 12 of the radial LEDs will first flash in the color of the item to be set. For example, the hour setting mode will sequentially flash the LEDs in red before the current hour value is displayed with a single red LED. Use the increment and decrement buttons to set the correct hour. AM is indicated if the middle left LED is lit. PM is indicated if the middle right LED is lit. When you have selected the correct hour again press the two buttons together which will save the new hours setting and transition the clock into the minutes setting mode. Use the same process for setting all other settable items. Note: if you want to retain the current value of a setting just press both buttons together to skip over the setting. After simultaneously pressing the two button while in the year setting mode, the clock will transition back into normal clock mode displaying the hours and minutes.
Setting of the minutes, day and year are different because they can have values greater than that which can be displayed directly on the clock. Minutes, for example, can have values of 0..59. Say we want to set a minutes value of 45. When you go into the minutes setting mode you will see the clock flash all of the LEDs in the minutes color some number of times. Each flash represents 12 minutes. A value of 45 would then be displayed with three flashes followed by the 9 o’clock LED being on because 3 * 12 + 9 = 45. The year value is relative to the year 2000. So the year 2012 would be indicated by one flash of year color followed by the 12 o’clock LED being on. Hopefully you get the picture. Setting the clock is easy once you understand the technique.

If the clock did nothing but display the time continuously it would get boring pretty quickly. To prevent boredom I have defined three events which fire periodically to liven things up. There is a 10 minute, 15 minute and 30 minute event. With each 10 minute event time display is suspended and a rotating color wheel effect is displayed. With each 15 minute event the full date is displayed. With each 30 minute event the clock goes dark and then brightens into full brilliance. You will have to see these events to appreciate them. In all cases as soon as the event is processed the clock returns to it normal display of time.
NOTE: the following pictures do not do the clock justice. It is much prettier than shown here.
[box color=”#985D00″ bg=”#FFF8CB” font=”verdana” fontsize=”14 ” radius=”20 ” border=”#985D12″ float=”right” head=”Major Components in Project” headbg=”#FFEB70″ headcolor=”#985D00″]Arduino
LED[/box]
For more detail: Modern RGB LED Clock using Arduino