Christmas 2015 yours truly was one of the lucky few in the world to receive the ESP32 for experimenting. The board was not assembled, and it was quite intimidating to assemble the board with just a fine tip solder. The experiment is documented at this URL: https://www.instructables.com/id/Beginners-ESP32-Gu…

This afternoon, yours truly came across the Arduino Core for ESP32 on GitHub URL here: https://github.com/espressif/arduino-esp32 . Very excited on this discovery, he was eager to experiment with it, but only when he is done with the consultations. If his STM serves him well, he recalled witnessing the exponential growth of IoT devices made with ESP8266 posted on the Internet, the ESP8266 board wars by the various board makers, professionals and amateurs alike. The growth was particular intriguing, especially after the ESP8266 development environment was ported from the regular GCC and make, to Arduino IDE. He might relive the growth of ESP32, now with Arduino port.
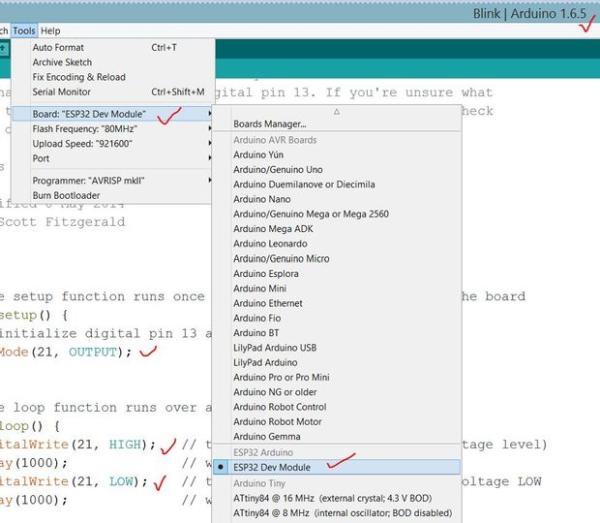
After installing, the settings seems to be prim and proper. Check out the screenshot for details
The following was the setup environment for ESP32 with Arduino IDE
Arduino IDE 1.6.5
Windows8
Python2.7
[UPDATE] The following setup that works: Ubuntu14.04 x86 desktop, Arduino IDE 1.6.12, python2.7
There is a gotcha moment; caveat emptor.
[UPDATE] : works with Ubuntu14.04
[UPDATE1] : attempted to download to my ESP32 (ESP31B)
[UPDATE2]: works with ESP32 in nano32 by gravitech
[UPDATE3]: works with ESP32S by AiThinker
This is a work in progress post.
[UPDATE] : check out new screenshots
[UPDATE1] : check out new pictures
[UPDATE2]: check out new pictures of nano32 by gravitech
[UPDATE3]: check out new pictures of ESP32S by AiThinker
post is available here too : http://shin-ajaran.blogspot.sg/2016/10/esp32-with-arduino-ide.html
Step 1: Windows8
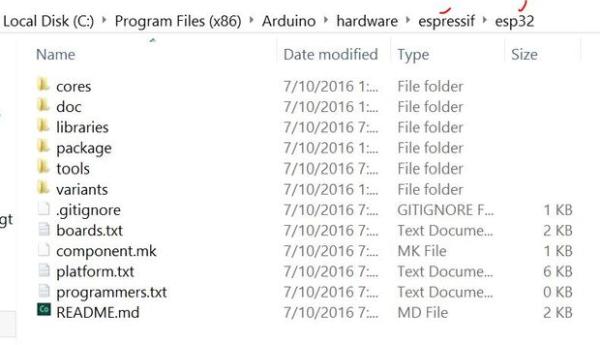
The instructions given in GitHub is crystal clear
https://github.com/espressif/arduino-esp32 download the necessary files.
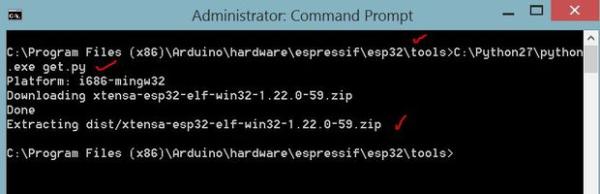
Here comes the fun bit, from the writeup it seems to be running off *nix. But since yours truly office laptop only comes with windows, he proceed nonetheless. Administrator rights needed to run the get.py
check out the screenshots for the details on win8.
Step 2:
![]()
Yours truly tried to compile the blink example with ESP32, but was greeted with this error.
Step 3: Ubuntu14.04 X86
On hindsight, perhaps it is better to install in the following environment
Ubuntu14 or any other *nix distros
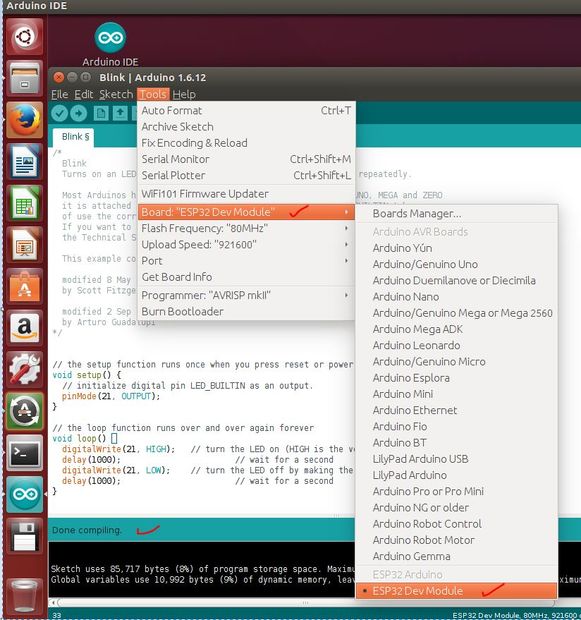
[UPDATE] Yes, the hindsight was right. ESP32 with Arduino IDE on Ubuntu14.04 works
check out the screenshots for the successful blink compiled.
Step 4:
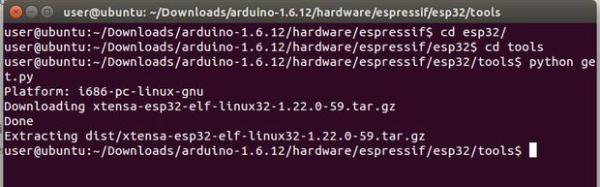
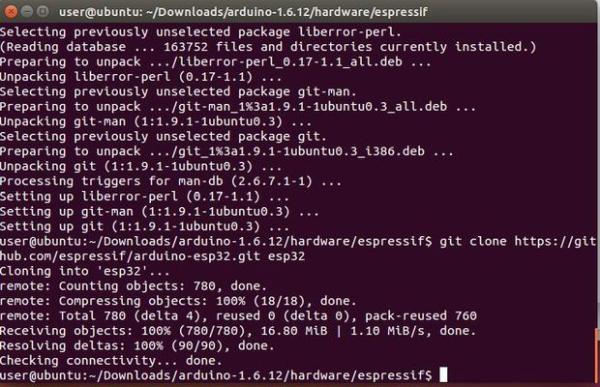
The screenshots of installing ESP32 for Arduino IDE on Ubuntu14.04
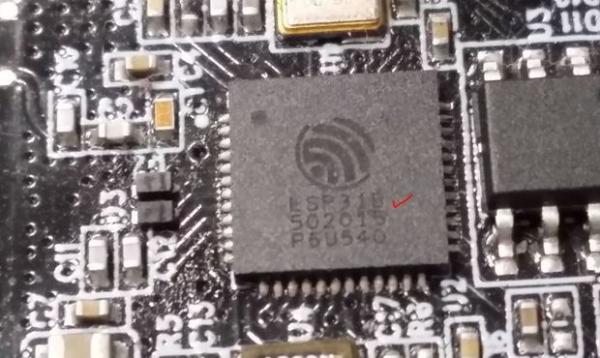
Step 5: ESP32 (circa Dec2015)
I do not have the latest ESP32 development board nor those sold by vendors such as adafruits or espressive or gravitech or AI-thinker. I do however managed to secured some through human networking; got a carrier to hand carry some ESP32 ESP3212 from shenzhen. [update] my carrier could not handcarry in, due to stock not available to fulfill
The ESP32 I had since last christmas, is not really a ESP32 per se. It is a ESP31B. Check out the screenshot.
Nonetheless, I have decided to download an example blink program using the Arduino IDE port for ESP32 on this piece of ESP31B that i have handy.
Step 6: Wiring of ESP32 (circa Dec15)

The wiring is as per outlined in the previous instructable on beta testing the ESP32 URL here: https://www.instructables.com/id/Beginners-ESP32-Guide-to-Assembly-Testing/
The only changes is the setting up for programming mode according to the spec sheet dated dec15 table1-2 pg5/20.
GPIO0 is pulled to low
GPIO2 is pulled to low
assert EN to low to “reset” the ESP32
for the ESP32 eg ESP3212 , boot mode in the following URL
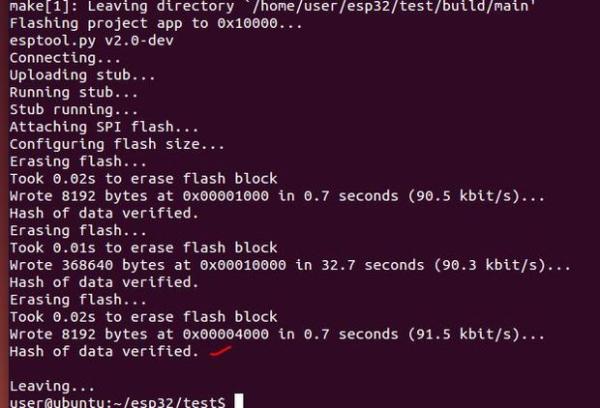
Step 7: Downloading Bin Into the ESP32

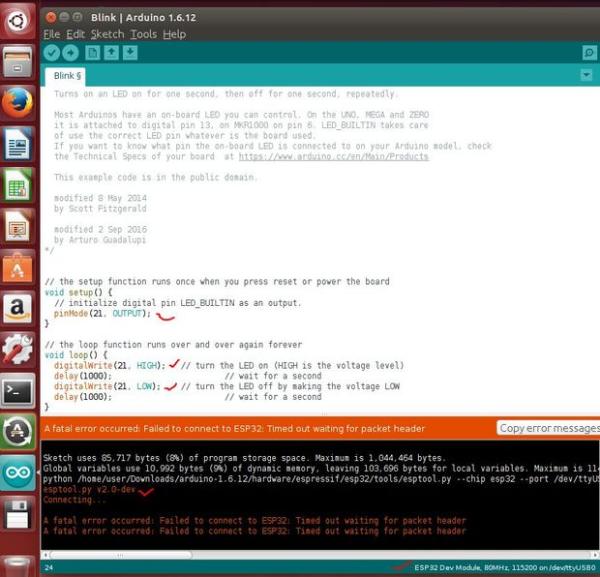
Verbose mode is enabled for downloading of the bin into the ESP32 via Arduino IDE
unfortunately, it doesn’t work out of box for my ESP32 (ESP31B) that is conveniently available to me.
Refer to the screenshots for details.
At the first try, esptool.py complained about “Timed out waiting for packet header”
After another assert on the switch to bring EN to low momentarily. Another try to download bin into the ESP32.
esptool.py complained about “failed to enter RAM download mode only got 2 byte status response”
Step 8: Observations
It seems that the esptool_ESP32.py worked on my ESP32 (ESP31B), but not the esptool.py v2.0.
Several things to test out
0. get my paws on the retail ver of ESP32 e.g ESP3212 chip that is in a convenient breakout board
1. ESP32 Arduino IDE (and not forgetting Espressif IoT Development Framework (IDF)) with the retail ver of ESP32 board e.g ESP3212
2. ESP32 with Espressif IoT Development Framework (IDF) with my ESP32 (ESP31B)
[update] I have got my paws on the ESP32 in nano32 by gravitech at SGD30 (approx USD20) a pop. the following steps outlined the experiments carry out
Step 9: ESP32 in Nano32 by Gravitech
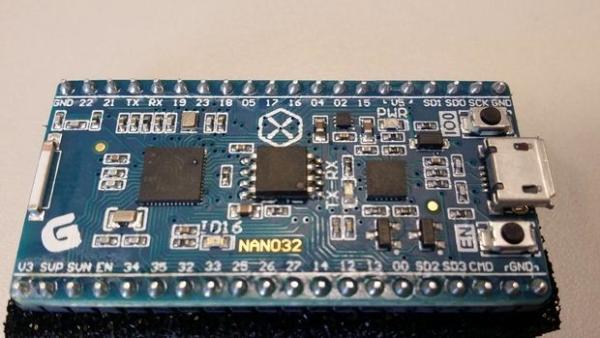
Earlier today, i came across Dr.Pan of gravitech. After several exchanges of pleasantries and many presentations later, yours truly was first inline to acquire the ESP32 in nano32 by gravitech at SGD30 (approx USD20) a pop.
The quality of this build is superb. As I was wondering where are the PCB traces for the antenna on the nano32, but was informed that it runs off a ceramic antenna instead. cool! can you locate the antenna from the picture of it or the schematic?
Step 10: FTDI Is Used in Nano32

the ubuntu setup that was outlined in the earlier steps is being used with ESP32 in nano32 by gravitech. note that the USB device is FTDI, instead of the trusty old CP2102
Step 11: ESP32 With Arduino IDE Hello World Using Blink

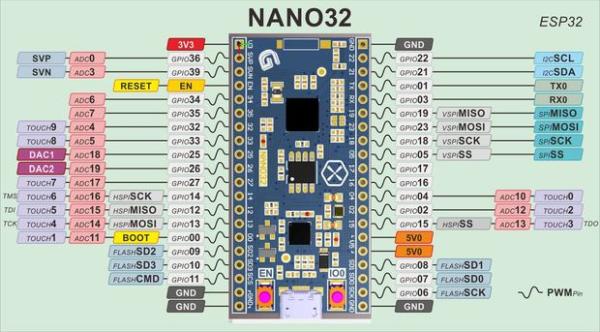
the ESP32 in nano32 sits snugly in the MK302 breadboard. One good feature of nano32 that is worth a highlight, it leaves 2 empty rows parallel to the long side of the board, on the MK302 breadboard. this makes quick prototyping that uses all of the GPIO pins possible without the need of another breadboard.
GPIO22 is used for the convenient sake, because it is sitting next to the GND pin. An LED is inserted without a current limiting resistor for the sake of “quick and dirty” play.
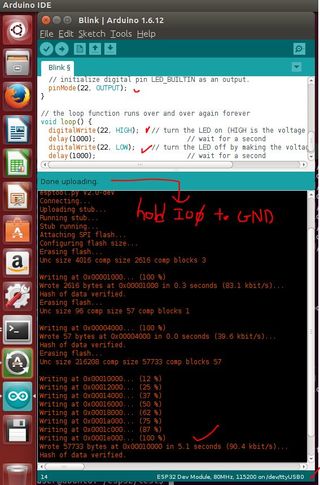
Hold down the GPIO0 pin via the push button, and press download icon on the Arduino IDE to compile the customary hello world program aka blink and flash the bin into the ESP32. Details in the screenshot.
Step 12: ESP32S by AiThinker

back in late Oct16, yours truly was at ShenZhen for Maker Faire, and embraced the landing of Typhoon haima. Lucky for him, he arrived before the typhoon landed on ShenZhen, otherwise there will be no update of such.
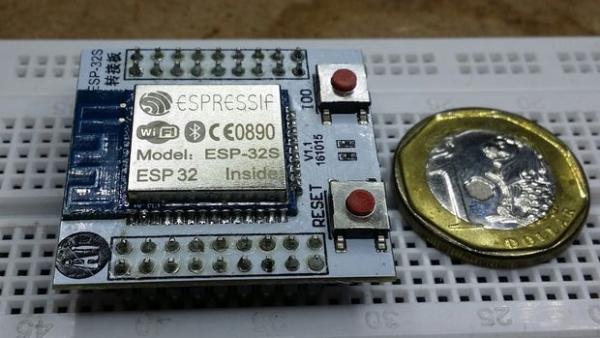
While in ShenZhen, yours truly networked with the good lads from AiThinker, and got his paws on the real ESP32S while there is a massive short of stock world wide. http://hackaday.com/2016/11/02/esp32-modules-poppi… Many thanks to staff from AiThinker coordinated the logistics at such a last minute request.
Soldering of the QFP is nerve wrecking. Thank goodness ESP32S doesnt smell like roast chicken when power with 3V3 from CP2102
Step 13: ESP32S by AiThinker
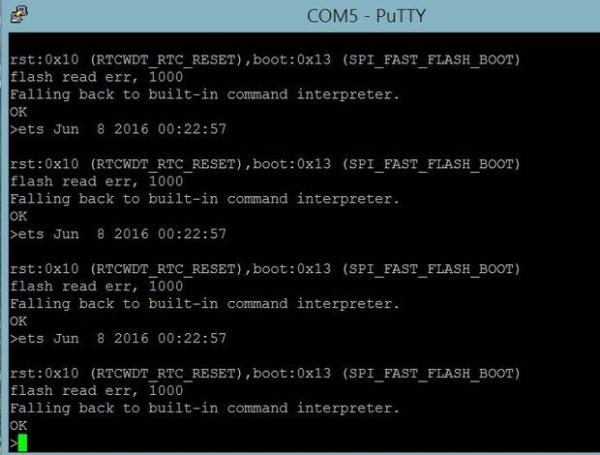

Quality supply is highly recommended to power up the ESP32S. While using only the CP2102 to supply 3V3 to ESP32S, the status is intermittent. Sometimes, the WiFi is up, sometimes not. While the WiFi is up, the serial comm on CP2102 definitely down. A screenshot of the erroneous state is here.
Step 14: ESP32S by AiThinker
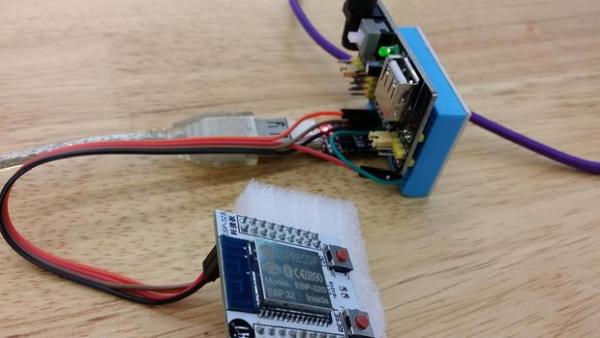

A breadboard powersupply board for MK302 is used with a DC wall adapter as the supply. the 3V3 regulated supply from MK302 is sufficient to power the ESP32S. the picture describes the ESP32S with breadboard powersupply powered with DC wall adapter. The screenshots describe the booting up of ESP32S, and also the operation mode
Step 15: ESP32S

The table describes the pin status to program the ESP32S via Arduino IDE or IDF or SDK
Step 16: ESP32 With IoT Development Framework (IDF)
The ESP32 with IoT Development Framework IDF setup earlier works like a charm with nano32. details in the screenshot.
now, what will you make with ESP32 in nano32?
Source : ESP32 With Arduino IDE