I’ve built a number of projects that have interfaced the output of the Simple Bat Detector with a microprocessor. The most recent was the BatLogger II. But I hadn’t come up with an easy way for others to experiment with this idea … until now.
My friend, Frank, in Germany, had wanted to make a relatively inexpensive bat activity logger … and he had come on the idea to do it using a Simple Bat Detector connected to an Arduino board. He added a data logging shield that provided a real time clock and an interface for an SD data card. The ArduBat was born.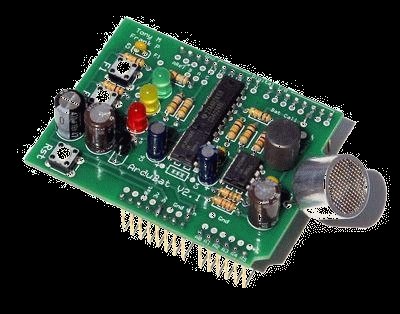
Once I had seen what the Arduino based hardware had enabled, I felt I needed to see if I couldn’t make this an even easier to accomplish task. So I designed the ArduBat shield, and now it is possible for anyone who is familiar with the Arduino, to more easily build their own bat detector based, microprocessor controlled devices.
The ArduBat shield is shown to the left. Besides the Simple Bat Detector circuit, there are two user configurable push-buttons, a reset button, and three user configurable LEDs.
What can the ArduBat be used for ? That depends on the inspiration and cleverness of whomever wants to use it. It might be used to develop a bat alarm, or a video camera that is triggered when bats are nearby. Or maybe you want to log the date and times that bats are active … like Frank and I do. The ArduBat doesn’t even have to be used with bats … maybe you could use it to detect and decode ultrasonic signals used for some other purpose ! Whatever the idea might be, I expect that the ArduBat could be easily applied to many different educational, scout, and school projects, as well as more serious applications.
The basic working circuit on the ArduBat shield is a slight variation of the enhanced Simple Bat Detector, and is shown in the diagram above. Two LM386’s amplify the bat calls from a piezo transducer and drive a CD4024 binary divider. The divide by 16 and divide by 32 outputs of the CD4024 are used to monitor and process the bat calls.
In the original Simple Bat Detector, only the divide by 16 output is used for listening. On the ArduBat, the divide by 32 signal is connected to a digital input on the Arduino ( digital pin 2 is recommended ). The pulses coming from the bat detector circuit at this point represent 16 cycles of whatever ultrasound has been detected. This pulse is easily measured by the Arduino with the PulseIn command … but other measurement techniques can also be used.
Another variation from the Simple Bat Detector is the addition of a 9 volt regulator to power the detector circuitry from the VIN supply from the Arduino. Also, the monitor output is fixed at one volume level, instead of having a pot to set it. This is OK, as you really will only use this output for testing and programming purposes.
Besides the bat detector circuitry, there are a some user interface circuits to give the shield more utility. All of the user interface circuits are teminated in solder pads that can be wired to whichever Arduino digital pins you might wish to use.There are two pushbuttons on the circuit board, F1 and F2, along with a reset button that gives you some control functions for whatever project you are constructing.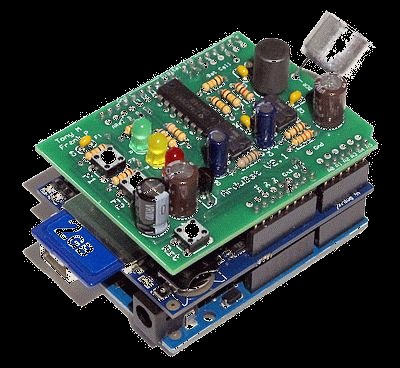
There are also three LEDs … typically green, yellow, and red, that can be used to display the various functions and information that the project needs to communicate back to the user.
One reason for including these circuits is that the ArduBat shield is usually going to be the TOP board of an Arduino project stack. The bat detector circuitry on the ArduBat board operates at very high gains, and is susceptible to electrical noise generated by the other circuits on the Arduino stack. To minimize this interference, a full surface ground plane is on the bottom of the ArduBat shield to screen as much EMI as possible. So the ArduBat should be on the top of the stack to make the best use of this shieldin
For more detail: A Simple Bat Detector based shield for the Arduino Uno