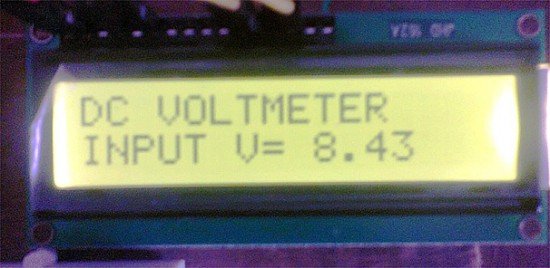
Here is a useful circuit for Arduino lovers and experimenters. It is a simple digital voltmeter, which can safely measure input dc voltages in 0 to 30V range. The Arduino board can be powered from a standard 9V battery pack, as usual.
As you may well know, Arduino’s analog inputs can be used to measure DC voltage between 0 and 5V (when using the standard 5V analog reference voltage) and this range can be increased by using two resistors to create a voltage divider. The voltage divider decreases the voltage being measured to within the range of the Arduino analog inputs. Code in the Arduino sketch is then used to compute the actual voltage being measured.
 As you may well know, Arduino’s analog inputs can be used to measure DC voltage between 0 and 5V (when using the standard 5V analog reference voltage) and this range can be increased by using two resistors to create a voltage divider. The voltage divider decreases the voltage being measured to within the range of the Arduino analog inputs. Code in the Arduino sketch is then used to compute the actual voltage being measured
Notes
- If the display reading didn’t match when comparing with your lab DVM, use a precision DMM to find the actual resistance of R1 and R2, and replace R1=100000.0 and R2=10000.0 in the code with that values. Next check the 5V supply with the lab DVM at GND and 5V pins on the Arduino board. It might give you less (for instance 4.95V), replace the value into the code vout = (value * 5.0) / 1024.0 (ie replace the 5.0 value to the actual V reading, in this case 4.95V). Further,always try to use precision 1% tolerance resistors for R1 and R2.
- The resistor values (R1&R2) in the circuit diagram provide some over-voltage protection then measuring low voltages. Keep it in mind that any input voltage higher than about 55V could fry the Arduino. No other protection (for voltage spikes, reverse voltages or higher voltages) is incorporated in this circuit!
Arduino Digital Voltmeter Sketch
- /*
- DC Voltmeter
- An Arduino DVM based on voltage divider concept
- T.K.Hareendran
- */
- #include <LiquidCrystal.h>
- LiquidCrystal lcd(7, 8, 9, 10, 11, 12);
- int analogInput = 0;
- float vout = 0.0;
- float vin = 0.0;
 float R1 = 100000.0; // resistance of R1 (100K) -see text!
- float R2 = 10000.0; // resistance of R2 (10K) – see text!
- int value = 0;
- void setup(){
- pinMode(analogInput, INPUT);
- lcd.begin(16, 2);
- lcd.print(“DC VOLTMETER”);
- }
- void loop(){
- // read the value at analog input
- value = analogRead(analogInput);
- vout = (value * 5.0) / 1024.0; // see text
- vin = vout / (R2/(R1+R2));
- if (vin<0.09) {
- vin=0.0;//statement to quash undesired reading !
- }
- lcd.setCursor(0, 1);
- lcd.print(“INPUT V= “);
- lcd.print(vin);
- delay(500);
- }
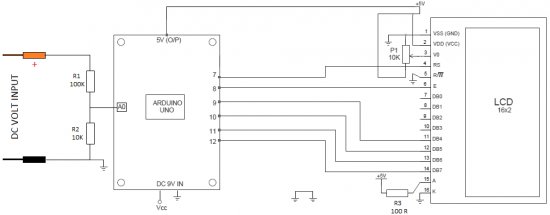
Schematic of the Arduino DVM Circuit

Parts
- Arduino Uno Board
- 100K Resistor
- 10K Resistor
- 100R Resistor
- 10K Preset Pot
- 16×2 Parallel LCD ( Hitachi HD44780 driver compatible)
Source: Arduino Digital Voltmeter 0V to 30V