Introduction
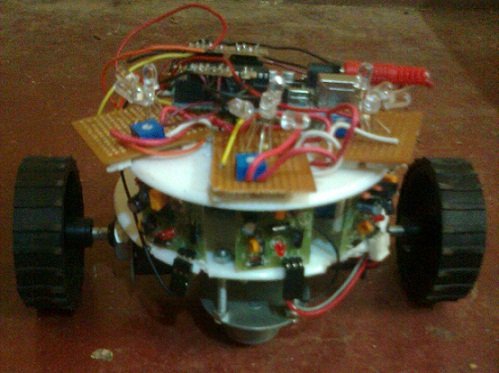
For our ECSP project we have made a bot that senses and follows light and at the same time avoids obstacles.
Rationale
We wanted some hands on experience in using microcontrollers and electronics in general . Using a combination of light and distance sensors seemed like a strong combination and a good learning oppurtunity.
Hardware
Components used:-
1)L293D motor driver
2)IC 7805 voltage regulator
3)Arduino Uno board with Atmega328
4)IR photodiodes(used to make light sensors)
5)IR proximity modules
6)Dc motors(300 RPM)
7)Lithium ion rechargeable batteries (ICR 18650-20)
8)Plastic wheels with grooved rubber
Electrical Part
Light sensors:-We used 3 light sensors,each used to sense a different direction. Each sensor uses an array of 4 photodiodes arranged in parallel in the circuit but like a flower externally. This improves the range and angle of vision of each sensor. Circuit diagram:-
he three light sensors each arranged like a flower
Each sensor gives a range of about 0.5 metre when light is shined on one of the photodiodes head on. On account of the directional nature of the photodiodes when light is shined on it, only one of the photodiodes goes high. Each sensor is powered by a 5 V line and its output is given to the analog input pins of the arduino.
Distance sensors:-Each sensor is a module purchased directly. Each sensor gives a maximum range of 60 cm adjustable using a pot. In the bot the range has been set to around 15 cms. When an obstacle comes within range of the sensor the sensor goes high. Output from the sensor is given to the digital input pins of the arduino. The sensors are powered using a Vcc of 5V.
R proximity sensor used in the bot. The led shown glows when an obstacle is detected. Battery:-We had on-board power using 3 lithium ion rechargeable batteries rated at 3.7 V and 2000 mAmp hour current capacity. During testing it had to be recharged roughly every 2 days and the charging time was approximately 1.5 hours using a 5V 1 ampere adapter.
Microcontroller:-We used a commercially available Arduino Uno board with an Atmega 328 mounted on it. This microcontroller board has 11 digital I/O pins and 6 analog input pins. PWM can be given on 6 pins out of which we used 4.
Motor control:-Once the inputs from all the sensors is processed the arduino gives a PWM to the two individual dc motors using a motor driver IC(L293D).
Pin configuration of L293D
The L293D is given a 12 V(Vs) power supply which powers both the motors. The PWM(pulse width modulation) given by the arduino controls the speed of the motor. The two enables and Vs is given a regulated 5V supply through the 7805. Power supply to all components:-The power supply for all the components in the bot which needed to be powered i.e. sensors, arduino, motors and the L293D was given through one board.
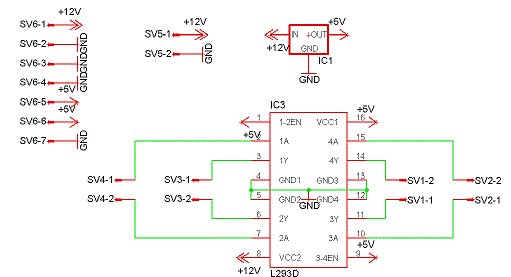 The 5V line was the regulated output of a 7805 which was given a 12V input from the battery.
Legend:-
SV6-2 to SV6-4 are grounds each of which go into the distance sensor ,light sensor and one ground is connected to the ground pin of the arduino(as precaution).
The two 5V lines SV6-5 and SV6-6 go to the distance sensors and the light sensors.
SV6-1 and SV6-7 is the power supply for the arduino board.
SV5-1 and SV5-2 is the connection from the battery.
For more detail: Light and obstacle detecting bot