This Instructable is all about one of life’s simple actions, flipping a light switch on and off.
At oomlout we do it many times a day, so many in fact it came to a point where we asked ourselves “Can’t we get an Arduino to do this?”. Of course we can, what follows is how we went about doing it.
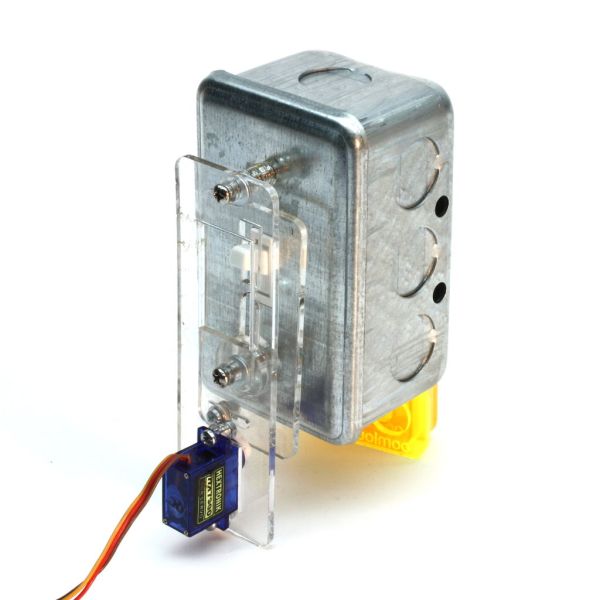
With the help of some acrylic, nuts and bolts and a small hobby servo we have made a great little switcher (we’re calling it our Servo Switcher – (SESW)).
Features:
- No need to mess with any high voltage wiring.
- Switch is still operable by hand.
- Easy to make and assemble
Applications:
- Simple light switching.
- Can be paired with sensor to make for more complicated applications. (security lights, temperature control on ceiling fans, night lights, the possibilities are endless) (some sensing examples are in a video on step 3 ).
- Wire up a switch to a socket and control anything that has a plug.
(shameless plug)
If you feel like skipping the building and getting straight to experimenting lovely kits are available from the oomlout.com shop
Step 1: Parts & Tools
Two options here.
Option 1: Purchase a lovely kit from oomlout.com
- kits with all the acrylic, bolts and servo motor are available from oomlout.com’s web shop (here) ($20 or 3 for $40)
Option 2: Make your own.
Electronics
- Mini Servo Motor – A small servo motor, these are available in many different power levels, but you will be requiring one of the stronger ones. We use (this one) (shipped from hong kong so can get quite pricey)
Nuts and Bolts: (available at home depot)
- 3mm x 10mm bolt (x3)
- 3mm nut (x2)
- 3mm locknut (x1)
- 3mm washer (x3)
- 5mm washer (x4)
- 6-32 x 1.25″ machine screws (x2)
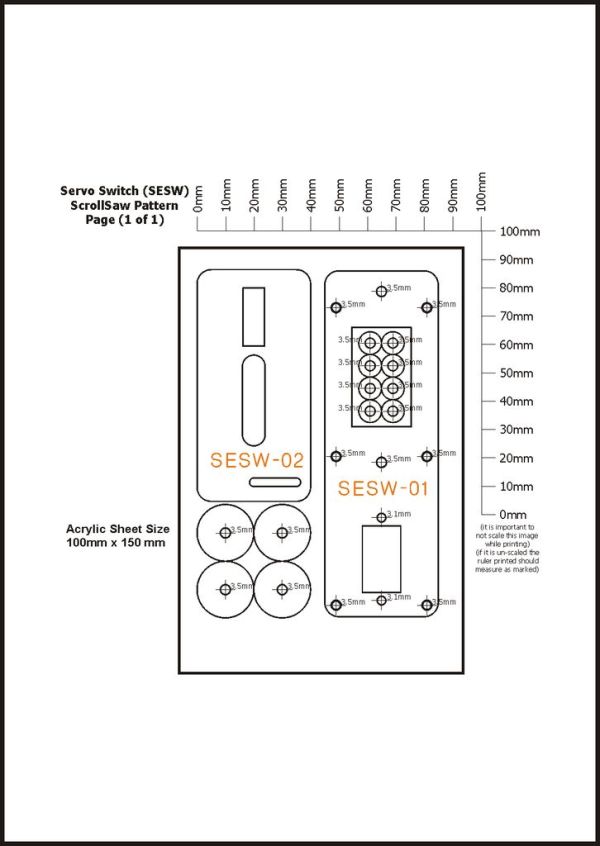
Acrylic – (several options)
- Cut Your Own (Scroll Saw) — Download the scroll saw pattern (03-(SESW)-Scrollsaw Pattern.pdf) glue it to a piece of 3mm Acrylic, cut and drill
- Cut Your Own (Laser Cutter) — Download (00-SESW-Parts File.eps or .cdr) and cut it on your laser cutter using 3mm acrylic
Step 2: Assembly & Wiring
With all the pieces ready to go what comes next is throwing them together.
Download the “.pdf” assembly guide below and follow the steps. (04-(SESW)-Assembly Guide.pdf)
A Few Notes:
- A small 3mm hole must be drilled in the servo horn before step 3
- In Step 4 when attaching the servo horn first rotate the servo as far clockwise (looking at the top) as it will let you go. Then attach the servo horn in it’s full upright position.
Wiring:
- Wiring is super simple. The servo plug has three pins which should be connected as follows
Pin 1 - black or brown - gnd Pin 2 - red - power Pin 3 - white or orange - signal
Pin 1 – attach to the negative side of your power supply (-)
Pin 2 – attach to positive power (4.8v – 6v)
Pin 3 – attach to pin 9 or 10 of your Arduino (or provide with a pulse between 1000 and 2000 mS for more details on controlling servos try (here)
for more detail: Easy DIY Home Automation (using servo switches)