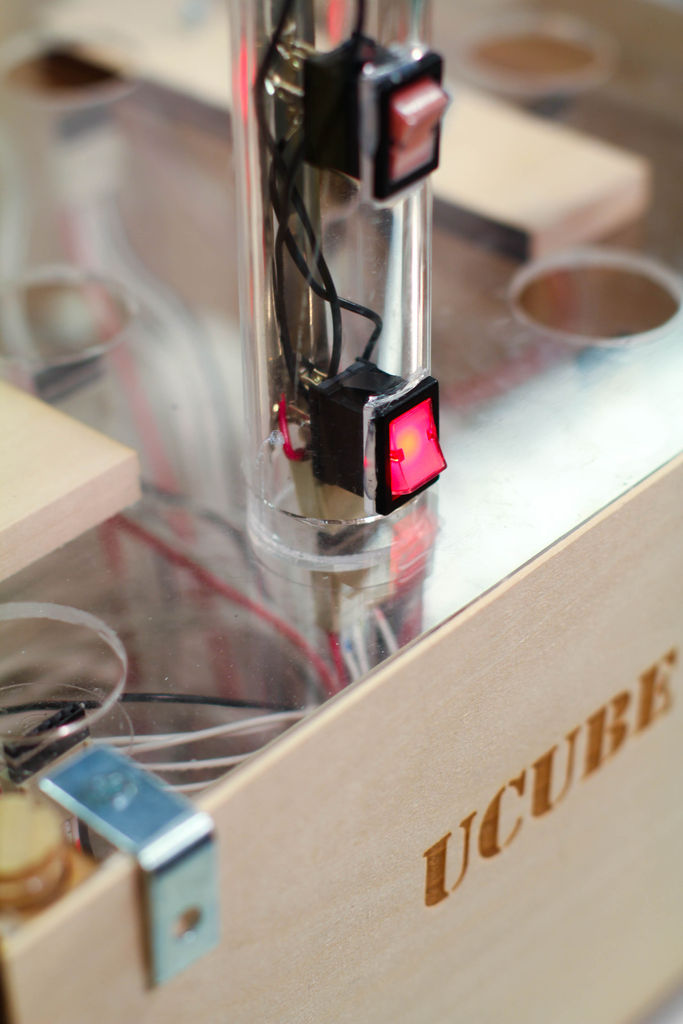
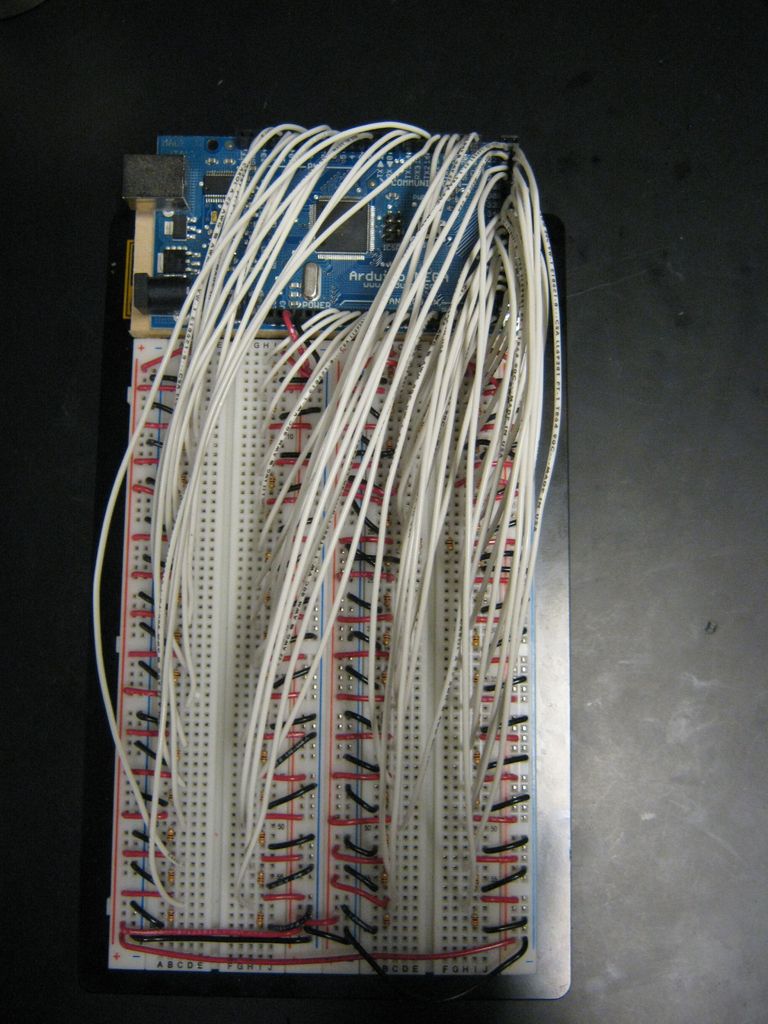
Note: I would love to eventually publish detailed instructions on how to make your own UCube, but since the design is still changing and improving, this post will gloss over a lot of those details and focus on how you can model and print 3D objects just by flipping a few switches.
This project was designed and built at the Craft Technology Lab at the University of Colorado Boulder: http://l3d.cs.colorado.edu/~ctg/Craft_Tech.html
Here’s a brief video overview of (some) what the UCube can do:
Step 1: The Basics
The software then displays the active points on the computer screen. From the software, there are several actions you can take to form shapes and models. You can take the convex hull of the shape (imagine wrapping a piece of paper around the set of points, and that’s pretty much the convex hull), the wireframe of the convex hull, make a spline through the points, and create a path through a sequence of points. There is also an ‘edit’ mode whereby you can tweak the vertices of your model to include points outside of the normal point grid (off the integer lattice). When you’re satisfied, you can export your model as an .STL file and print it on a 3D printer.
The pictures in this section follow a simple use-case for the UCube: defining the vertices of a model on the physical interface, selecting the convex hull of the active points through the software, exporting the .STL file of your model, and printing it out on a 3D printer.
The next sections will go through more complex modeling techniques and features of the UCube system. (You can do much more than make a cube).
Step 2: More Complex Modeling
The knot mode allows you to record a sequence of selected points on the UCube and draw a 3D path connecting those points. First, you select the ‘knot’ button from the sidebar (shown in pictures in the step). Next, activate (in sequence) the points you want the knot to follow – the software will build the knot in real time on the screen. If you make a mistake or change your mind, you can hit the ‘clear knot’ button and start again. If you want a closed loop kind of knot, click the ‘close knot’ button when you’re done modeling. You’re now ready to export your knot to and STL file and print it out! Sweet!
Step 3: Other Functionality
In addition to solid shapes and knots, the UCube software has some additional functionality that increases it’s flexibility and expressiveness. As mentioned earlier, the UCube can model splines through a path of points (like the knot, but with curves and without a 3D mesh to print out). The UCube also has an ‘edit’ mode whereby you can tweak the points of your shape by clicking and dragging them on screen. This allows the modeling of shapes with vertices that lie outside the structured grid of points that the switches default to.
For more detail: The UCube: Design & Print 3D Objects by flipping switches