One of the most fun and useful projects on instructables is to create your very own solar USB/ iPhone charger. They’re not overly difficult to make, nor are the parts overly expensive or hard to find. For the most part they do a rather good job of charging up small gadgets. Mostly.
The big flaw in the DIY solar charger world are the batteries. Nearly all the designs on instructables (including all of my designs) use standard NiMh rechargeable batteries. They’re cheap, easy to find, and very safe to use. The problem is that their capacity and voltage are both low, and the gadgets we keep wanting to charge are getting bigger and better batteries.
For instance an iPhone 4 has a 2,000mAh battery inside of it. Now that isn’t too tough to charge up decently with a well made solar charger using 2 or 4 AA batteries. On the other hand an iPad 2 has a 6,000mAh battery pack on it. Not so easy to charge up.
The solution for these problems is to ditch NiMh batteries and turn to Lithium batteries.
In this guide I will show you how to make your very own Lithium battery charger. One that is cheap to make, easy to build, and most importantly safe to use.
(Oh and help me win the Instructables Green Tech Contest by voting for this project! An iPad would be great for my classroom! Even better, I’ll build a massive Lithium powered charger to run the iPad. It’ll be 100% green in my classroom.)
Step 1: What you need
Electronics Parts:
5V (or greater) Solar Cell
3.7V Lithium Ion Battery: 2,600MAH, 4,400MAH, 6,600MAH
Lithium Battery Charge Controller
DC-DC USB Boosting Circuit
2.5mm Female Panel Mount Plug
2.5mm Male Jack with Wire
1N4001 Diode
Wire
Building Supplies:
Electrical Tape
Shrink Tubing
Double Sided Foam Tape
Solder
Altoids Tin (Or other enclosure)
Tools:
Soldering Ion
Hot Glue Gun
Drill
Dremel (Not necessary but good to have)
Wire Cutters
Wire Strippers
Helping Hand
Safety Goggles
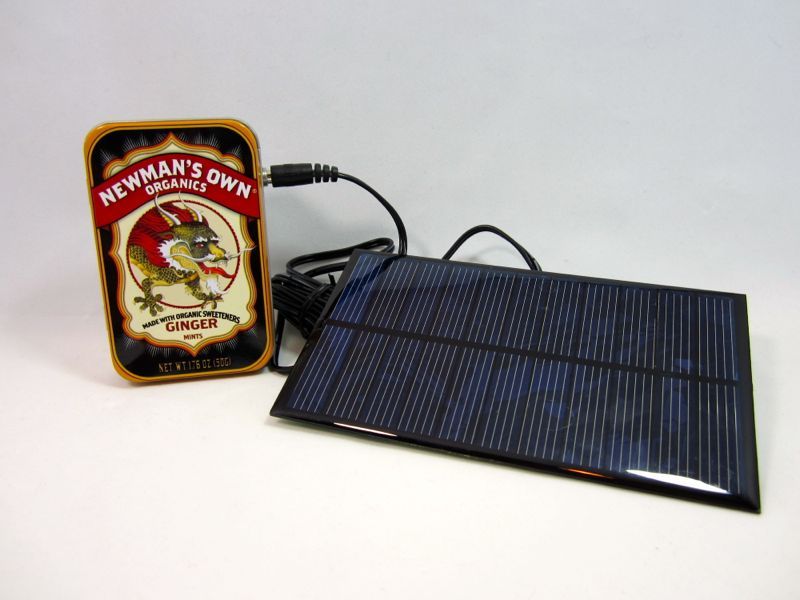
This guide will show you how to make a Solar powered version of this charger. You can also easily ditch the Solar section completely and rely on USB to charge up the Lithium battery.
While many of the parts for this project can easily be found at most online electronics store, a few items like the “DC to DC Boosting Circuit” and the “Lithium Charge Controller Board” are more difficult to find. As this guide continues I’ll provide you with several options on where to get most of the parts as well as a detailed rundown of what each one does. Then you can make an informed decision as to which one best meets your individual project needs.
As a disclaimer I will say that I do sell both finished versions of this charger, parts to make this charger, and complete kits on my website BrownDogGadgets.com. We currently have two kits available, a basic Solar USB Kit and an updated Lithium Heavy Duty Kit.
Step 2: What Are Lithium Batteries?
Whether or not you know it, you’ve probably got a one in your pocket right now. And one on your desk. And one in your purse/ backpack. Lithium Ion batteries run most modern electronics. They provide a large capacity of power, a high voltage level, and a high number of recharges for their size. This as opposed to rechargeable AAs which are are most always NiMh in composition.
In case it’s been a while since high school chemistry for you, the difference between your standard rechargeable AA battery and a Lithium Ion battery are the chemicals inside. Take a look at the Periodic Table and you’ll see that Lithium is on the far left in the first column, where all the most reactive elements live. This as compared to Nickel which hangs out in the middle of the table with a lot of random nonreactive stuff. (And if you want to know why it’s so reactive, that’s because it only has one lonely valance electron. Which I’m sure at least one of my 8th grade science students probably still remembers. Sigh… teenagers.)
This is why Lithium often gets a bad rap. Since it’s so darned reactive it can sometimes get out of control. A few years back Sony made a bad batch of laptop batteries, some of which started on fire randomly. (Did you know Sony makes a good chunk of the world’s laptop batteries, for most major brands?)
This is why we must take certain precautions when dealing with Lithium Ion Batteries. In order to maintain a very precise voltage when charging. The 3.7V batteries we’re using in this guide need to have a charging voltage of 4.2V. A volt high or a volt low can mean an out of control chemical reaction which can lead to danger.
This is why you must be careful when dealing with Lithium Batteries! While they are quite safe when handled with care, if you start doing things you shouldn’t you can end up with big problems. Treat them with the respect they deserve.
Step 3: Choose a Lithium Charge Controller
As reactive as Lithium batteries are all you really need to be safe is to have a circuit that controls the voltage going to your battery.
While you could make your own charge controlling circuit, it’s far easier to just buy one that you know works. For this you have several options.
Adafruit is now on it’s second generation of Lithium Charge Controllers that have several options for power input. They’re very nice, but a bit on the large size. Not at all small enough for our Altoids tin sized enclosure.
I sell some small Lithium Charge Controller Modules on my site. These are the ones I use in my kit and in this guide. I like them because they’re small, simple, and have status LEDs for charging and when the battery is full. Like the Adafruit charger you can also use the USB port on it to charge up the Lithium Battery if you lack sun. (Something that is very handy for any solar charger.)
No matter what you use, be sure that you know how to use it and what goes where.
Step 4: USB Circuit
Most modern gadgets can charge via USB. It’s become the standard world wide. So why do we need a special circuit for it? Can’t I just wire up a generic USB port directly to the battery?
The problem is that USB operates at 5V of power. The Lithium Batteries you’d want to use with this project are only 3.7V of power. The USB Circuit I have in this project is a DC to DC Boosting Circuit. Meaning it bumps up the voltage so our gadgets can actually charge. (This as opposed to a lot of USB chargers on instructables that use 9V or 6V worth of batteries and then drop down the voltage, which makes using solar very difficult.)
The circuit I’m using, and sell on my website, is a surplus circuit from some random charger that I found after a lot of testing. It’s more or less a clone of the Adafruit Minityboost Circuit. Except it’s cheaper and already made for you.
So yes, you can find a cheap USB charger online and take it apart BUT listen up. What you want to find is one that goes from 3V (AKA 2 AA batteries) up to 5V (AKA USB). What you don’t want to do is take apart a wall USB charger or a car USB charger. Those convert higher voltages to lower voltages, which is the exact opposite of what we’re trying to do.
Also, keep in mind that while the USB Circuit I have and the Mintyboost both work with Apple Products, many USB chargers do not. Apple products check the data tabs on USB to see what they’re plugged into. If they don’t see any power flow over the data tabs, something no other gadget does, then they won’t charge. Believe me, I’ve tried a lot of cheap circuits off eBay only to find that my iPhone 4 rejected them. You don’t want this to happen.
Step 5: Choose a Battery
Do a quick google search and you’ll find a wide array of batteries with different sizes, capacities, voltages, and prices. It can be a tad confusing at first.
For this charger we’re going to be using a 3.7V Lithium Polymer (Li-po) Battery. One that is probably very similar to the one in your iPod or cell phone. For this project you really want to be using a 3.7V battery, as thats what our Charging Circuit is designed to charge.
While it should be a non issue, you need to get a battery with a built in Overcharge / Undercharge protection. Many sites will call this “PCB Protection.” (Looking at you eBay.) This just means that there is a small circuit board and chip that makes sure the battery stops charging or stops discharging at the right time.
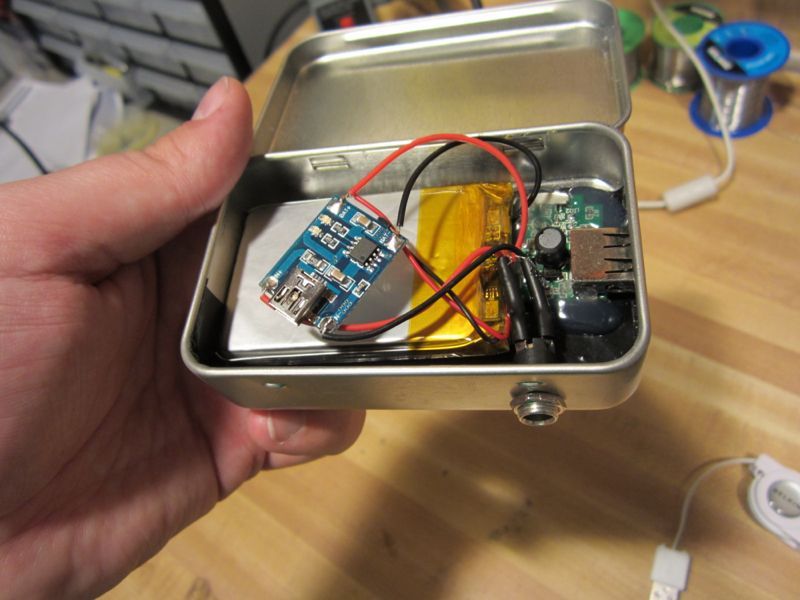
Since you can easily find many different batteries out there, your big concern should be the physical size of the battery along with it’s capacity. The size really depends on your enclosure. In this guide I’ll be using an Altoids tin for a case, so my size is rather limited. While I would have loved to fit a 4,400mAh battery inside an Altoids tin I instead have gone with a 2,000mAh battery instead.
For more detail: Lithium Battery Solar USB – iPhone – Arduino Charger