Step 1: Materials
The materials for this project are pretty straight forward. You’re gonna need…
– A remote control car. The one I used has one small DC motor to drive the car and a small stepper motor to control the steering. Having a car with a similar motor configuration will make this project much more smooth for you. Specifically the kind of car I used is an Xmod from radio shack. I have a few, and they are a really fun medium to hack with. I don’t know if radio shack still sells them but I’m sure you could find one for really cheap on ebay.
– A TV remote. I set up the project with a standard Comcast remote, most people seem to have these. The project can still be done with a different remote you’ll just need to add an extra step and you’ll probably learn a little extra about the code and reading infra red signals in general.
– A motor controller. I have one of the Arduino shields from sparkfun, and I would recommend picking one up they make projects with motors much easier. If you want to get deep with it you can make your own out of an H bridge or some transistors, there are plenty of instructables around on how to do this.
– An Arduino Uno or some smilar variant.
– An Infra Red receiver. You can find these in just about anything that uses a remote. I took mine out of an old portable DVD player. You can also find them at radio shack or cheap online.
– An altoids tin.
– Some breadboard jumper wire.
You’ll also need a hot glue gun and soldering gun to get the project together!
Step 2: Prepare The Car
You’re going to want to get your car down to the bare bones. If you have an Xmod look at the pictures to see exactly what needs to come out. As long as you have access to the wires into and out of the drive and stepper motor you should be good. To make things simple I recommend soldering some breadboard compatible tips onto these wires, make sure they are long enough to reach your motor controller. Your car should also have an onboard power supply, find the voltage and ground to this and dress it the same.
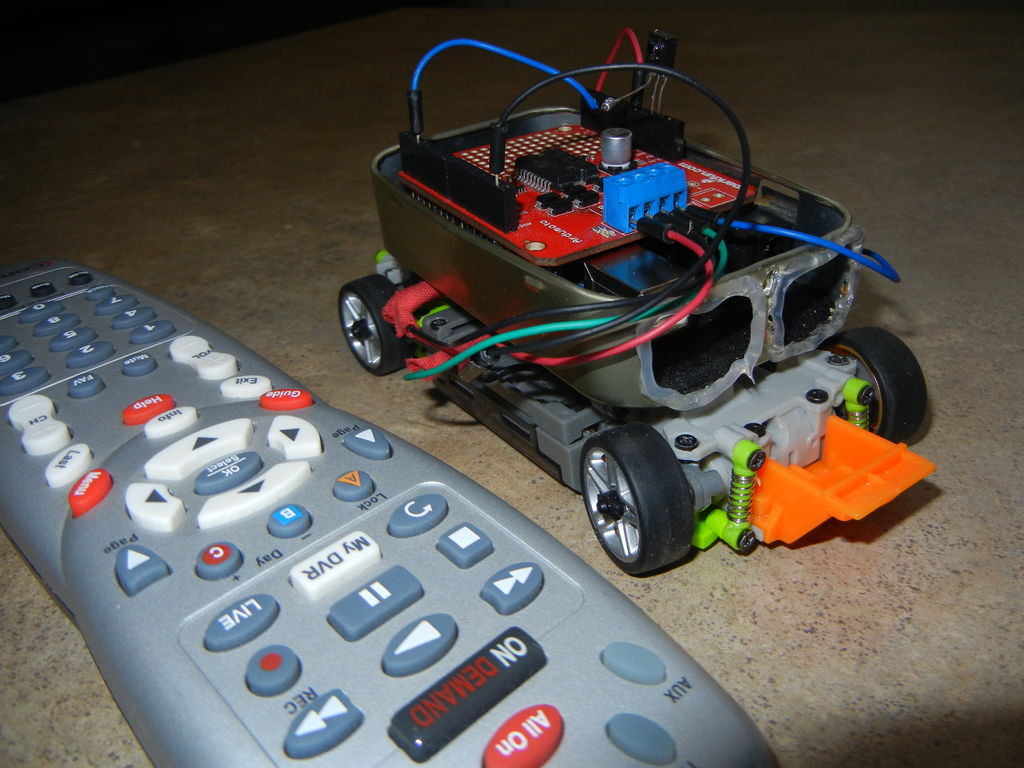
I added an enclosure for the hardware on my car and I would recommend doing the same. The bottom half of the altoids tin works great. Just drill some holes in to access the Arduino’s power supply and line the bottom with electrical tape just to completely avoid any shorts. Hot glue that onto the top of the car and you’re looking good!
** Note ** If you have an xmod car save that blue board you took out. If you happen to find the remote to the car (or never lost it in the first place 😛 ) you can make some cool things with this like a remote controlled light dimmer or whatever you want.
Step 3: (Optional) Program Your Remotes
<http://learn.adafruit.com/ir-sensor/using-an-ir-sensor>To program your remote download the IR decoder code from this instructable or the link above. Configure your Arduino as shown and upload the code. Open serial communications, and when you point your remote at the Arduino and press the button you wish to configure a long list of numbers will appear on the screen. (If you want to know more about what this list means, you do, click the link above!) Open IR_Car1 file and access the ircodes.h file. Copy the second half of your list of numbers and replace the existing numbers in this file under the command you wish to configure the button for.
Repeat this step until all of the commands are configured to your remote!
If you are having issues (again) check out the link above. Make sure your Arduino is configured correctly and that your are copying the right set of numbers and deleting the old set. When copying be sure to include the bracket to close the code and semicolon to end the line!
 IR_Car1.zip4 KBirdecoder.zip2 KB
Step 4: Loading The Software
At this point you should be using a Comcast remote or have configured your remote to the code!
Pop your Arduino into the computer, download the code below, and upload it to your board!
The comments at the top of the code are for my car. But your stepper motor should be connected to Channel A and the drive motor to Channel B. If your car goes in reverse when you press forward or turns left when you press right switch the order of the wires within the incorrect channel. Also connect your IR receiver just like you had it before, but this time on top of the shield.
I clipped the VIN pin to my Arduino from another project so I have to power it from a different power source than the cars onboard power. Unless your cars voltage is within the range of the Arduino I suggest you do this anyway. Hook you cars voltage to the VIN pin on the motor controller and the ground wire to GND. Power up the Arduino and place the boards into the storage on your car.
For more detail: Construct A TV Remote Controlled Car Using Arduino