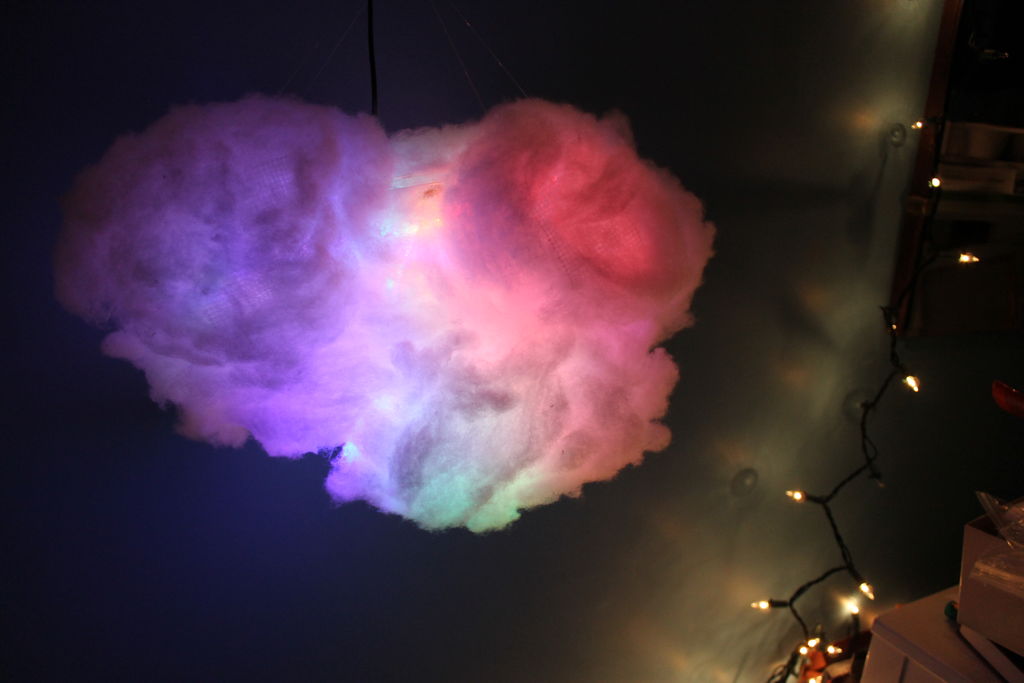
This is a project I created for a Digital Art and Installations class. The class covered basics of several types of programming, and our projects were meant to be an interactive cross between art and technology. This was a fun and easy project with really impressive results (if I do say so myself) . The same technology could be applied to many different types of types of projects. The technology is very easily altered as well, for example, I was considering using a distance sensor or a light sensor. I had everything on hand, so it cost nothing. This is my first instructable :] Sorry the photos don’t really do it justice! Check out the video to see it in action:
-Light weight, transparent container. example
-Mesh Spackle tape. example
-Pollyfill stuffing
-Fishing line or thread to hang
-Arduino
-LEDs, Wires, Resistors, Infrared sensor and Remote
-Battery or power source for arduino
-Breadboard or blank circuit board, I used this one from Radio Shack.
Tools:
-Hot Glue
-Soldering iron (optional)
-Wire cutter, strippers
 Remove these ads by Signing Up
Step 1: Circuit and Code
http://www.arcfn.com/2009/08/multi-protocol-infrared-remote-library.html
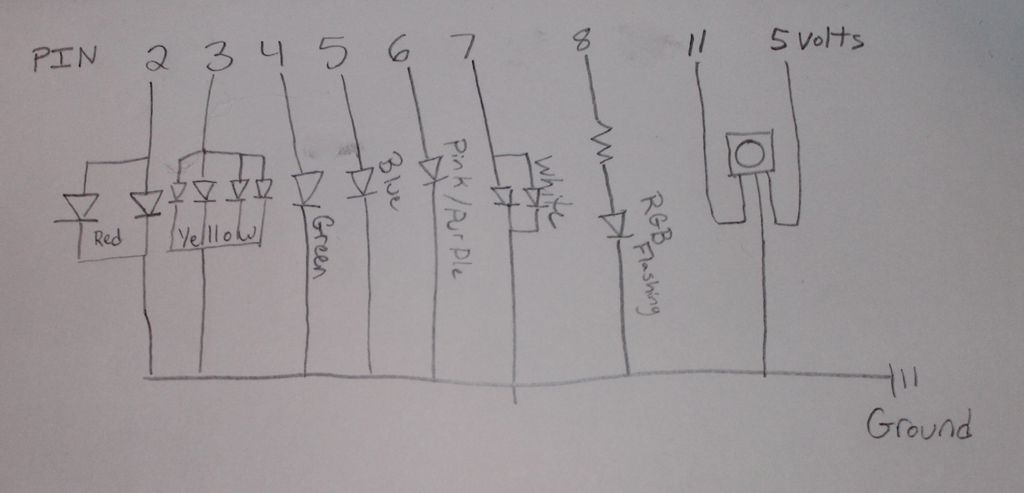
Set up the bread board with the attached schematic.
2 red leds to pin 2,
4 yellow leds to pin 3,
1 green to pin 4,
1 blue to pin 5,
1 pink/purple to pin 6,
2 white to pin 7,
1 RGB flashing to pin 8 (I had to use a resistor to dim it)
The reason I used multiple leds in parallel was so that the light would be dimmer from each individual one and be more defused
Connect the left leg on the IR sensor to 11, middle to ground, and right to 5 volts
Use the IRrecv Demo included with the examples to “configure” your remote. To do this run the sketch and open the serial monitor. Press buttons on the remote and note what numbers apear.
Open the attached IR Rainbow code and scroll down to each case statement Change the number after the word case to match the button you want to use.
My code has
sun (white and yellow)
rain (blue and white)
lightning (blue and purple with flashing white)
??? (RGB flashing led)
stop
and also on/off for each individual color.
 IRrainbow.zip1 KB
Step 2: The Housing
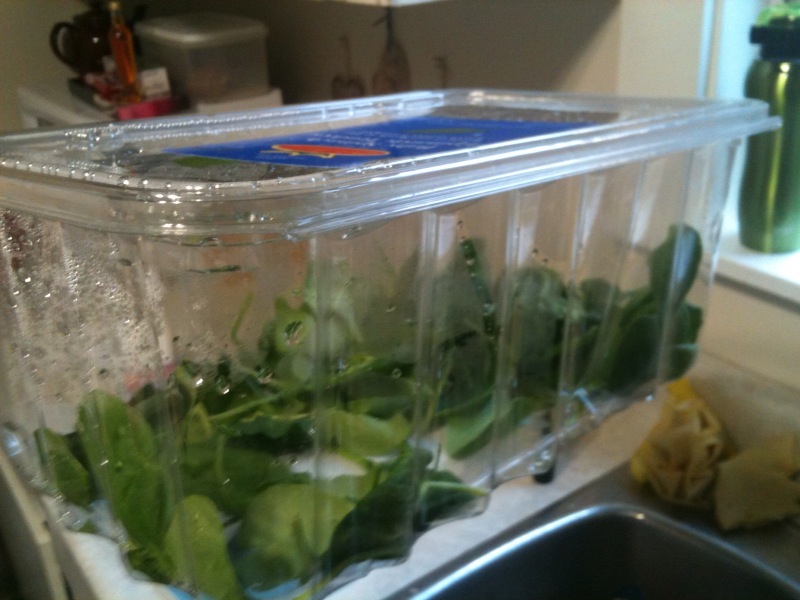
Take the plastic container; something light weight, and clear. Mine was from spinach. Like this one.
Attach fishing line or thread to the corners of main part of the container, not to the lid. Secure them in the middle so that it hangs evenly.
With the lid off, hang the container at a comfortable height to work on it. Attach the mesh tape in arches to help disguise the squareness of the box. To do this, cut lengths between about 6 inches and a foot, hot glue down one end, and then the other making sure the tape is arching away from the container. Creating an X with the arches helps to give more support. (in the picture my cloud was starting to look a bit square-ish from being squished while transporting it. But before it was much puffier looking)
Next, hot glue puffs of poly fill around the whole container.
Next, Poke wholes in the lid of the box, and use twist ties, wire scraps or cable ties to secure the breadboard or circuit board and arduino to the lid of the container. If you used a battery secure that down as well, if you are using a power cord, poke a whole in the top of the container in the middle and feed it through.
Flip the lid over and cover it and create puffs on top the same way you did on the outside of the container.