We have used the pda with a desktop computer (robot) and with the Nslu2. Here we are going to use an old pda with serial port.to act as an lcd. Everyone either has one or knows someone who has an old pda that they do not use anymore. Ask them if you can borrow it get get it cheap. Though it is not demonstrated here, you could also use the pda for input, Therefore you can easily interact with your Arduino using the proper programming.Another advantage of using the serial lcd is that you have more pins freed for use than with a parallel lcd screen.An lcd takes up less room that a tv and is lighter to carry around.
Step 2: Pda.
ptelenet. prc is installed.
Under linux with a properly set serial port:
Now to get the Pda working with the unit. The Palm pda will not work as is as a dumb terminal, so I had to install a program on to it from another computer called ptelnet.prc using a usb to serial interface. The Palm has an interface cable that will plug directly into the 9 pin serial port on the back of the computer or into an usb to rs232 converter cable..
For linux: (Other systems will vary on how to do this).
$ sudo apt-get install pilot-xfer
$ pilot-xfer -p /dev/ttyUSB0 -i ptelnet.prc
Set serial 9600-8-n-1
 ptelnet-0.61.zip25 KB
DB9 Gender.
Most rs232 interfaces come with a female end assuming you will adapting to a standard rs232 port. I ordered a male because I wanted to allow the pda cable with the standard female end to plug into it directly with out a gender changer.
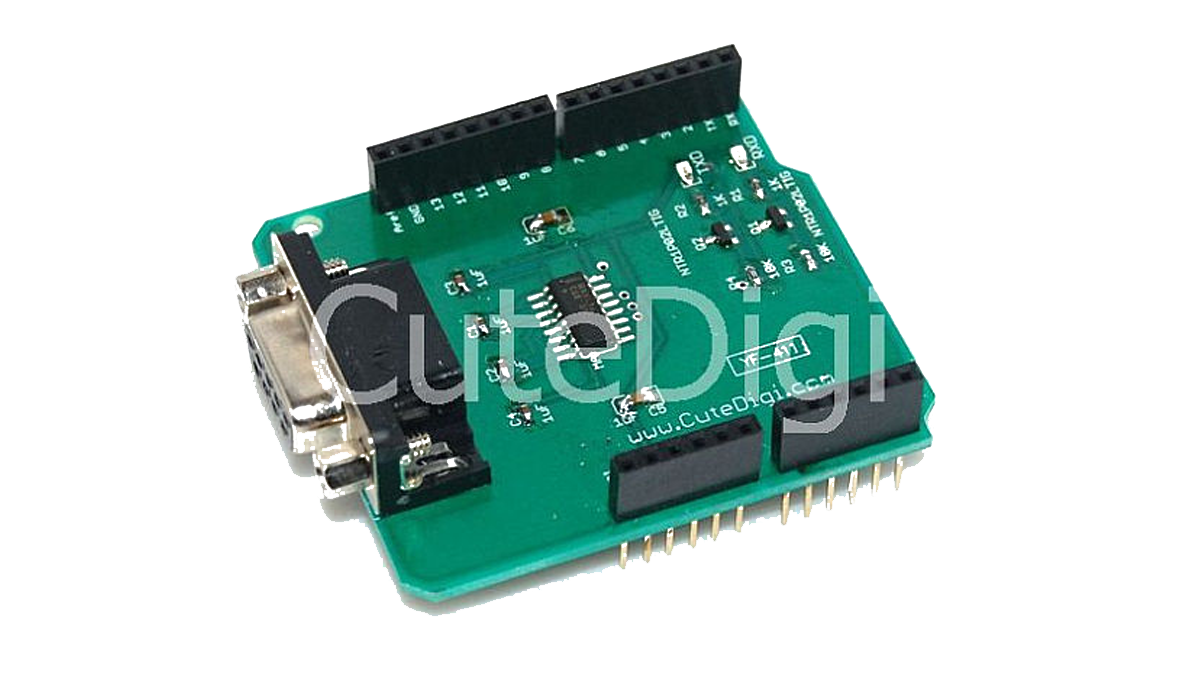
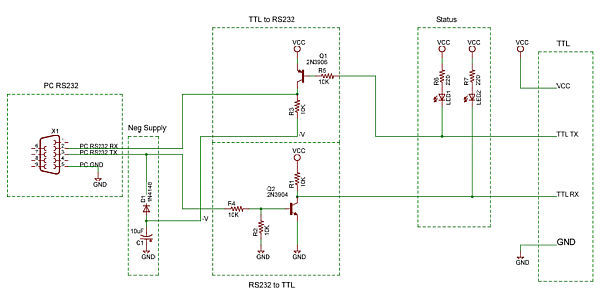
Rs232 to TTL interface.
Rs232 has a higher voltage than the Arduino uses. You have to have some electronics to deal with the voltage differeinces.
1. Get an arduino rs232 shield. (You may need a femaie-female gender changer adapter)
2. You can get a pre-made adapter. Easiest.
3. You can get a dip Integrated circuit (aka IC). (Make sure to get some 1uF or 10uF capacitors while you are at it)
4. You can make one from discrete electronic parts you might have laying around.
Notice: Use any electronic circuit at your own risk. I will not be responsible for any or all issues. Get a professional to help if you are unsure.
Cdrom header cable.
To adapt the header on the rs232-ttl interface you will probably need cdrom cable end (wires and header) to connect to the Arduino. Like to use cable where all the wires are not bundled up. Otherwise you will have to strip com insulation back to have enough length to connect to the Arduino. IF the cable has headers on both ends, there is usually a metal tab that will release the wires from the header without having to cut the header off.
For more detail: Cheap lcd screen for the Arduino