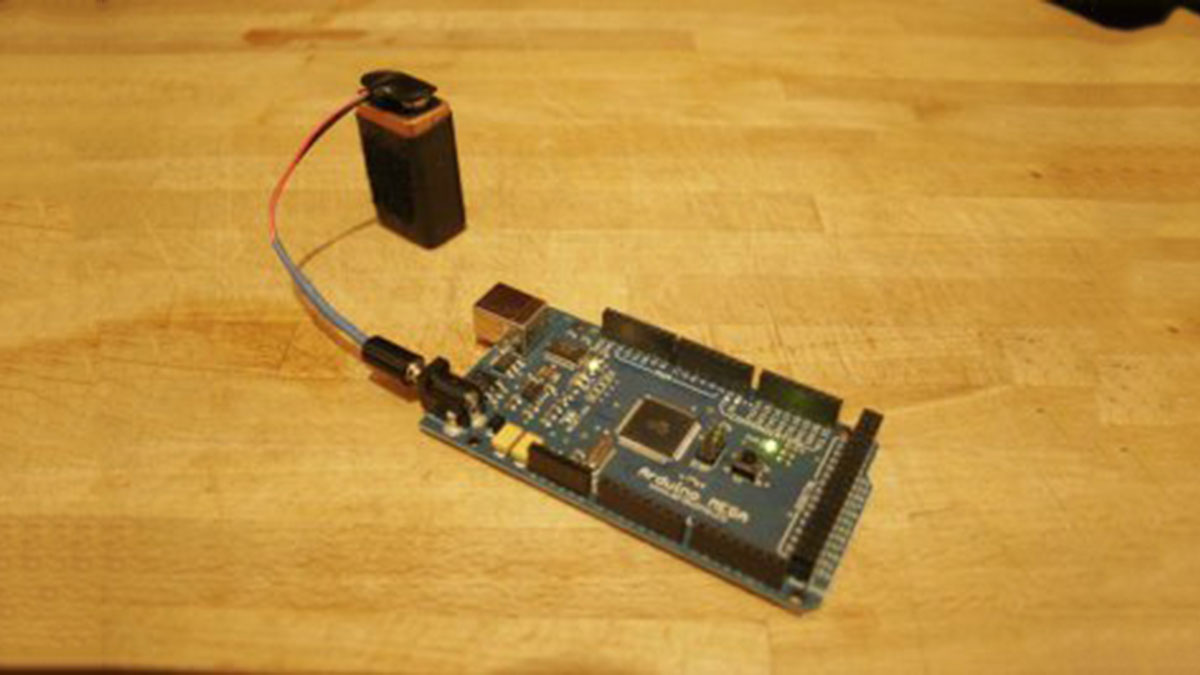
This is super simple but very useful if you are in a hurry or just like to do things yourself and on the off chance you didn’t know, this is about the easiest way to add mobile power to your Arduino.
After looking at a number of battery power solutions for Arduino ranging from Lithium Backpacks to Minty Boost kits I decided I didn’t want something even that complicated. Granted, the 9 Volt isn’t the most efficient battery for the job and it’s expensive compared to others, but it is widely available and compact.
It is also possible to wire a battery adapter directly to the pins but I wanted to use the DC power jack and not have any wires running to the pins than I have to.
I did this for my Mega but it should work with any of the Arduino boards with a 2.1mm jack. You can use either the 2.1 X 5 or the 2.1 X 5.5, both will fit. 9V DC is right in the middle of the ideal range for the on board power management circuitl. So, no resistors, caps or other components are needed. (They are rated up to 12V but I don’t think I’m brave enough to test it with a Mega since you can’t just replace the chip if you cook it.)
You can buy these assembled from Adafruit but I needed a couple of them and didn’t want to wait for the mail or pay shipping. You only save a few dollars but you get to do it yourself and you have the option of extending the leads if you need to.
Materials
[box color=”#985D00″ bg=”#FFF8CB” font=”verdana” fontsize=”14 ” radius=”20 ” border=”#985D12″ float=”right” head=”Major Components in Project” headbg=”#FFEB70″ headcolor=”#985D00″]
1 9V battery snap connector
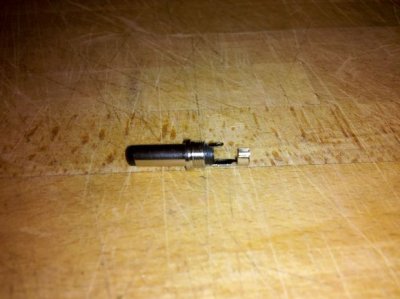
1 Coaxial plug 5X2.1(K) size is probably best but the 5.5X2.1(M) will also work
A couple inches of 1/8 inch shrink tube and an inch or two of 1/16 inch
Optional
A few inches of 27 X 1 3/8 inner tube. The 1 3/8 is the important part
An inch or two of Velcro
[/box]
Tools
Soldering iron and solder
Wire cutters
Hobby knife or scissors
The positive lead is the center contact for the Arduino.
Slip a small piece of 1/8 shrink tube over both wires and another 1/16 one over the positive wire and slide them back while you solder. (If you want to use the protective cover that came with the plug you can do that as well. I used both shrink tube and the plastic cover.)
Solder the red wire to the small pin/center lead and let it cool before pushing the shrink tube in place. Be sure to push the shrink tube as far up as it will go to prevent shorting.
For more detail: 9 Volt battery adapter for Arduino